Company party location
INTRODUCTION
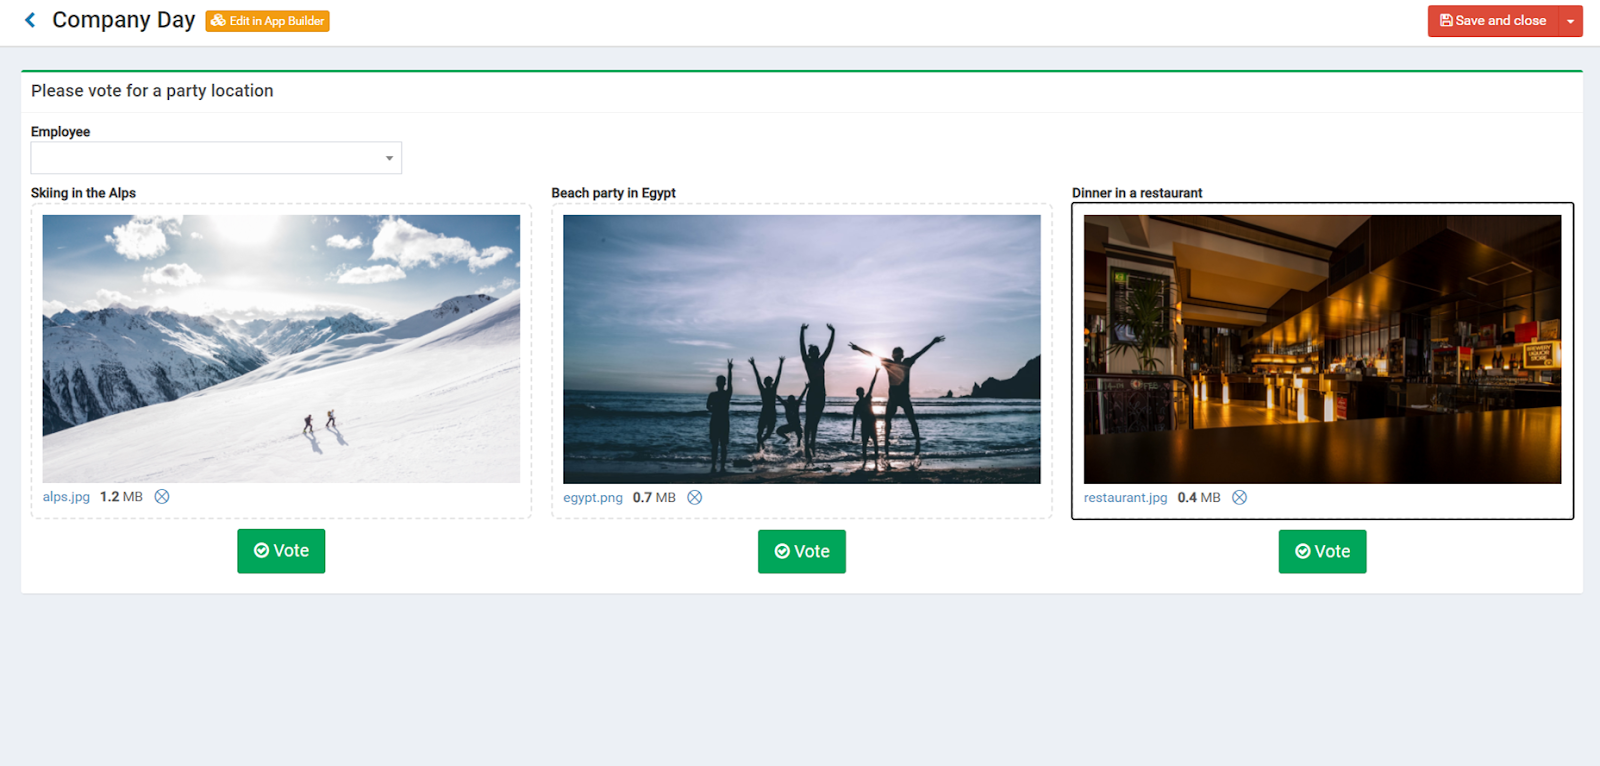
In this Codejig Intermediate tutorial, you will learn how to build the website to vote for the Company Party Location!
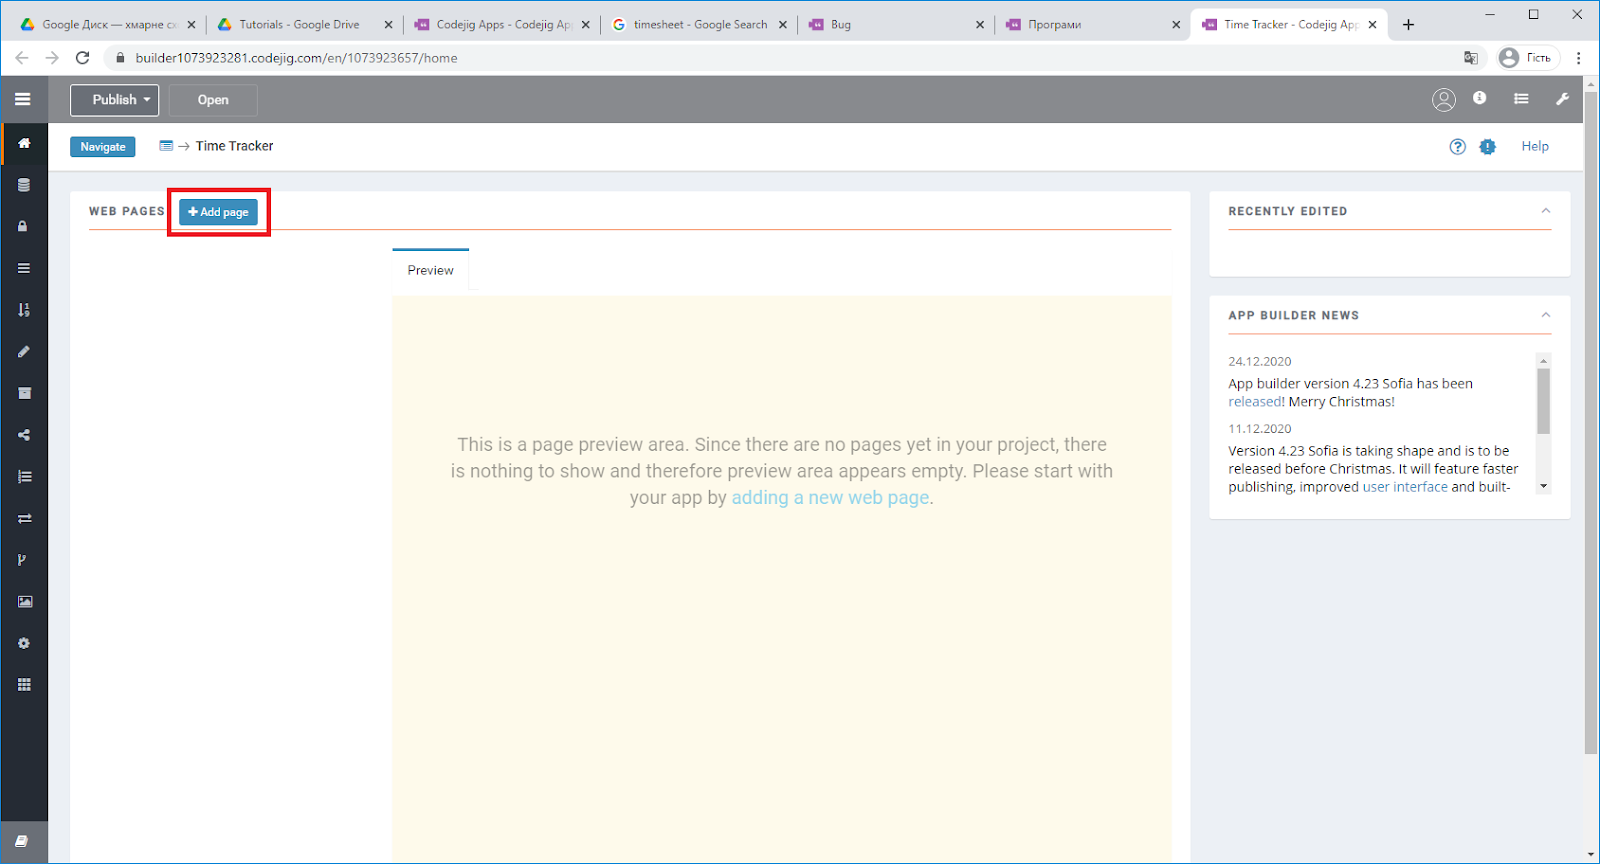
Before we start with a walkthrough, let’s take a quick look at the home page of App Builder IDE (integrated development environment). Click on the image below to enlarge it.

CREATE A NEW WEB PAGE
From the Web pages section, click on the Add page button and name the new web page Company Day.
INTRO TO THE WEB PAGE EDITOR
App Builder opens the page in a Web page editor. It consists of the Components/Properties panel, Working area, and Type actions / Page properties panel (take a closer look at the screenshot below).
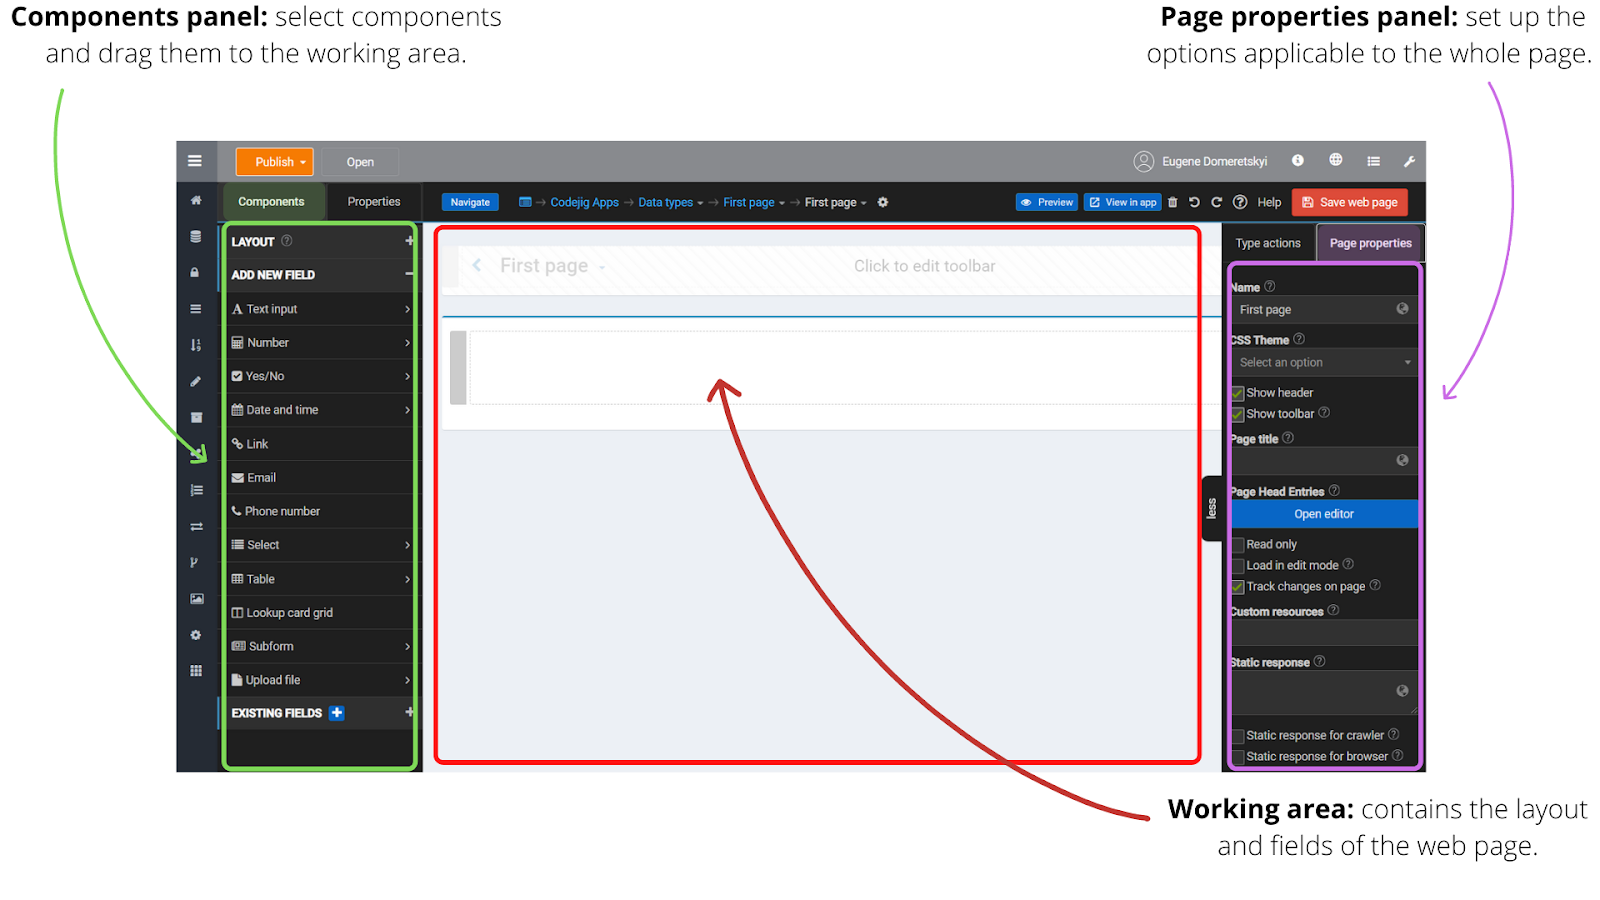
Please notice that the Components panel is automatically replaced with the Properties panel whenever you select anything in the Working area. Type actions / Page properties panel is hidden by default and can be shown or hidden with more/less button.

ADD ROW
First of all, we need a layout where all the fields we create will be located.
Hover near the middle-bottom of the groupbox and select a row with three columns.

MOVE ROWS
Now move the top row inside the one you’ve just created.

You can also copy and paste elements.
Select the row and click Ctrl + C to copy and Ctrl + V to paste. Paste the row twice.
The result should be as follows:

ADD IMAGE FIELDS
From Components -> ADD NEW FIELD drag and drop Image field.

Give it the name Skiing in the Alps.

Repeat the actions above for the Image fields Beach party in Egypt and Dinner in the restaurant.

SET COLUMN PROPERTIES
Now we need to add some descriptive information about our web page.
To add a Title to the groupbox, just click on its free area.

And then, in Properties -> GENERAL put a tick on the Show header and set the Title to Please, vote for a party location.

In Properties -> APPEARANCE You can also change the styles of the field.
Select Show as: Classic and Style: Success.

ADD BUTTON
From Components -> LAYOUT drag in the Button.

Set button’s Title to Vote.

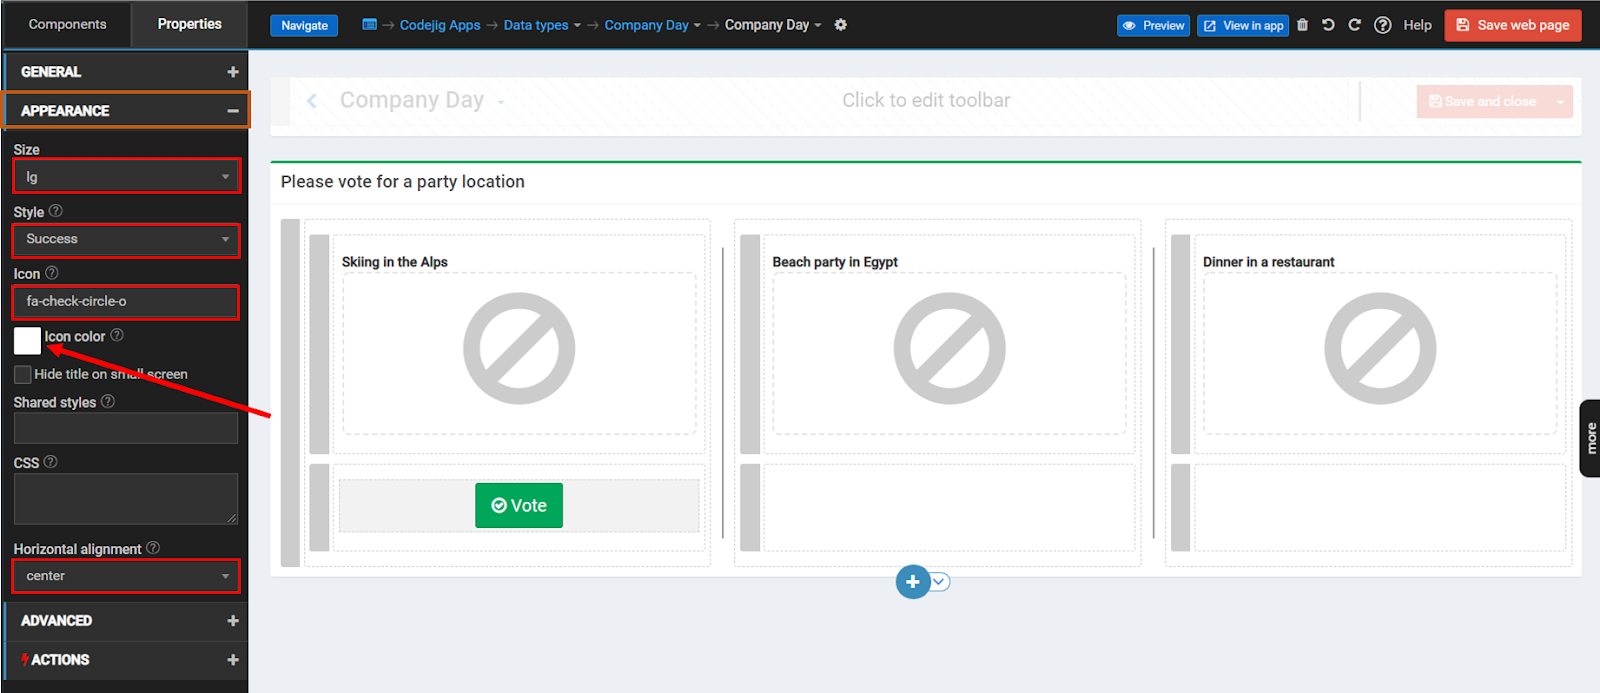
STYLE BUTTON
The process of styling the button is similar to any other field styling.
Click on the button to open its Properties. In APPEARANCE set:
Size: lg
Style: Success
Icon: fa-check-circle-o
Color: white
Horizontal alignment: center
Save your web page and go to the Web pages section using the Project menu on the left.
CREATE THANK YOU PAGE
From the Web pages section, click on the Add page button and name the new web page Greetings.
Add a Static text field. It is just the block where you can write and edit the text in the HTML editor.

Click on the field, and in Properties -> GENERAL open the Editor.
You can create any text you want, but we have provided the sample with the text “Thank you for voting!” with Header 1, bold, alignment: center.
Close the editor and save the web page.

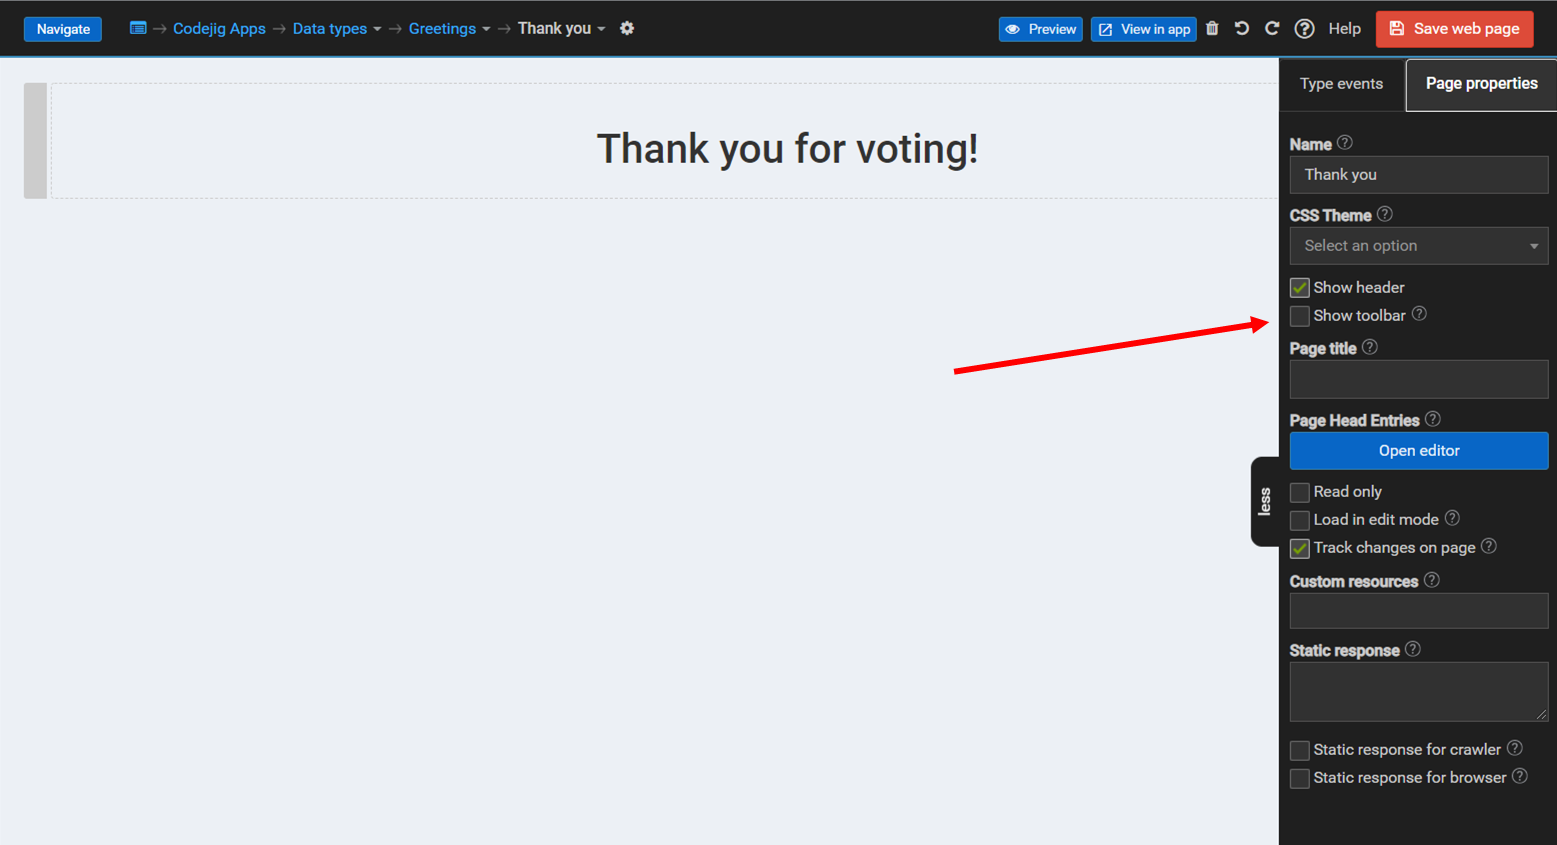
REMOVE TOOLBAR
The last touch is to hide the toolbar. Instead of deleting element by element, you can open the Page setting panel on the right.
Remove the tick from the Show toolbar option.
Save the web page and return to the Company Day.
CREATE CLIENT FUNCTION
If the user clicks the button, he will be redirected to the Greetings page.
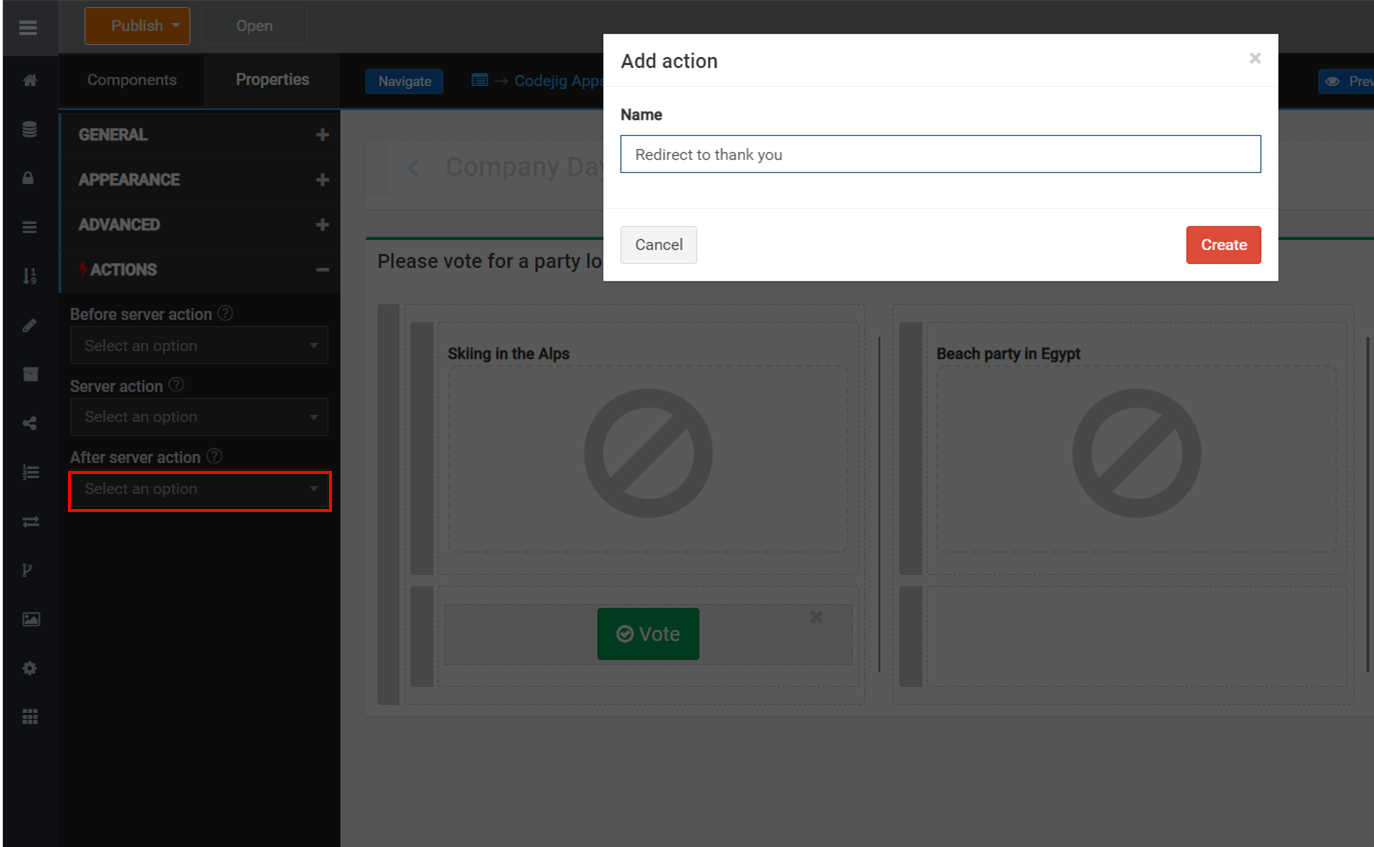
Redirect is a kind of client action. In the button's properties, ACTIONS unfold After server action and click Create new.
Name it Redirect to thank you.
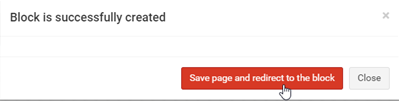
Save the page and redirect to the Code blocks.
INTRO TO CODE BLOCK EDITOR
Before writing your Codejig App Builder code, take a quick look at the Code block editor’s elements.

REDIRECT TO A WEB PAGE
From the Block Panel -> Links drag in the open link block.
You can specify how to open the link. Here we need to open it in the same browser tab.
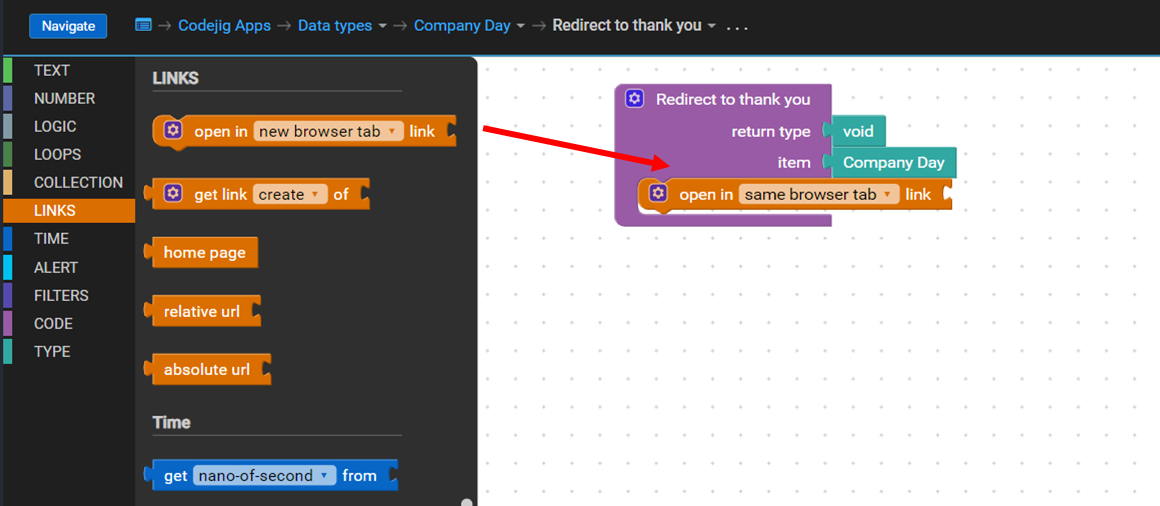
The block get link of [create] creates a new instance of a Data Type you pass as an argument and then gets its link.
Add get link of puzzle and connect the Greetings Data type.

Save the code and go back to Company Day.
DUPLICATE BUTTONS
To avoid repetitive clicking, copy and paste buttons.
The result should be as follows:

Note: all styles and actions are saved during copypasting.
ADD SELECT FIELD
For now, any person can vote as many times as he/she wants.
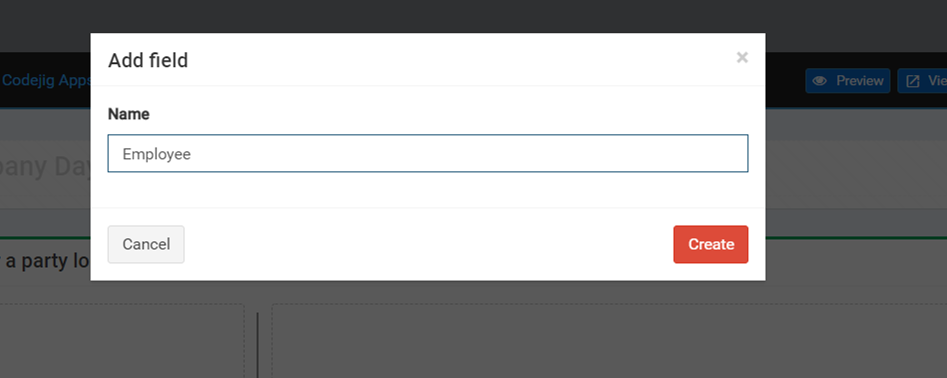
To keep track of employees, add a Select field and name it Employee.

In the Application, you can create a new employee or select the existing one. It is possible to add employees manually from the APP BUILDER, too.

Save the web page and go to the Data Types section in Project Menu.
CREATE REGULAR FIELDS
From the Data types section, click Add new. Create a Vote directory. Here we will save all the votes.

The Vote directory doesn’t need any view representations. By default, it has the index page (table with data).
It will contain Employee and Location fields.

To add a field, click on the plus button on the Fields panel, and select Regular.
Add Location of Type String and Employee of Type Employee (the type we have created in Company Day).

Go back to the Company Day.
ADD SERVER ACTION
The data must be saved on the server. So to keep track of votes, we need to create a server action.
Create a one for the Alps button with the name Vote for Alps.
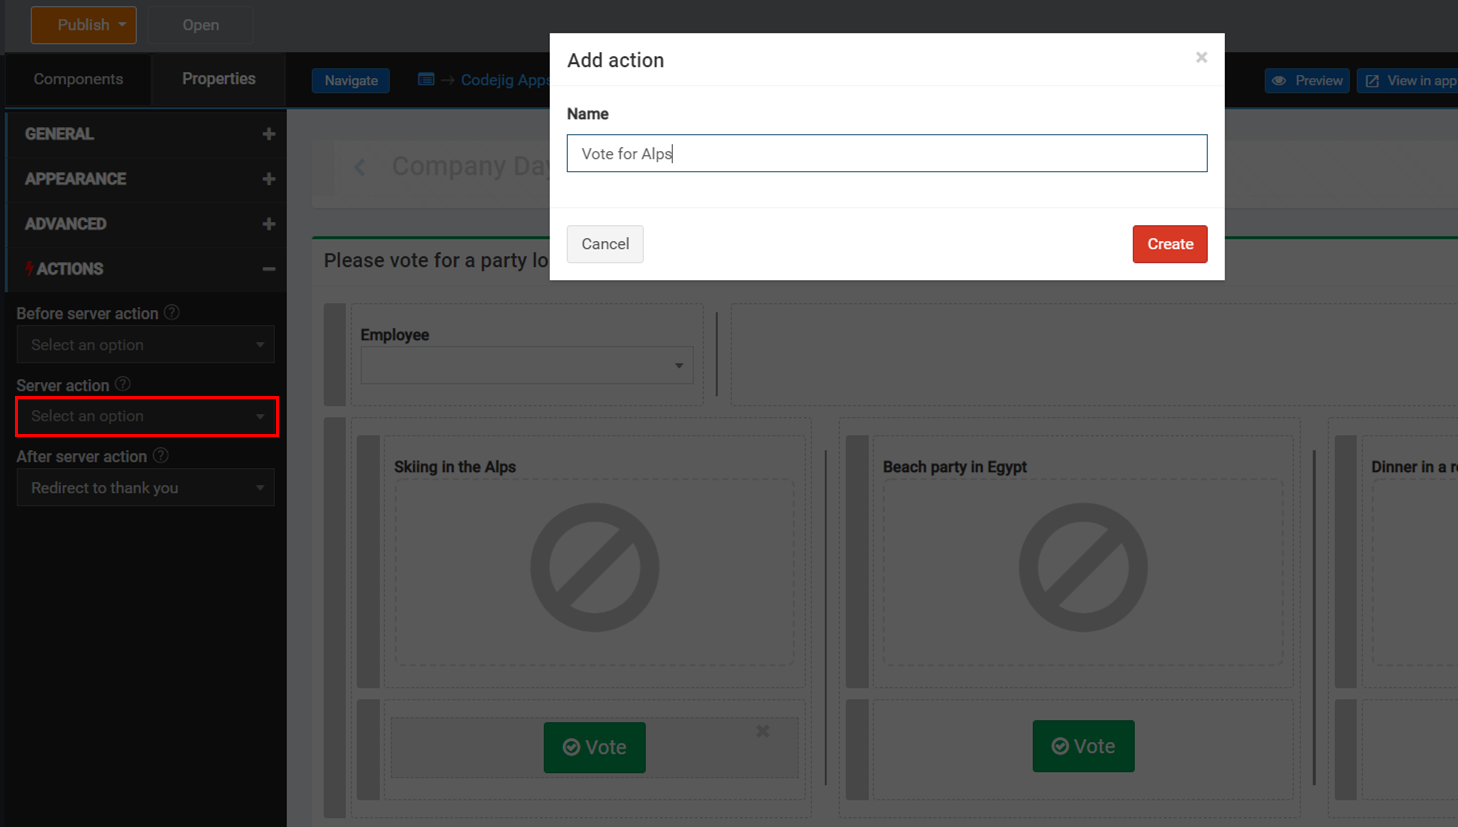
Save the page and redirect to the blocks.
ADD LOGIC BLOCKS
The action’s logic is that if the Employee is selected, look through every single vote and check if the current Employee has voted before. Then create a new Vote item and update the Company Day instance.
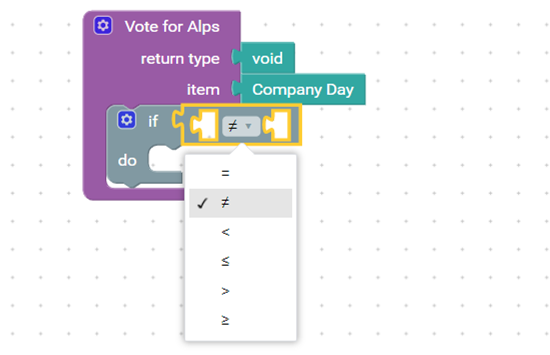
Add an If and comparison blocks.

Set the comparison operator to not equals since we will check if not null.
FILL IN IF OPERATOR
Click SHOW ALL on the right to open the Data Panel. Find the item.Employee and connect it with the if block.

Also, get the null block.
That code means that if the current employee is anything (it is selected), then the If body will be executed.

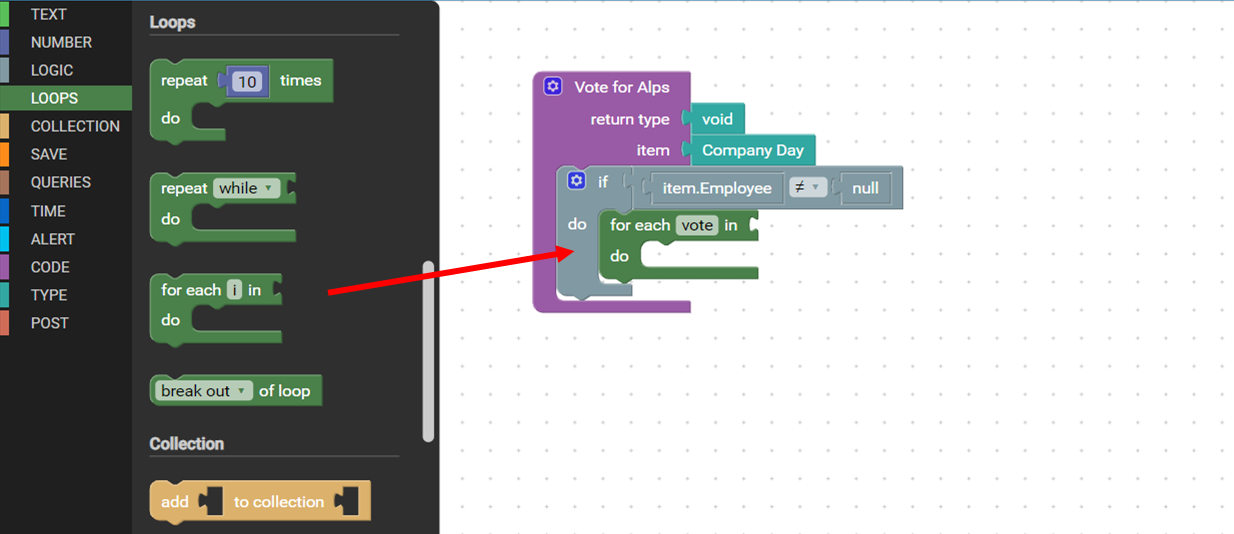
ADD FOR LOOP
From Blocks Panel -> Loops drag in for each block. Rename the looping variable to the vote.
From QUERIES, drag in a stream block. From the Data Panel, find a Vote Data Type and connect it with the stream. In such a way, you get data from the database.
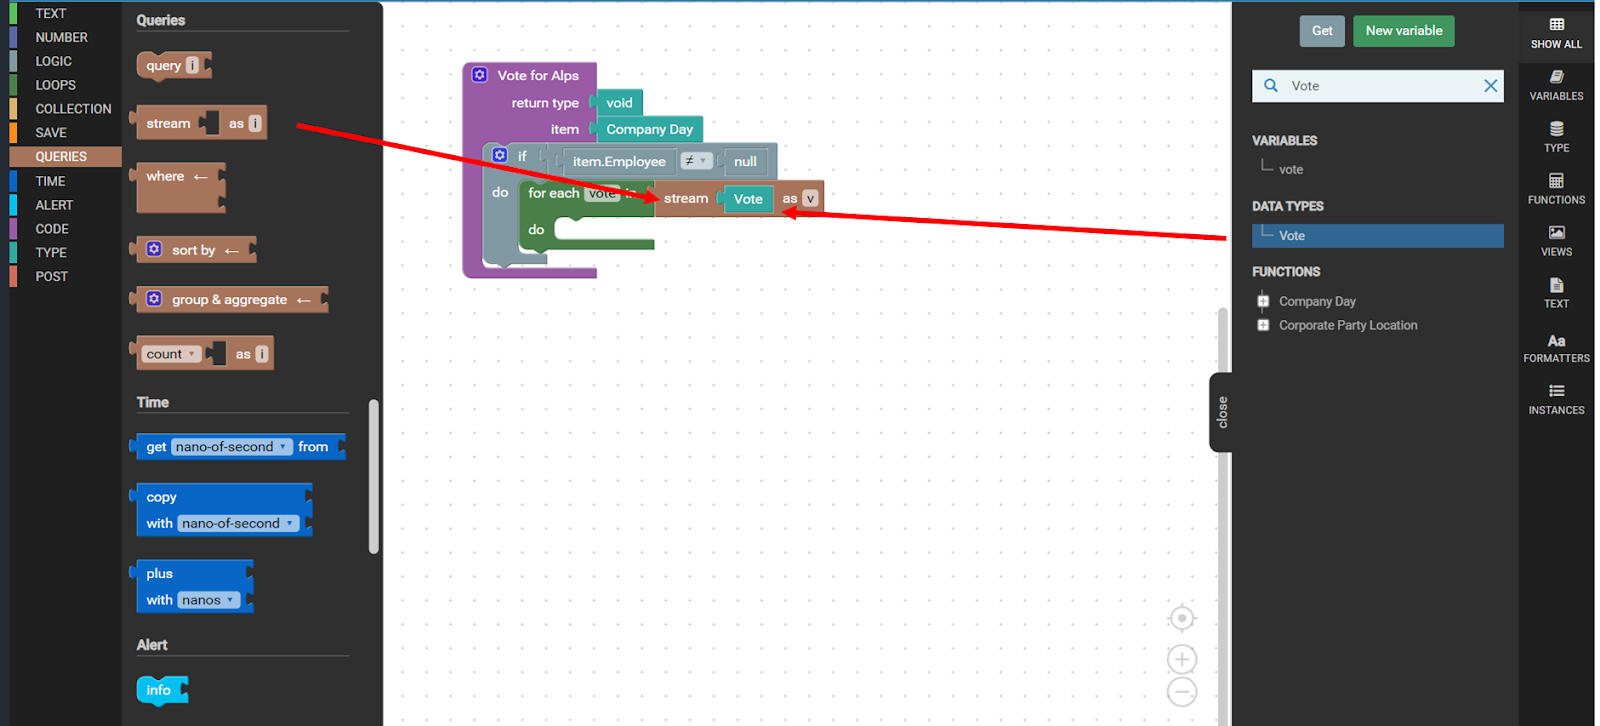
You have built a code that gets all the votes from Vote (stream) and iterates (for each) over them.
ADD ERROR BLOCK
Next, we need to check if the current employee is equal to an employee from the vote.
If so, we stop the program and show the error message from the ALERT category.

Note: When you reach an error alert, the code execution is finished.
CREATE NEW VARIABLE
If one clicks a button, a new Vote instance should be created.
To do that in Code Blocks, first, create a variable. In the Data Panel find Vote and click the New variable button on the top right corner.
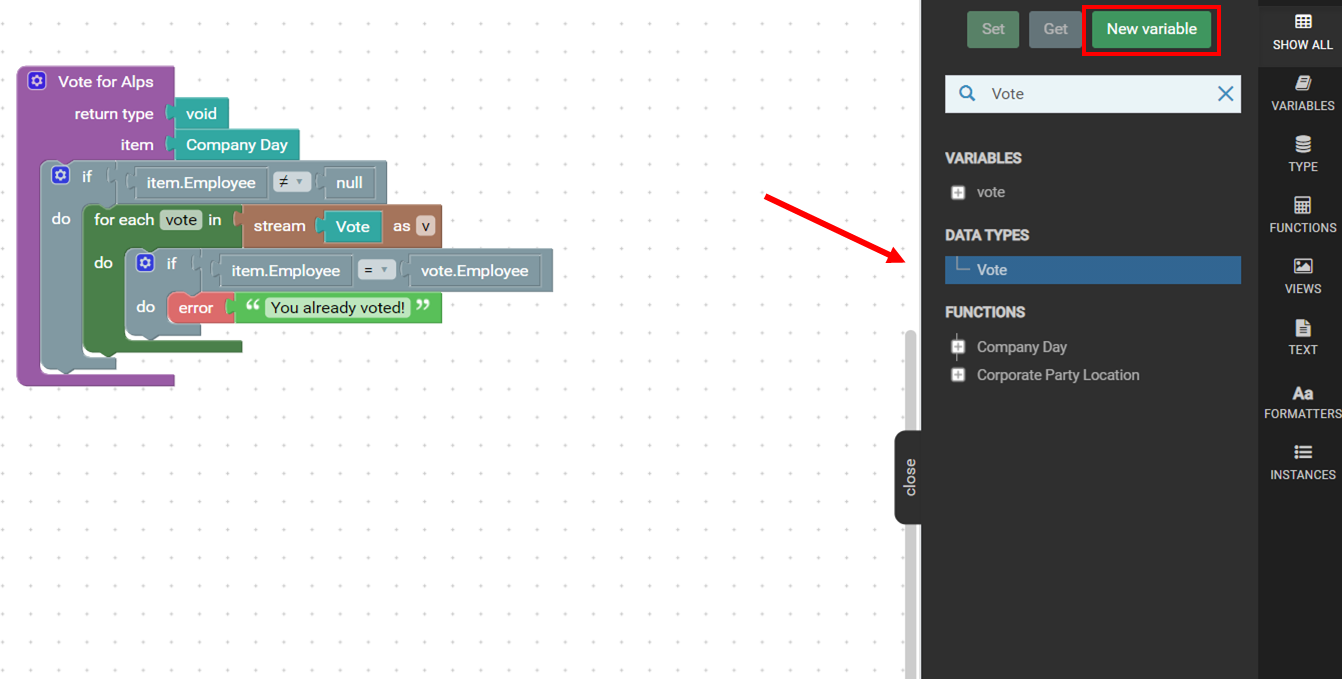
Type the name vote and click Create.

SET VARIABLE
A new variable of type Vote has been created, and now you can find a vote variable in the Data Panel.
Drag vote.Employee across the green line to create a setter.

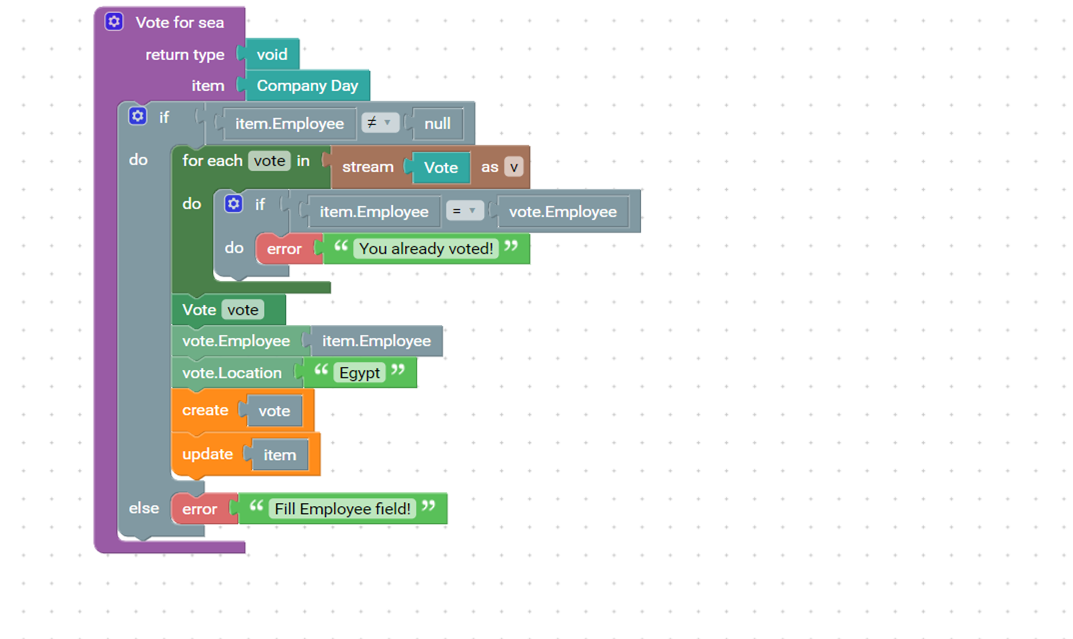
CREATE AND UPDATE
Set the vote.Employee to be the item.Employee (current employee).
Set the vote.Location to be “Alps”.
For now, the vote is not saved in a Database.
From Block Panel -> SAVE use create block to save the vote and update to update the existing item.

FINAL TOUCHES
There is a gear icon near some blocks. Click on it to open/close the block’s menu.
Add an else to the outer if block.

If item.Employee is not specified, we tell the user that he should fill the Employee.

The function is completed.
Save the code and return to the Company Day.
CODE SAMPLES
Try to build the same code for the buttons of Egypt and Restaurant.
The only difference is the vote.Location line where we specify text representation of a location.
Here is the result for the second:
And the third buttons:

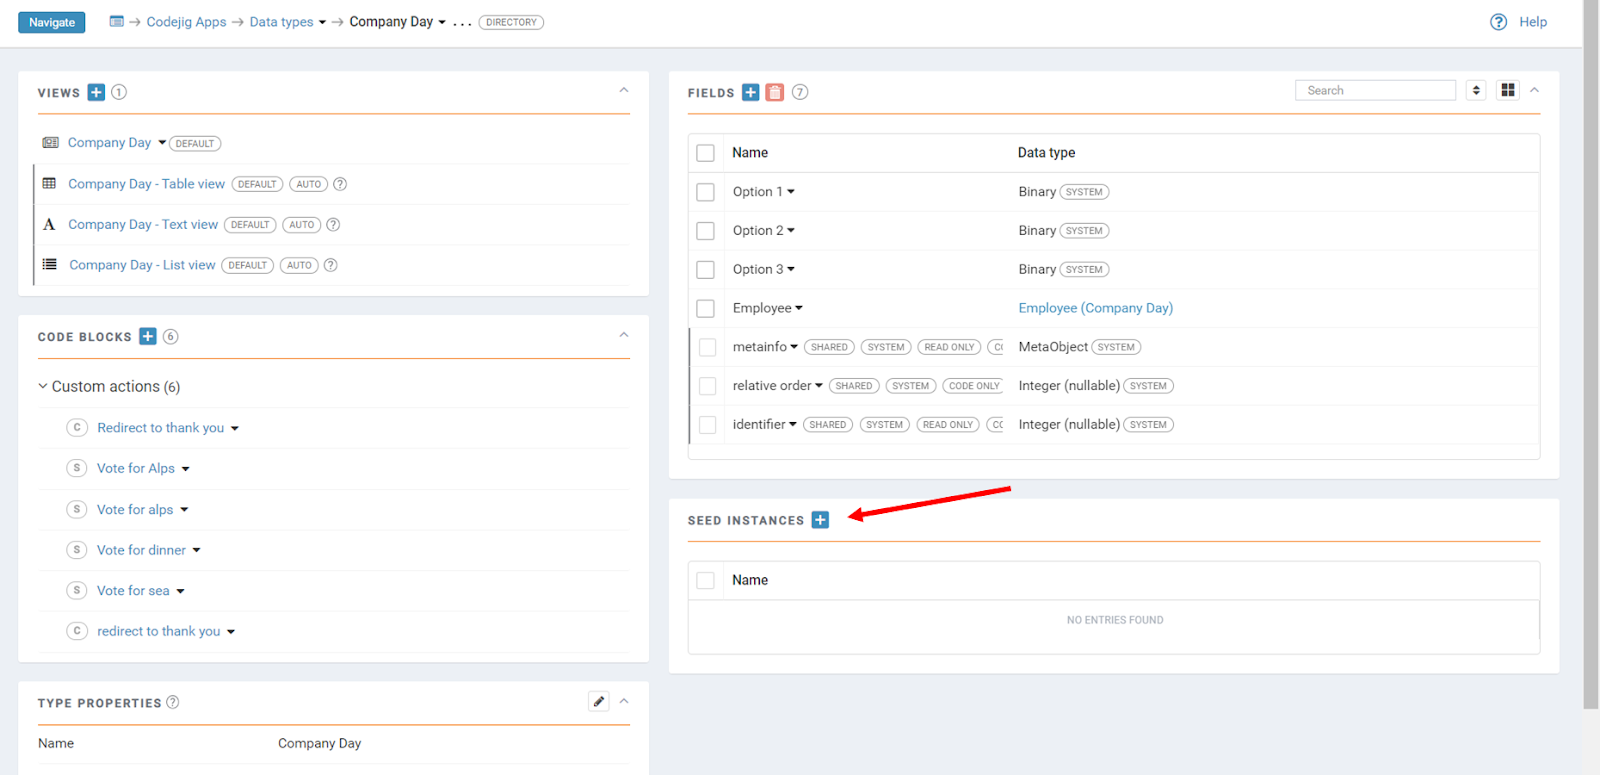
CREATE SEED INSTANCE
Seed Instance is a predefined instance of a Data Type.
In the directory of Company Day -> SEED INSTANCES panel, click on the plus to create a seed instance.
You will be redirected to the Web Page View, the same as in the Application.
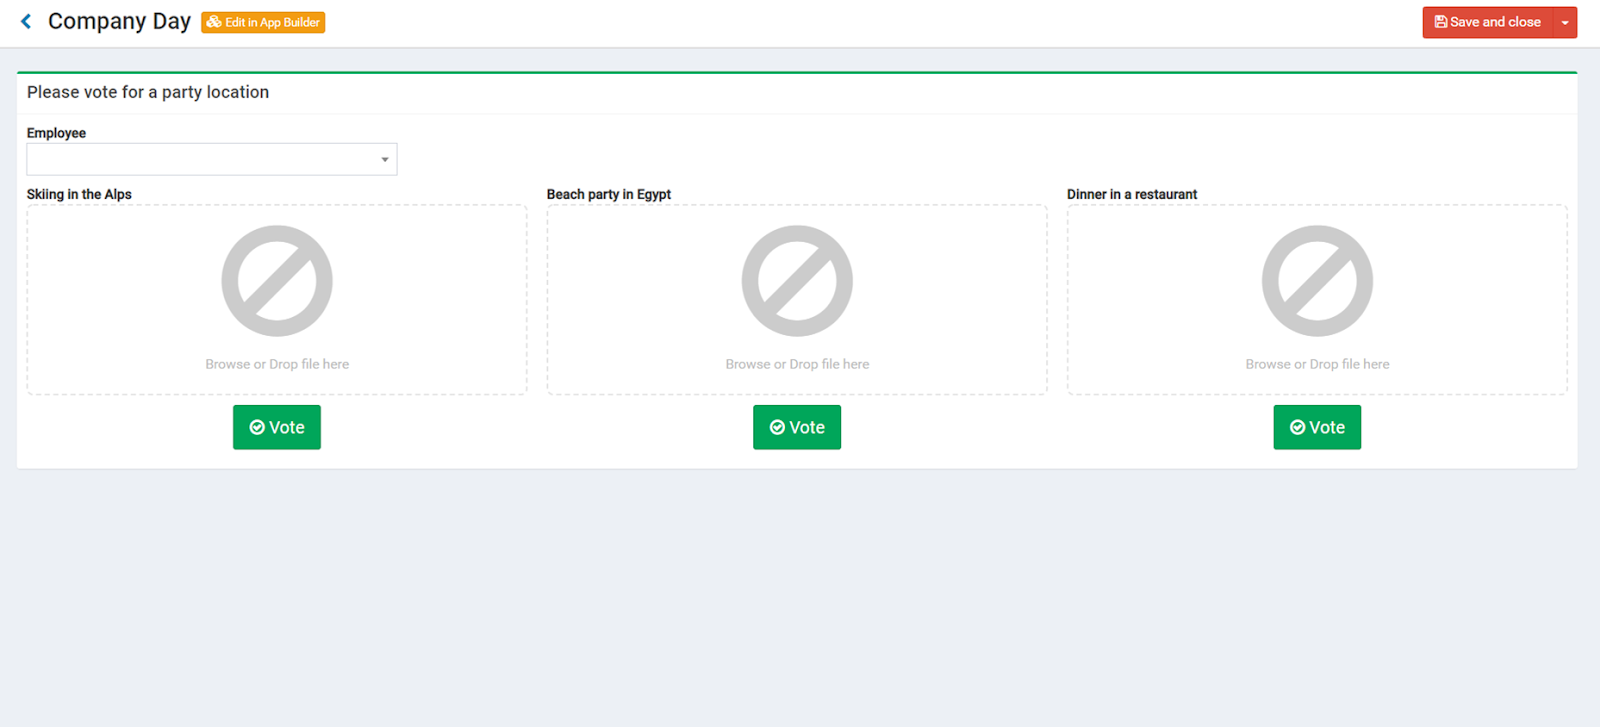
Upload the photos.
You can download them here or use your own.
Save and close the page.
CHANGE PAGE PROPERTIES
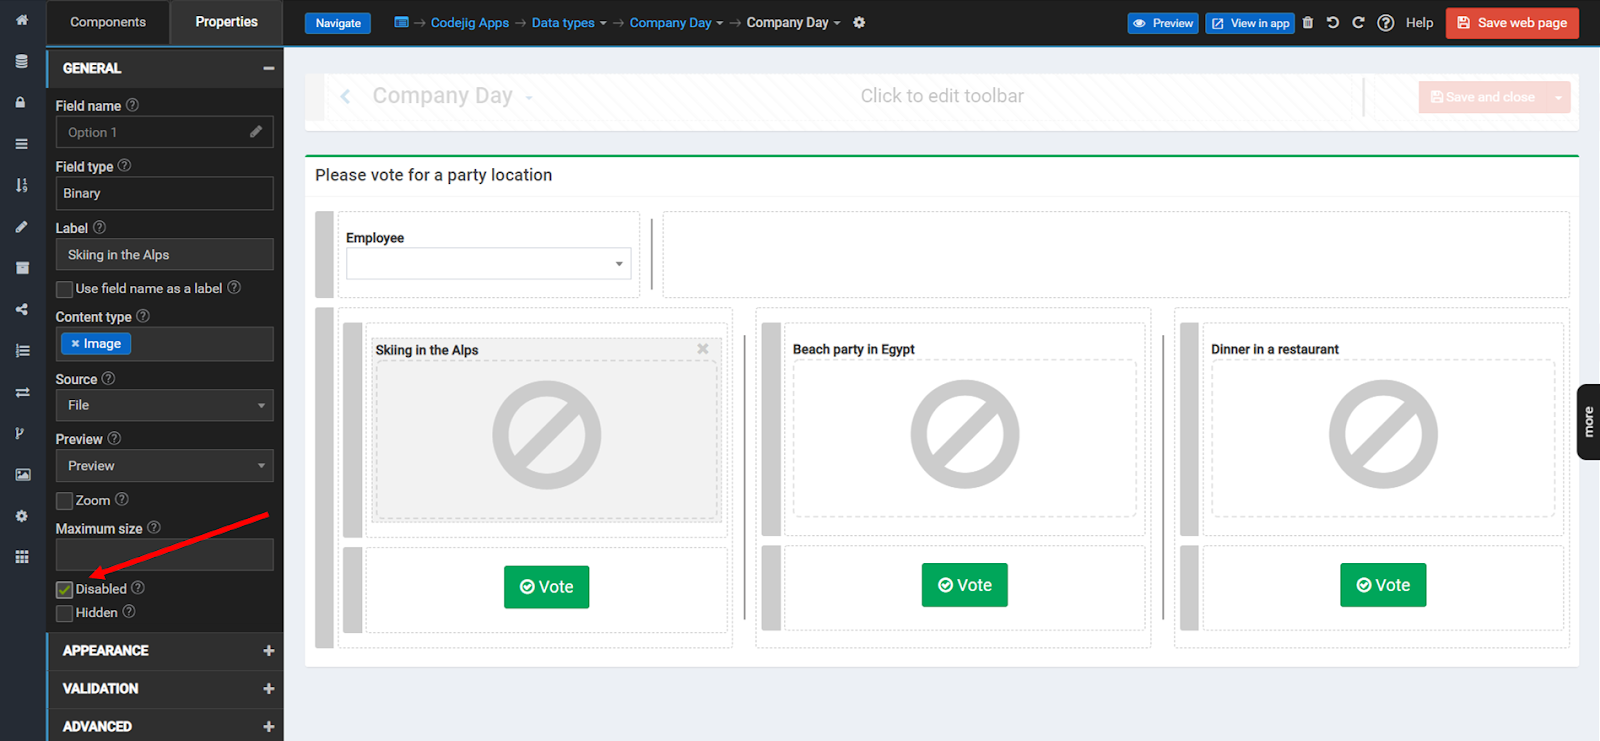
The uploaded photos can be editable, and the filename will be visible.
To make the image static, in its Properties -> GENERAL, put a tick on disabled.
The last but not least thing is to hide the toolbar and load the page in edit mode (so the user can select an Employee).
You can change the page properties in the Page settings panel on the right.

Note that it is no longer possible to create an instance of the Company Day after this step. At least you need a toolbar to update and save the instance.
CHANGE APP MENU
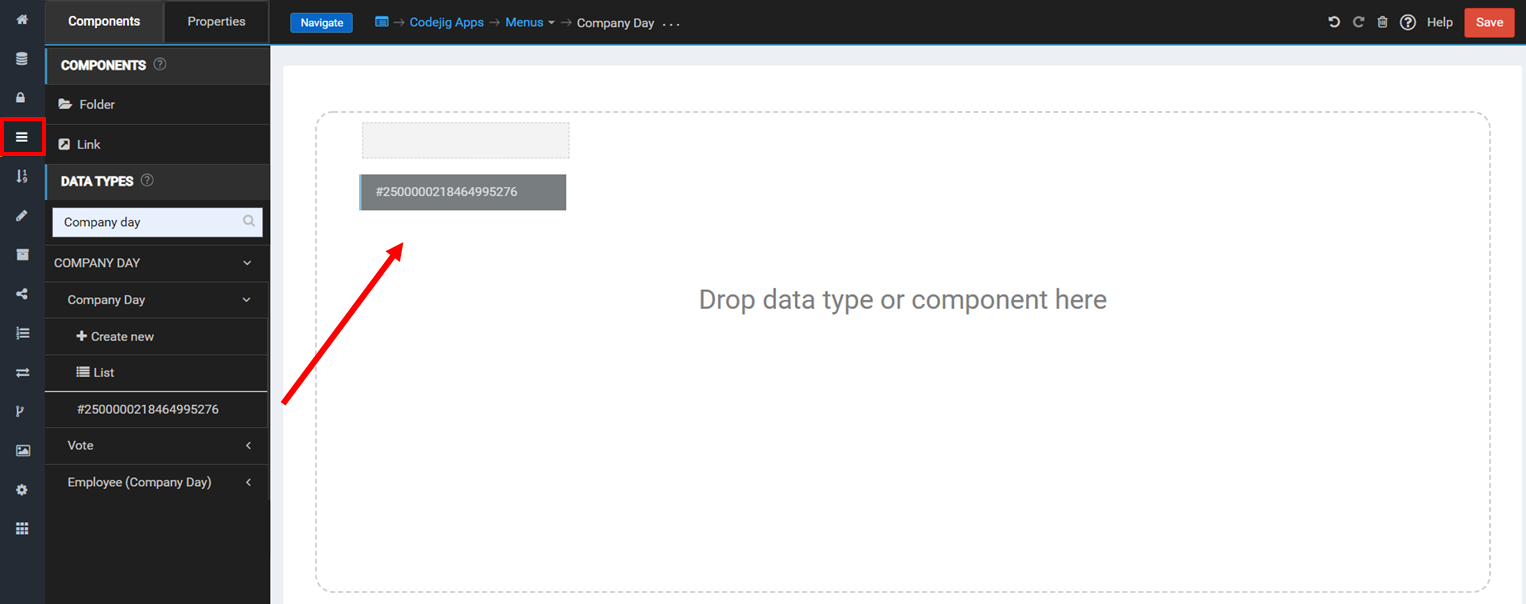
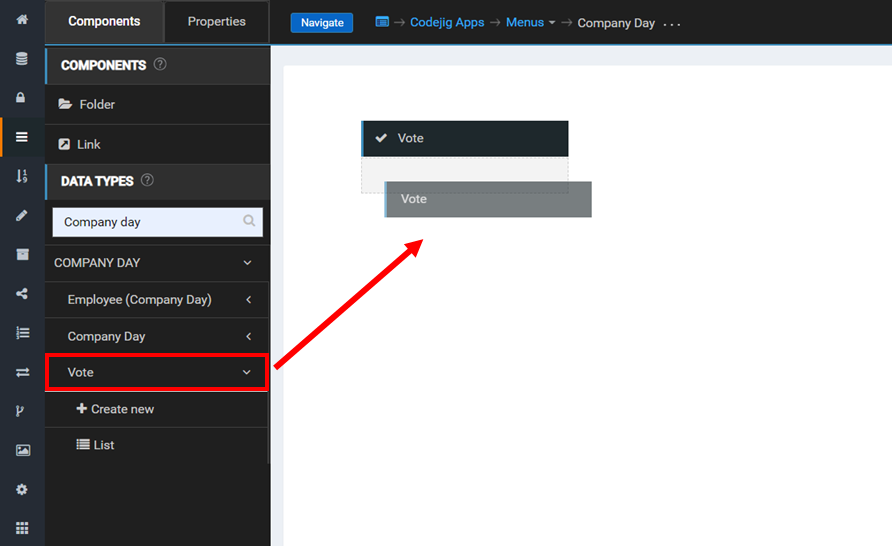
Go to the Menu Editor from the Project Menu.
In Data Types, find Company Day, unfold it and drag in the instance (with digital id).
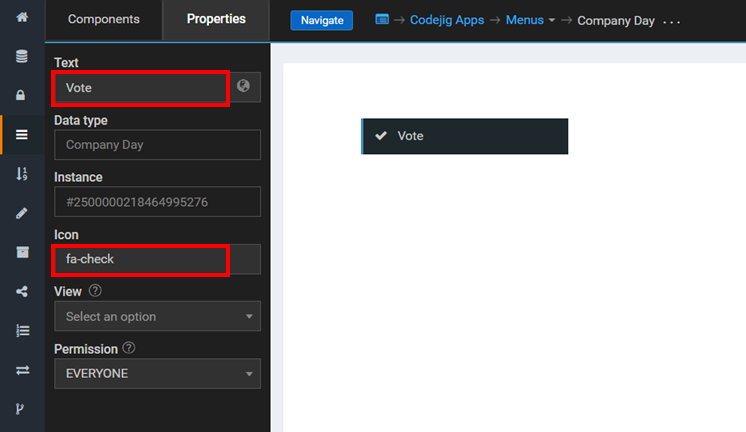
Set Text to Vote and Icon fa-check.
This page will be visible to everyone.
MENU PERMISSIONS
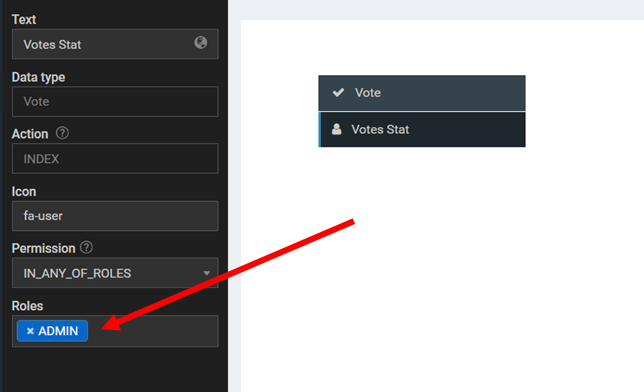
From Data Types drag in a Vote.
Set Text: Votes Stat
Icon: fa-user
Permission: IN_ANY_OF_ROLES

Votes Stat page should be visible only for Admins. Select the role Admin.
PUBLISH YOUR APP
If you followed the instructions, then the Application is ready to be published!
Click on the Orange button on the top left corner.
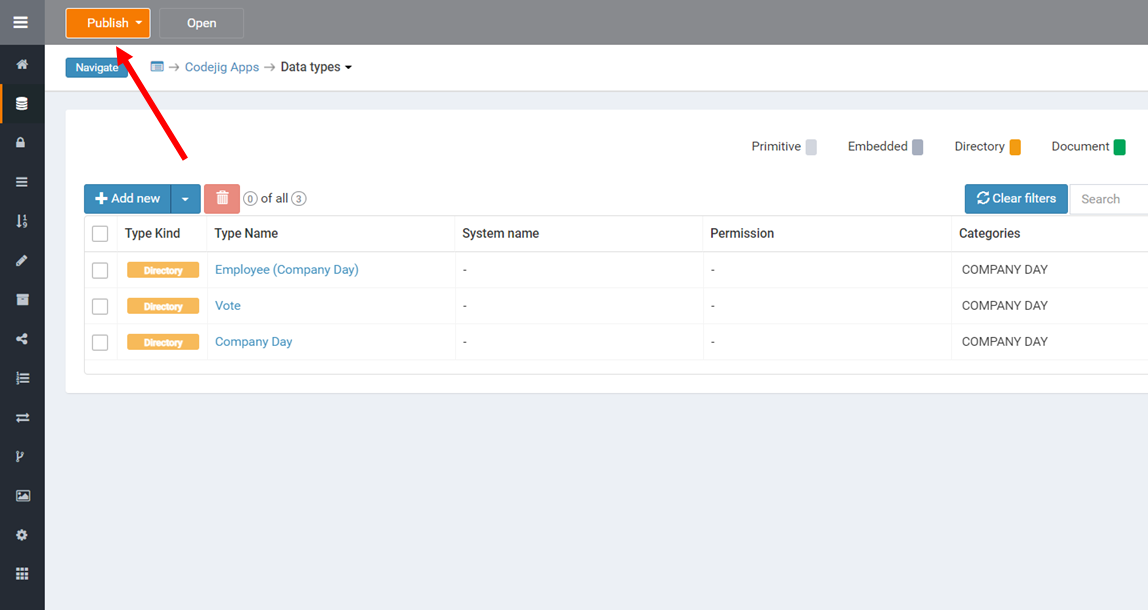
The Publish button will build the App and then deploy it to your default container.