Report
New test The Report kind is intended for generating analytical reports that show aggregated values first and allow for drill-down browsing of underlying data. While reports can store the data in the database, this facility is provided rather for saving report settings than aggregated report results.
Reports are expected to be executed in three consecutive stages:
1) Collect the necessary data
2) Calculate aggregate values
3) Pass the data to the browser and display it
There are two actions in the Report data type: get_data_leaves and build.
In the get_data_leaves action, you can create the collection and fill it with the required data.
In build, a new aggregation function can be declared.

On Get Data Leaves
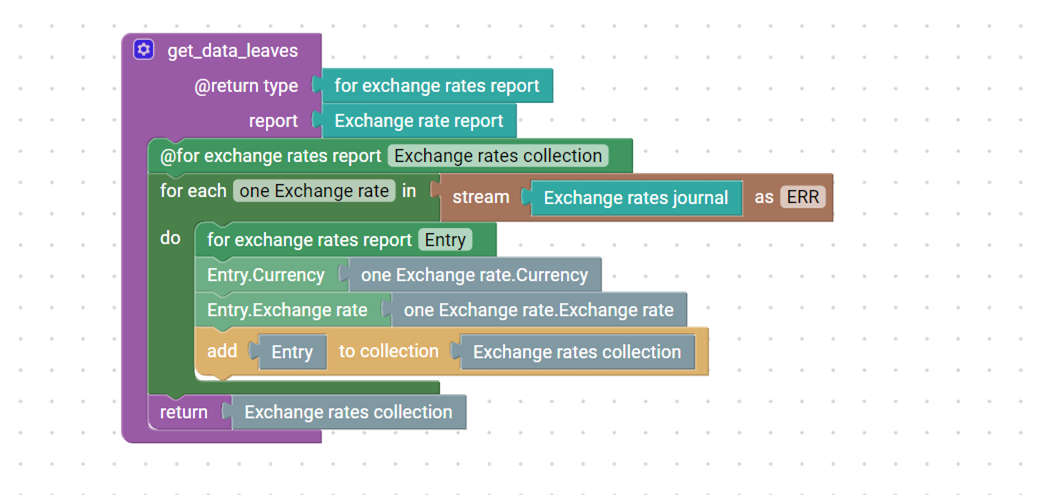
Usually, a Collection to be shown on the Report page is selected on a Report creation. To render a custom collection, you create the get_data_leaves server action. The return type must be collection.
In the example below, the for exchange rates report collection with Exchange rate report entries is filled with data from Exchange rates Journal. In the end, the action returns that collection.
On Build
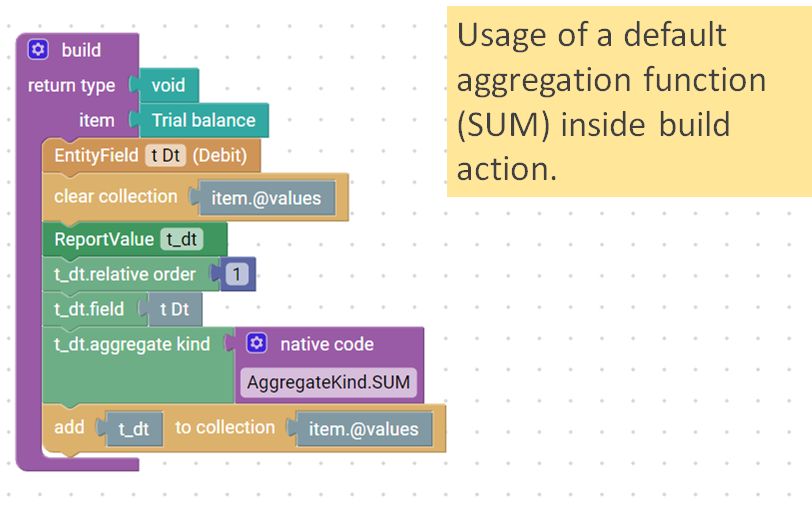
The build action tells a browser how to represent the collection that was specified earlier. That includes both default and custom (written using Java Collectors) aggregation functions.
The syntax of adding a variable in the build action includes fetching an instance that will be added to the journal, its attributes (relative order, field, and aggregate kind). Finally, you need to add the object to the collection of the current data type to show the data on the Report page.
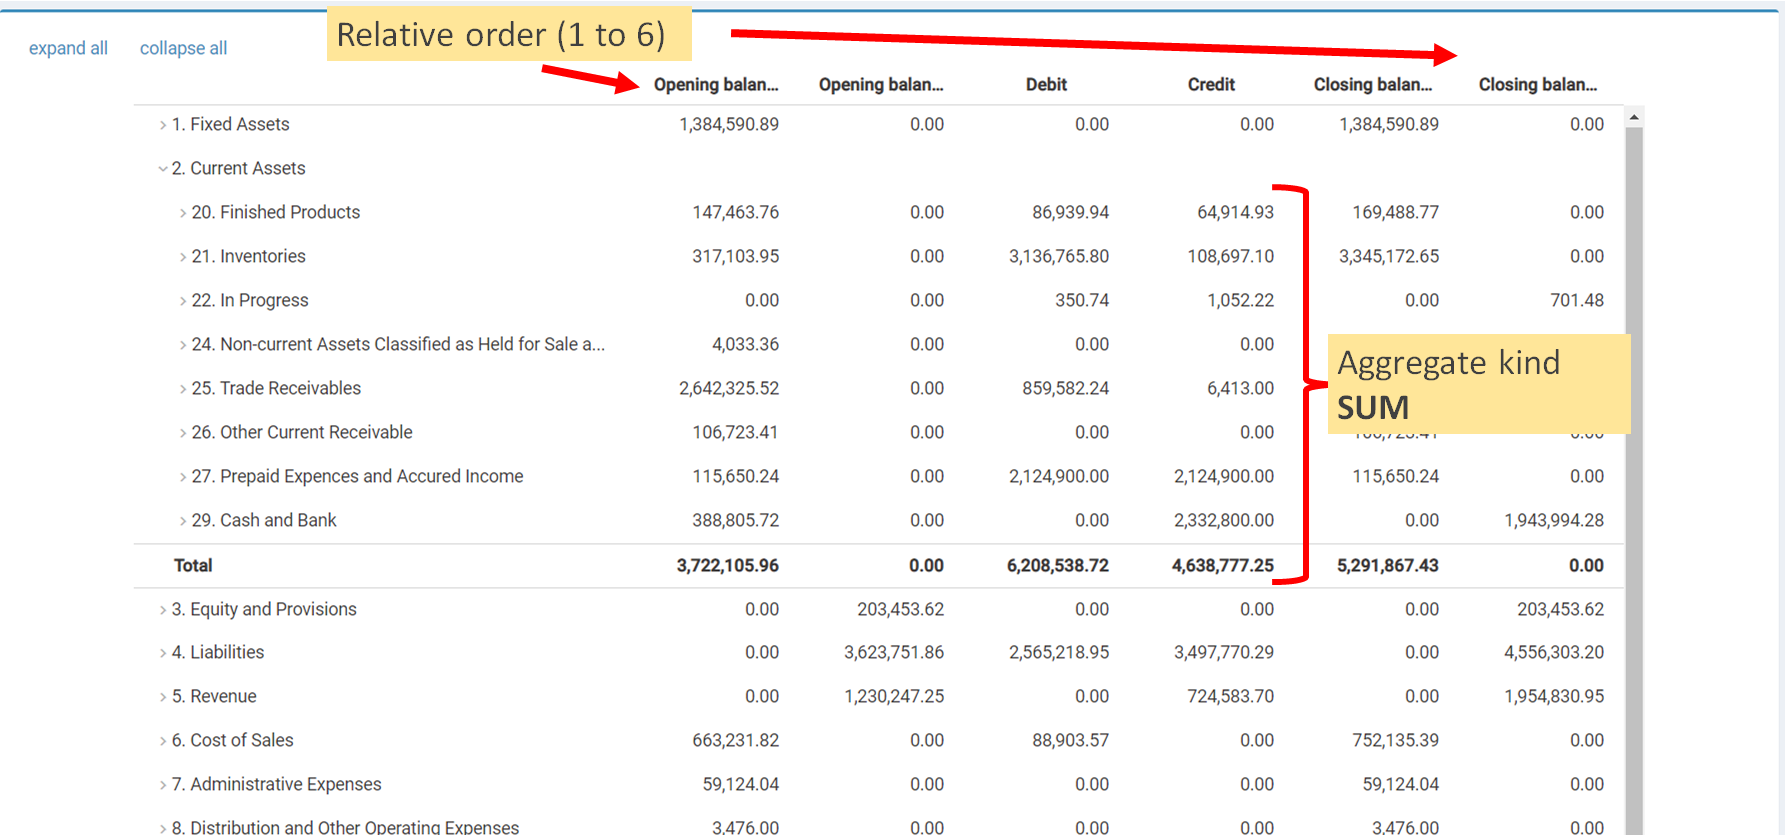
Relative order: defines the column number in which datatype will be shown starting from left to right.
Field: a fetched instance of a data type.
Aggregate kind: either aggregate function or CUSTOM aggregation kind. Default aggregation list includes Average, Count, Sum, Min, Max. The aggregate kind is specified by the native java code AggregateKind.COUNT, for instance.
Levels in terms of Reports are rows. The first levels are the furthest (where the aggregation starts from). The last levels are the first rows you see on the Report web page.
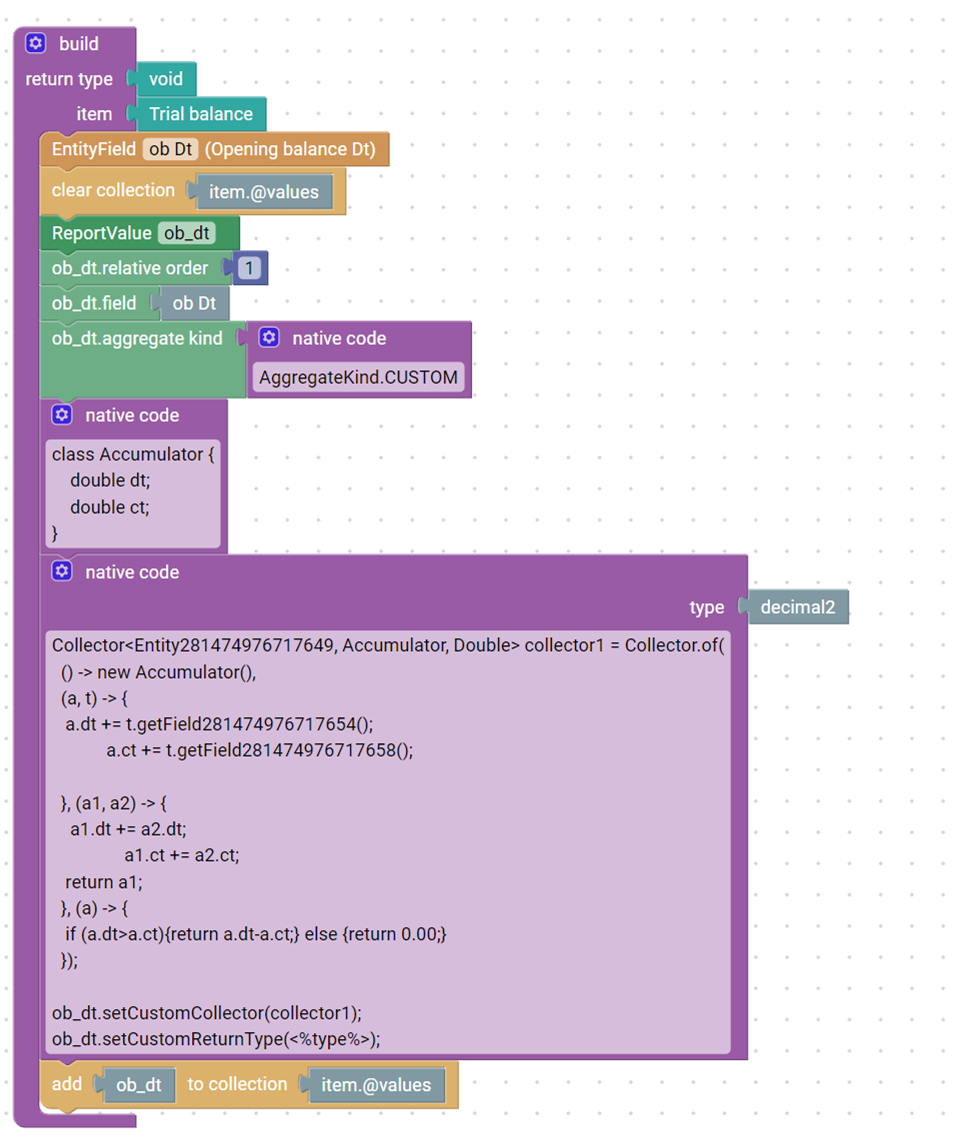
Use the following steps to create a working Custom aggregation:
- Fetch an EntityField instance and create object ABC.
- Set attributes of ABC
- Create Accumulator class
- Create java.utils.Collector to perform an aggregation logic.
- Set collector to ABC
- Set Custom return type to ABC
- Add ABC to the item collection
The Collector has three main parts:
(a, t) ⇒ transfer data from type t to the accumulator a.
(a1, a2) ⇒ how to aggregate values on each level.
(a) ⇒ how to return information for each level.
In order to set a Collector and specify return type, use the following code:
object.setCustomCollector(collector1);
object.setCustomReturnType(<%type%>);
Notes:
Custom aggregation involves the usage of java.utils.Collector. As the parameters Collector should accept transient type id, Accumulator Class, and return type.
Codejig decimal2 and java Double are identical.
Aggregation logic, written in the build action, can’t be affected during the Report Customization on the web page view.
Aggregation kind in the build action should be by uppercase, e.g., AggregateKind.MAX.
Examples
An excellent example of a CUSTOM aggregation kind usage is ERP Trial Balance, where the calculation of credit and debit balances are based on if-statements logic.
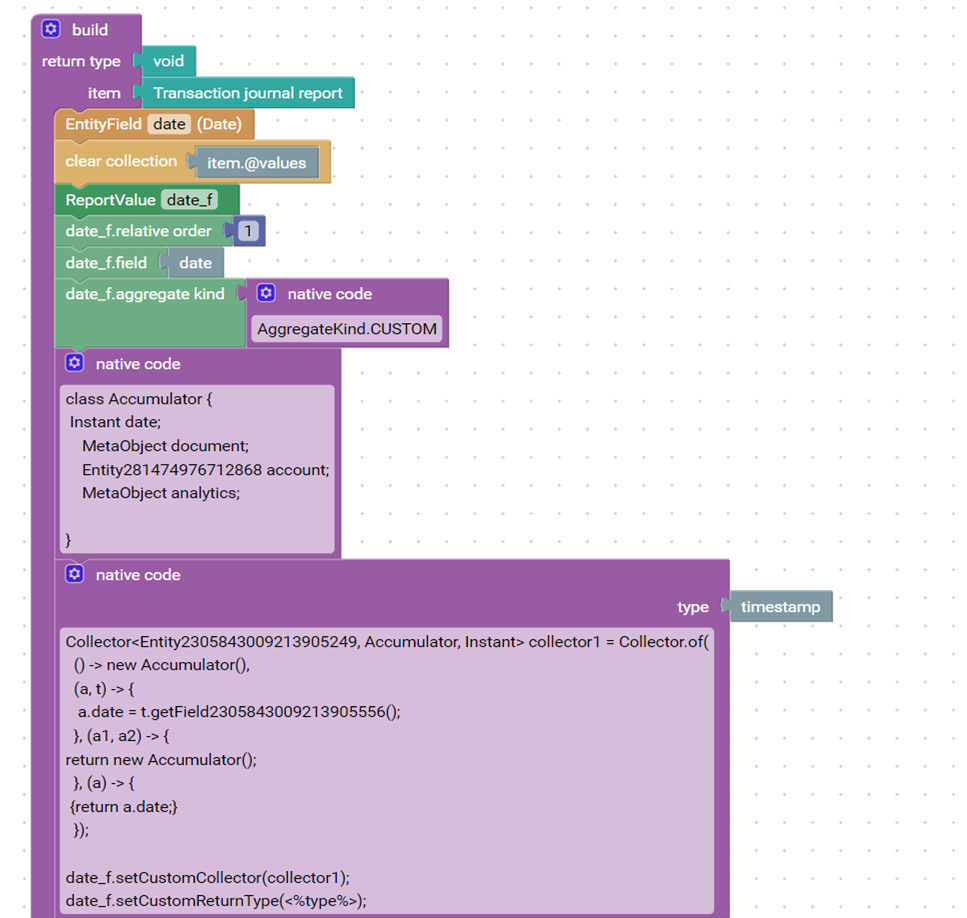
A usage of CUSTOM aggregation can become handy when you don’t need any calculations, just to show the data (otherwise, the entries will be shown as undefined). For that, in the Collector do the following:
// transform data
(a, t) -> {a.date = t.getField2305843009213905556();},
// Create new Accumulator - no aggregation
(a1, a2) -> {return new Accumulator();},
// Return the value without chagnes.
(a) -> { {return a.date;} }
The example is taken from ERP Transaction Journal Report.