Menus
App Menu is a list of options which the application user sees in the left sidebar. You can open the web page in edit or create mode. Also you may edit it in the Builder by adding in-app or external links.
HOW TO:
Add item to menu
To add a menu item, from Components ⇒ DATA TYPES select the type you need. Then you have two options: Create new or List.

Create new will create a new instance of the type. List will open the index page where all the type instances will be shown in the table format.
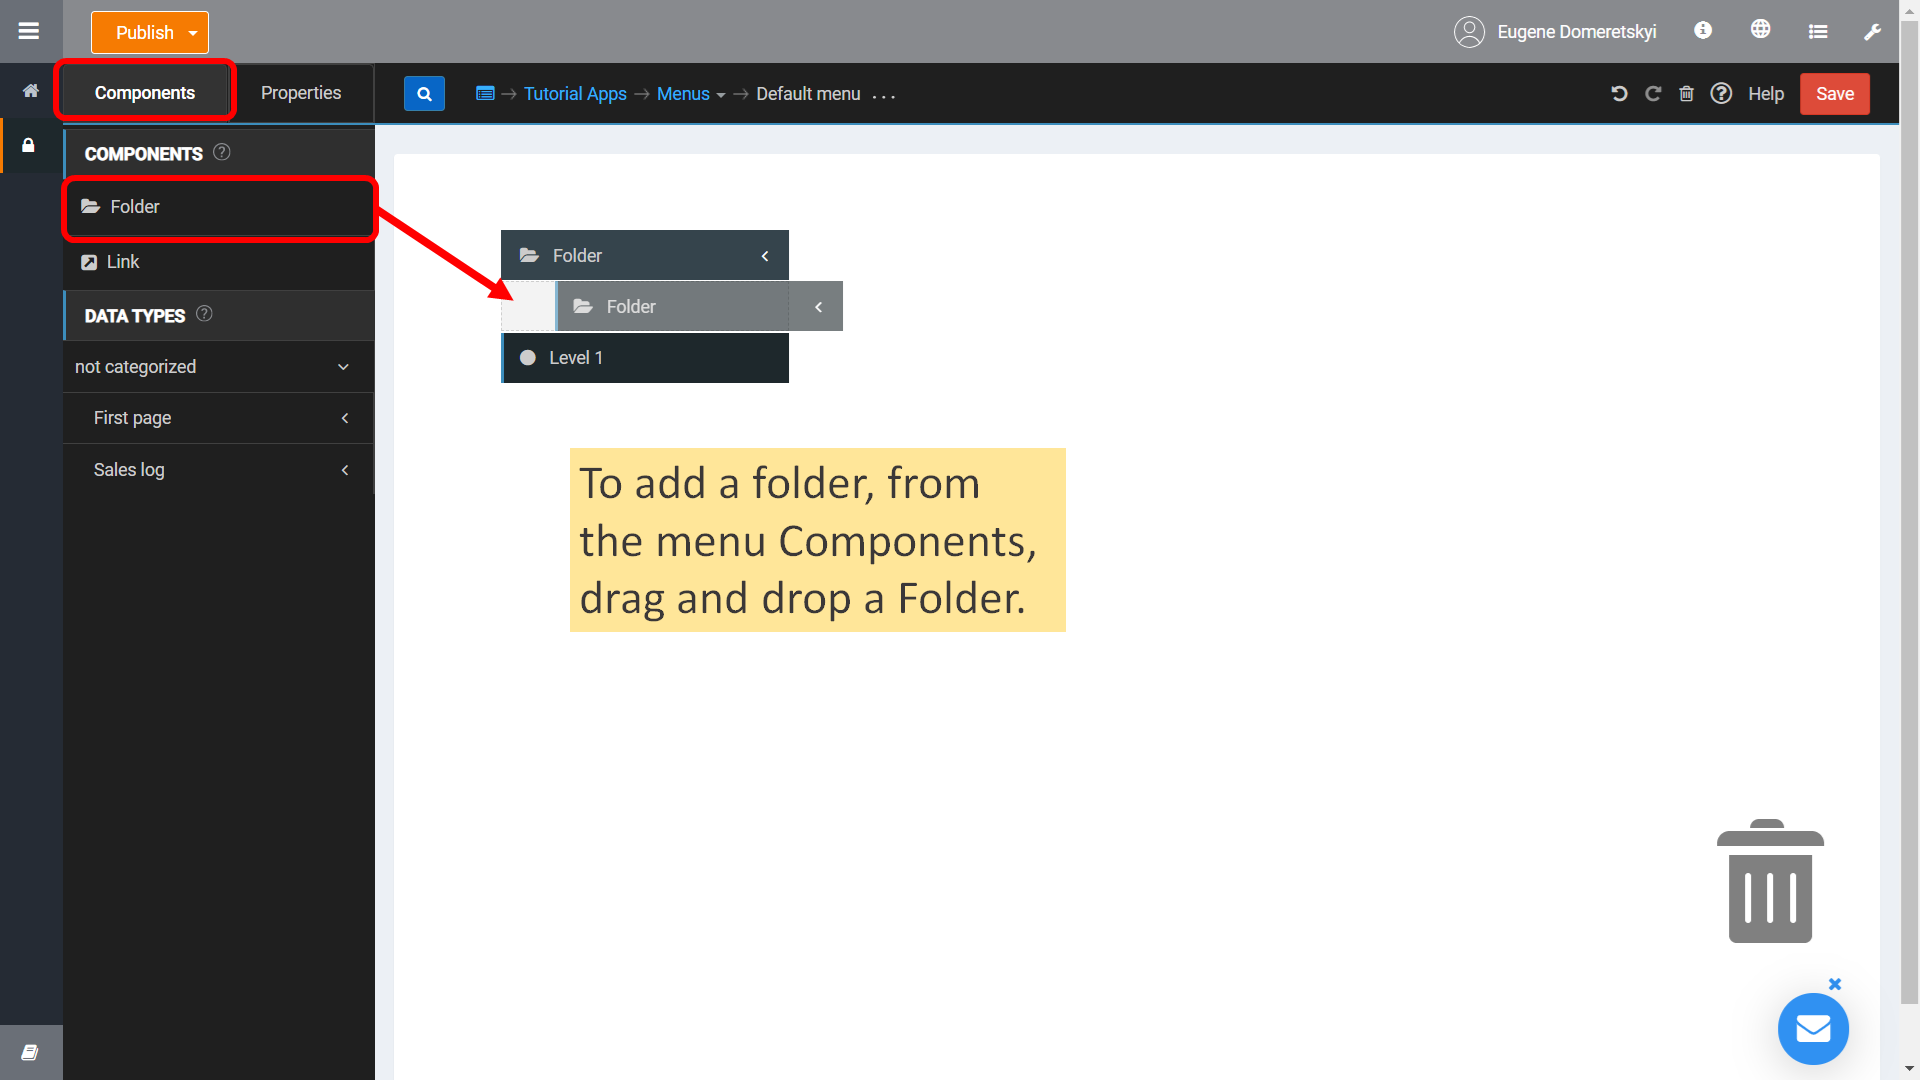
Add a folder to a menu
Folders exist just for grouping menu items. To add a folder, go to the menu Components and drag and drop a folder.
A maximum of three nested levels is available.
Inside the folders, you can add any menu items you need.

Customize menu folder
In the Menu editor, you can rename a folder or change its icon.

You may also need to change permission for the folder. In the example below, For admins only folder will be shown to no one but the admins.

Change an item icon
Folders and data types may have an icon in the Menu.
To change an item icon, click on the item to open its Properties. Then, in the Icon field, select the icon you need.

Rename a menu item
Click on any item to open its Properties and change the Text field to rename an item.

Add an external link to the menu
An External link is a regular link with a static URL. It is opened in a new tab.
To add one from the Menu editor Components panel, drag and drop a Link element.

Then, insert the URL you need:

After you Publish and open your app, and then click on that link, a new tab with https://example.com will be opened.
Show a different menu for a specific data type
In an application, if you open the app, the default menu will be displayed everywhere.
If you want to display different menus for different data types, then you need to:
1) Create a new menu.


2) Select the menu for the corresponding type.
Go to the Data type details page. Then, click on the pencil icon to start editing it.

In the type properties, select the menu you need and save it.

After that, if you will visit the page related to the Sales log (type from the example), the new, Second Menu will be shown.
Change permissions for the menu item
In the Menu Editor, you can set the permissions and visibility levels for different app users.
Click on the menu item to open its properties. Select the proper Permission.
In the example below, only logged-in users can see Sales history page.

And if you select IN_ANY_OF_ROLES you can specify a separate role for which this menu item is visible.

Note: User roles can be created in the Permissions editor.
FAQ:
Why do I need more than one menu for the application?
Be more productive. You can add categories for your data types, create a menu for each category and use them effectively.
Furthermore, by creating other menus, you avoid too many nested links in the menu.
Note: to learn how to select a menu for a data type, see “How to show a different menu for a specific data type.”
Why is my data type opened in the edit mode?
The problem may be in the menu creation. For example, if you drag and drop the Data type using the Create new button, the data type creation web page will be opened.

If you want to open the index page (the one with all the data displayed) from the menu, find the data type in Components and use the List creator.

I need to select another default menu.
The default menu for the project can be selected on the Settings page.
