Company Expenses
INTRO TO THE ENVIRONMENT
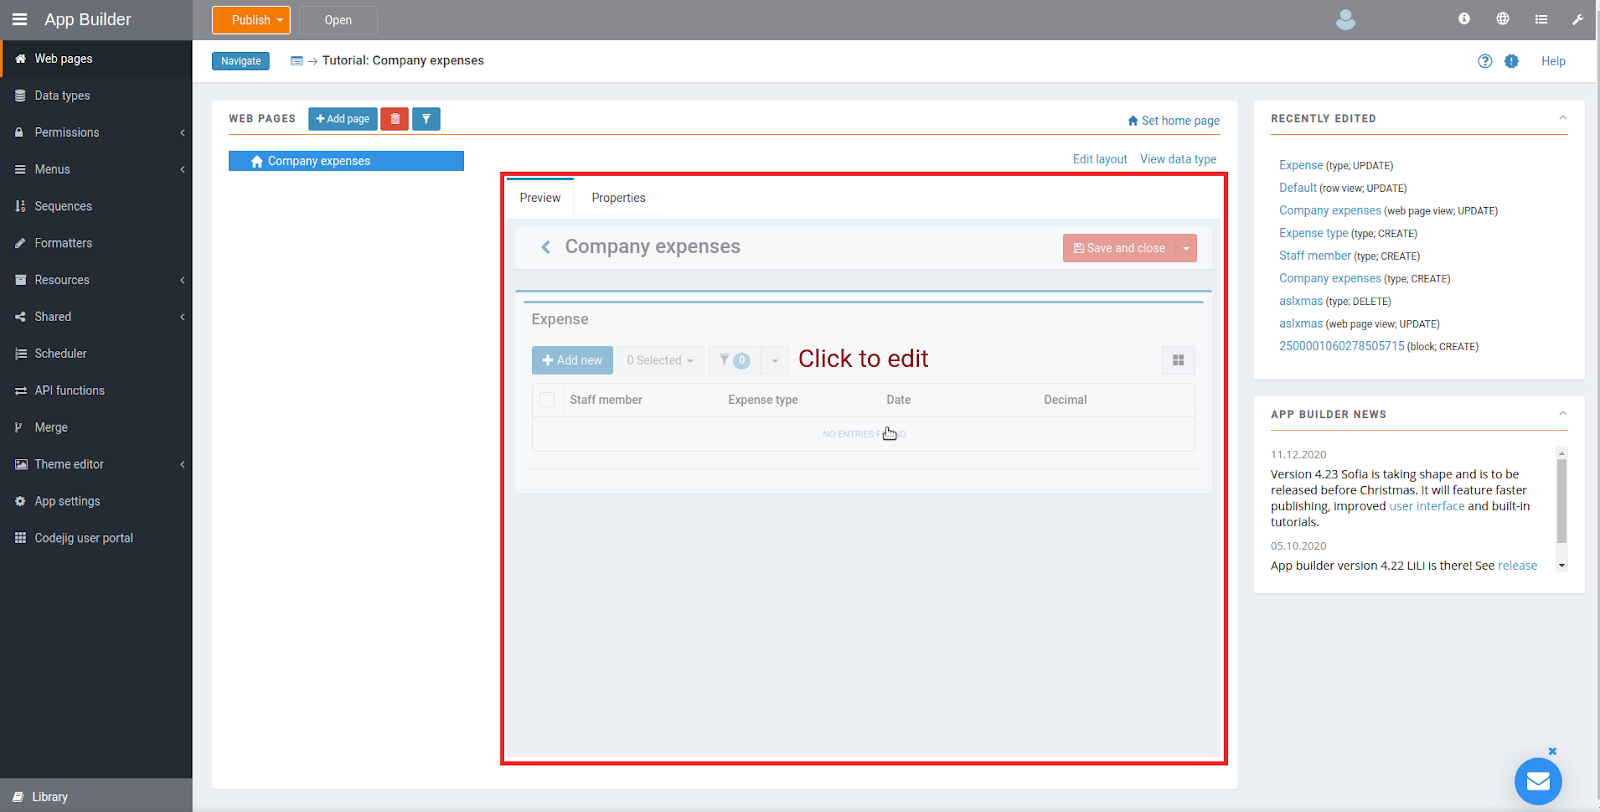
This tutorial shows how to prototype an expense management app. Before we start with a walkthrough, let’s take a short look at the home page of App Builder IDE (integrated development environment). Click on the image below to enlarge it.

CREATE NEW WEB PAGE
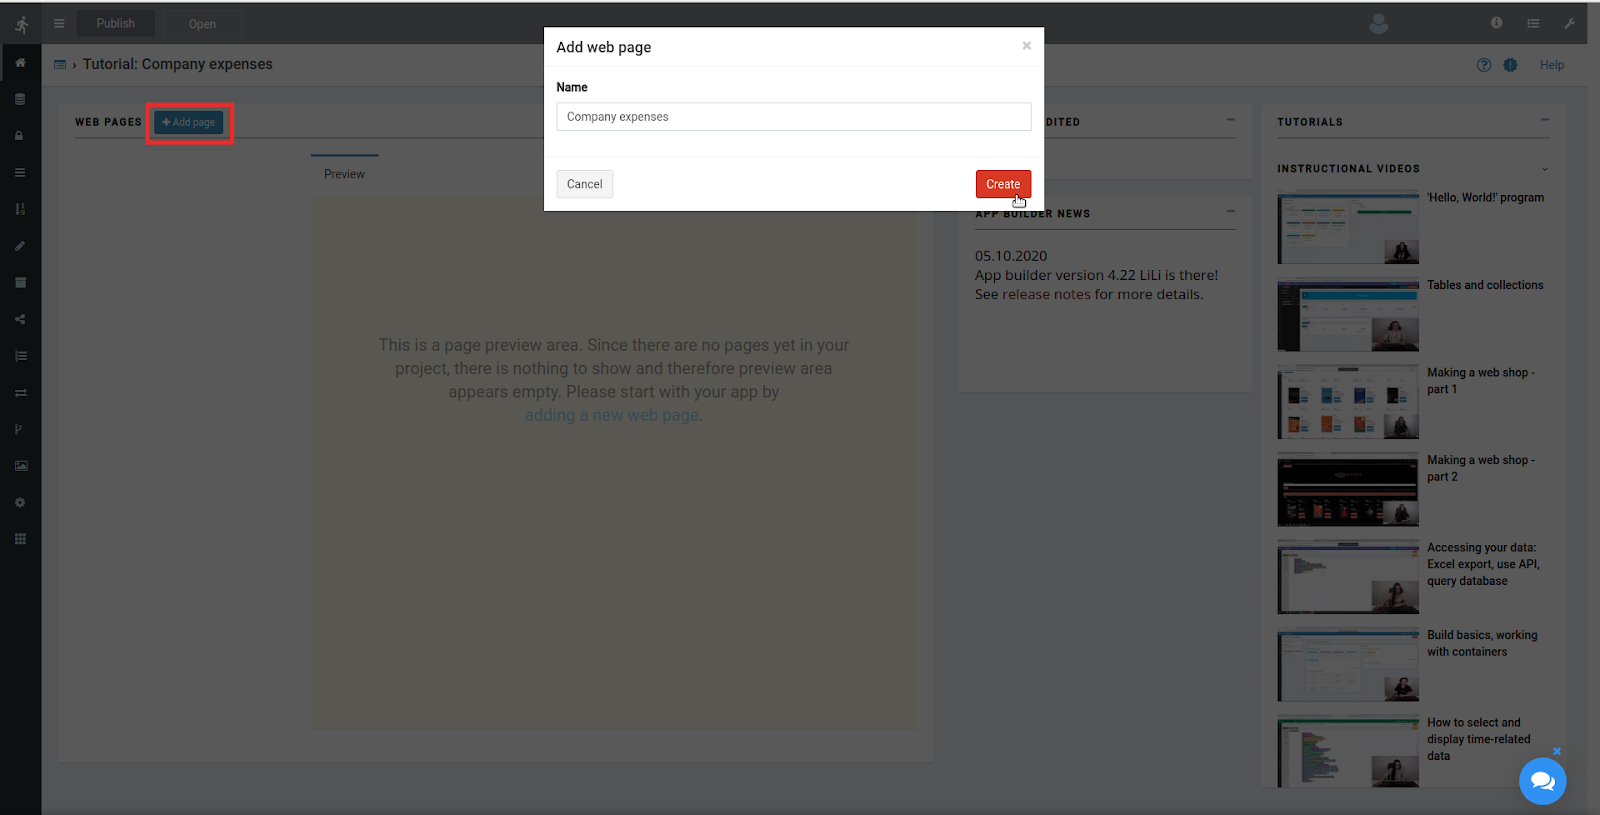
From the Web Pages section - click on the Add Page button. Name a new page Company expenses.
INTRO TO THE WEB PAGE EDITOR
After clicking on the Create button we get transferred to the Web page editor.
In depth: what has happened In the background:
1) App Builder has created a new data type called Company expenses
2) Created a database table to hold its data
3) Moved us to edit its web page view.
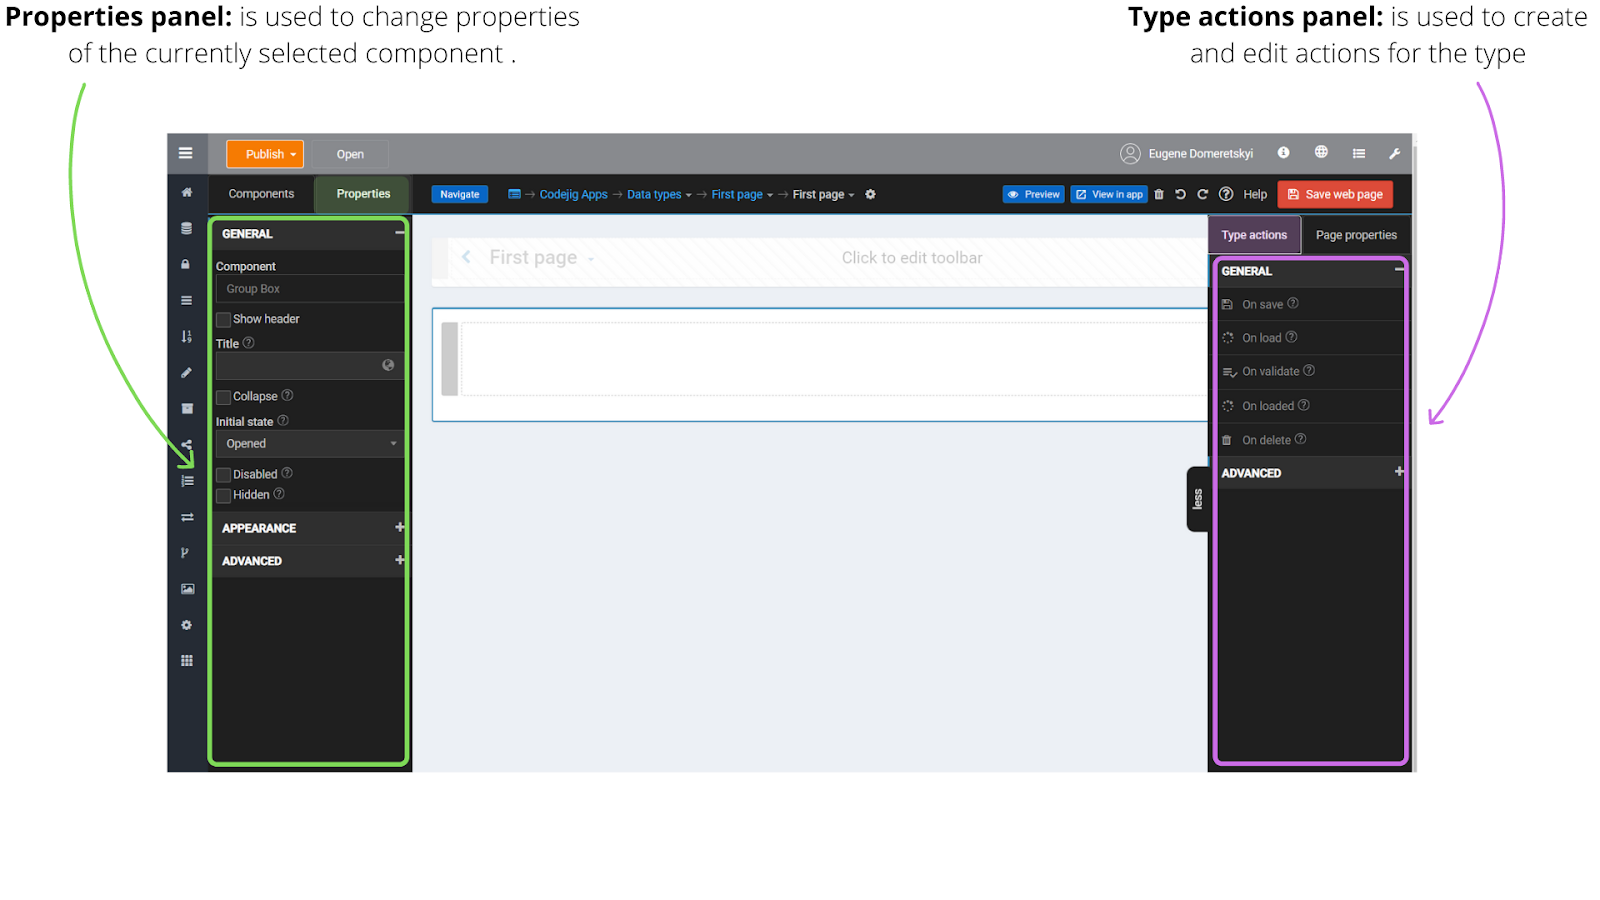
Please take a look at the images below to get familiar with Web page editor terminology.
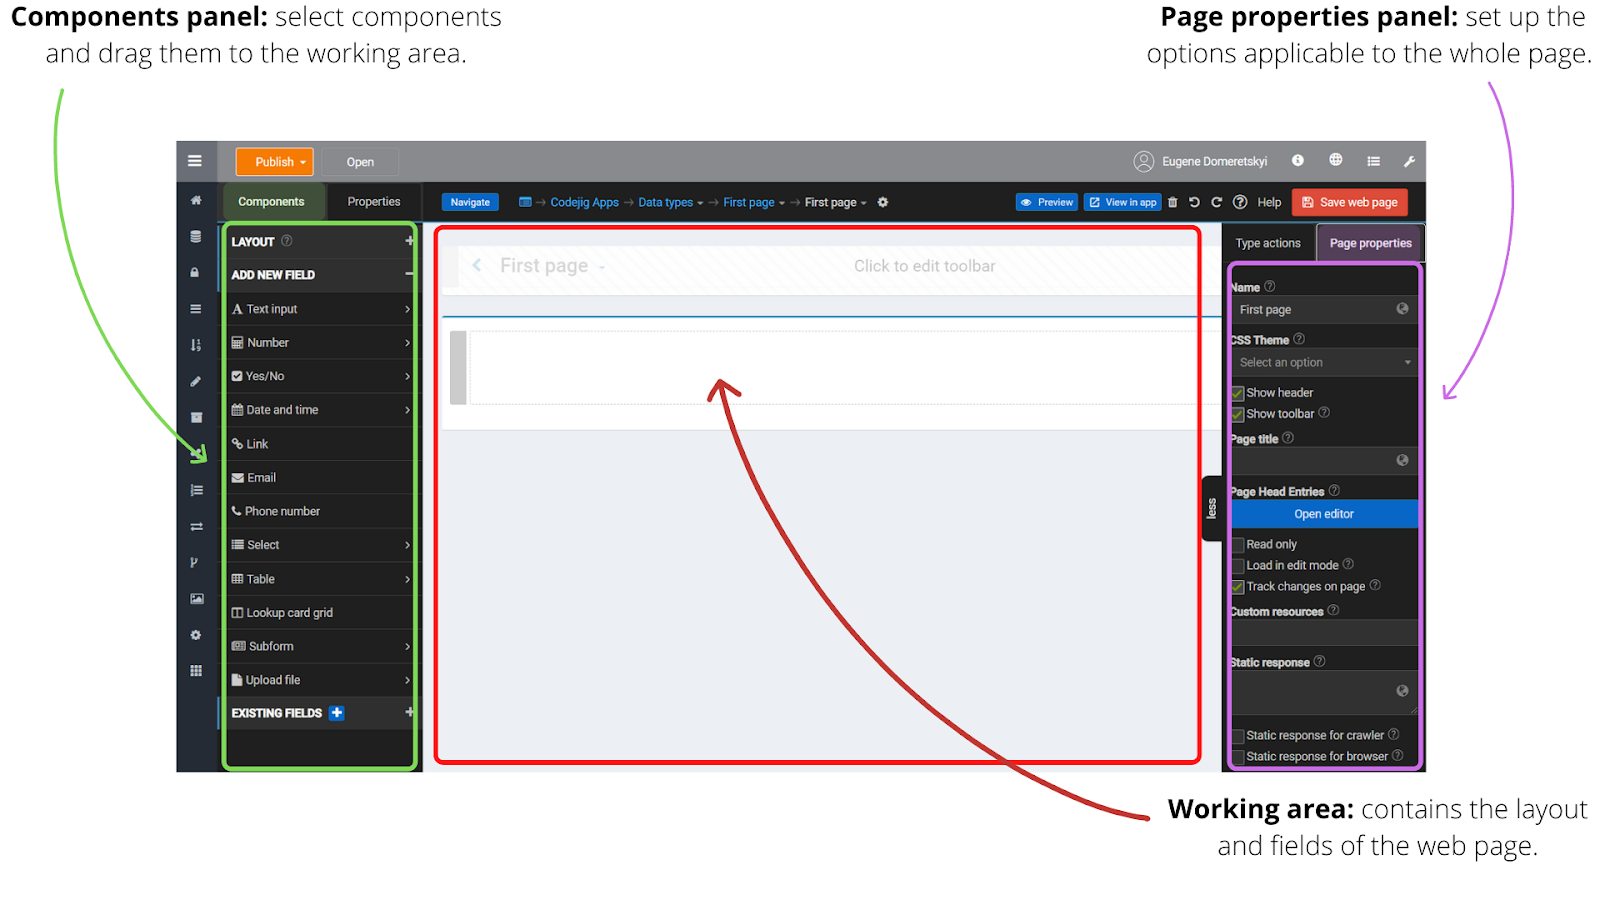
Please notice that the Components panel is switched to the Properties panel whenever you select a component in the Working area.
ADD EXPENSES TABLE
From the Components -> ADD NEW FIELD in Components panel, drag in a Table, and drop it under the group box.

Name it Expense.

After pressing on Create the table appears in the Working area.
In depth: what has happened In the background:
1) App Builder has created a new data type called Expense and created a database table to hold its data.
2) A collection field of type Expense has been added to the data type Company expenses.
3) The field has been added to its web page view and has been shown using auto-generated table view for Expense data type.
DELETE GROUP BOX
Delete unnecessary Group Box on top of the page by clicking the delete icon on the right upper corner of it.

ADD TABLE COLUMNS
We want to have several columns in the Table: Staff member who made the expense (that can be selected from dropdown on creating a new expense), Expense type (will be selected from dropdown as well), Date and Amount paid.
To add a column with a selectable field, from Components -> ADD NEW FIELD palette, drag a Select -> Select to the Table.

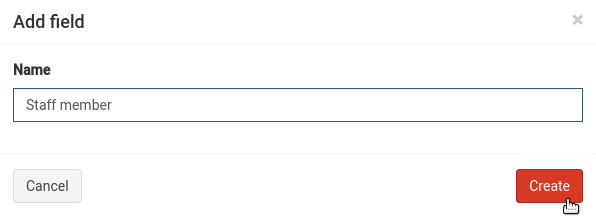
Name it Staff member.
A column Staff member appears in the table.
In depth: what has happened in the background:
1) A new data type Staff member has been created.
2) A field of Staff member type has been added to Expense type. As always in such cases, App Builder automatically made necessary changes to the underlying database structure.
3) The auto-generated table view for Expense has been updated.
Please repeat the same step for the Expense type column.
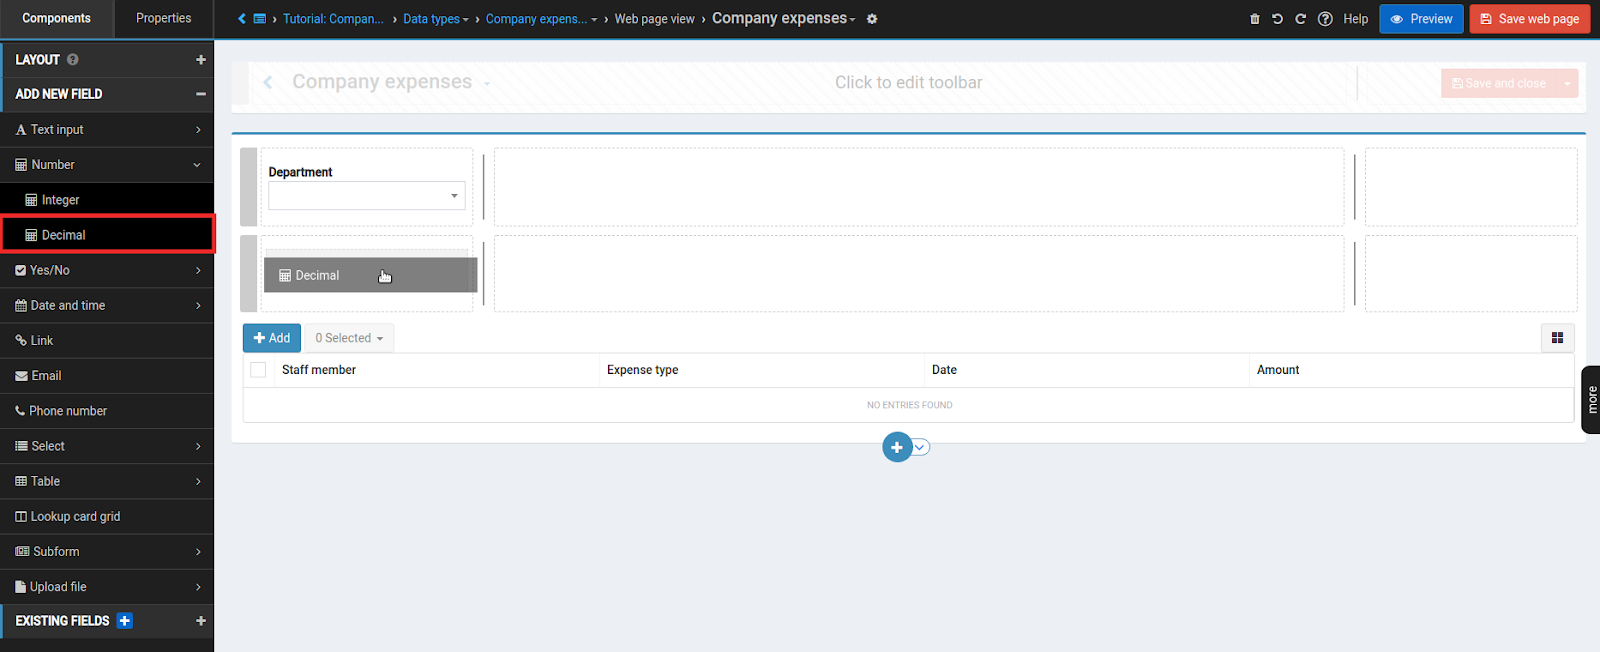
For the Date, we would like to use a Date field type. From Components -> ADD NEW FIELD, drag a Date -> Date to the Table. Name it Date.

And for the Amount column, from Components -> ADD NEW FIELD drag in Number -> Decimal to the Table. Name it Amount.

The form for creating a new Expense is auto-generated.
HIDE TABLE TITLE
As we already have a page title Company expenses, the title for the Expense Table seems to be unnecessary.
Click on the Group box in which Table is located and in Properties -> GENERAL uncheck Show header.

GO TO THE TABLE VIEW EDITOR
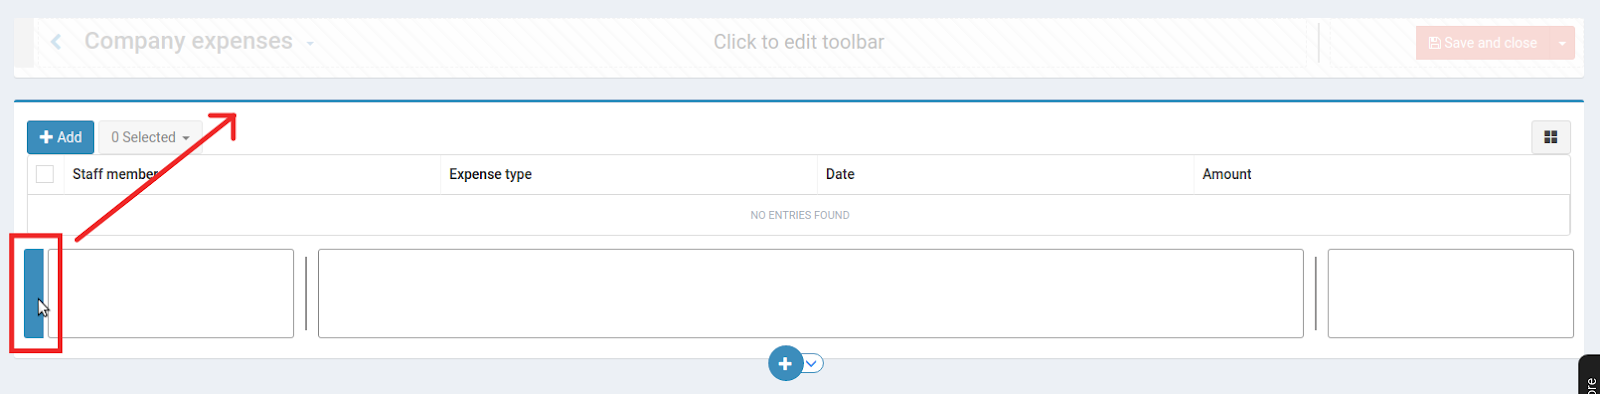
Hover over the Table for Edit Table button to appear. Click on it.

Confirm saving the page and go to the Table View Editor.

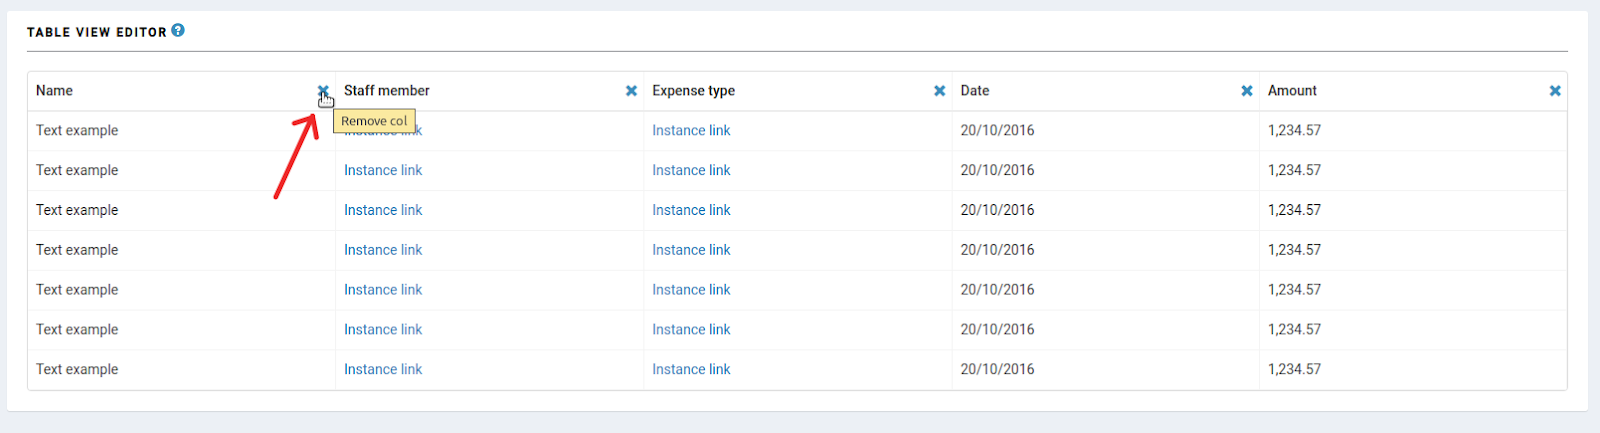
DELETE COLUMN
Delete unnecessary column Name by clicking the delete icon on the right of the column.
Save the page.
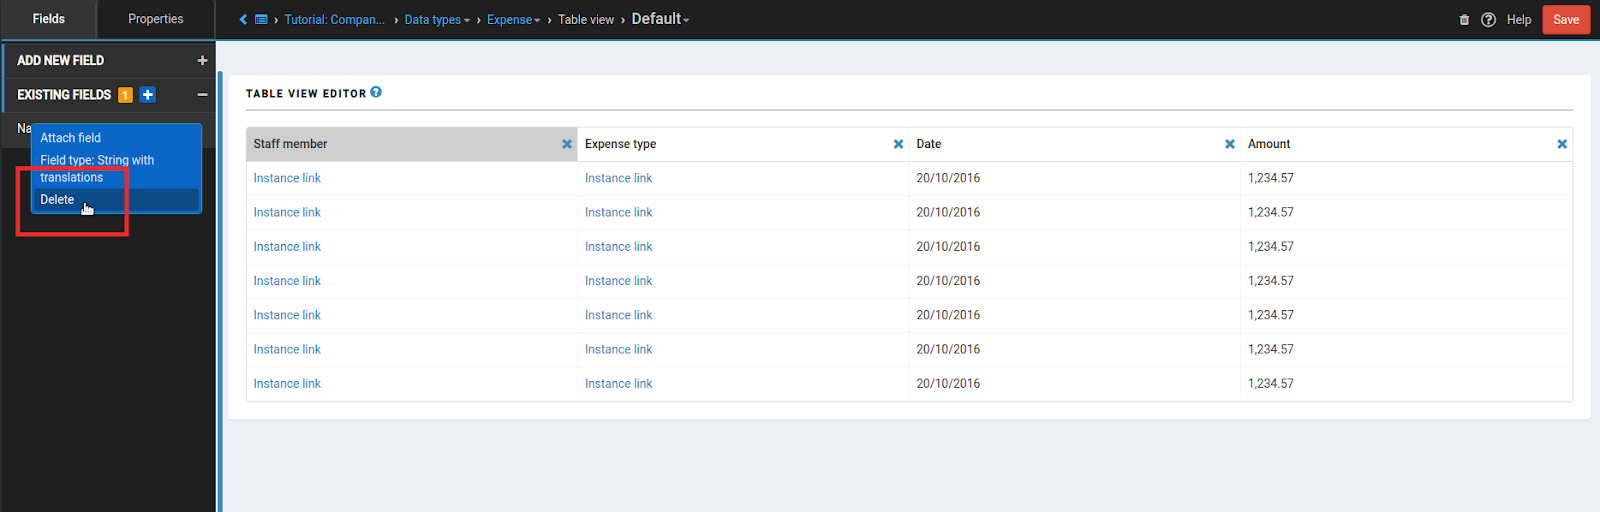
To completely remove Name field from the Expense, in Fields -> EXISTING FIELDS find Name. Click on more on the right from Name and delete it.
REORDER COLUMNS
Reorganize the order of the columns by dragging them to desired locations if needed.

NAVIGATE TO THE PAGE
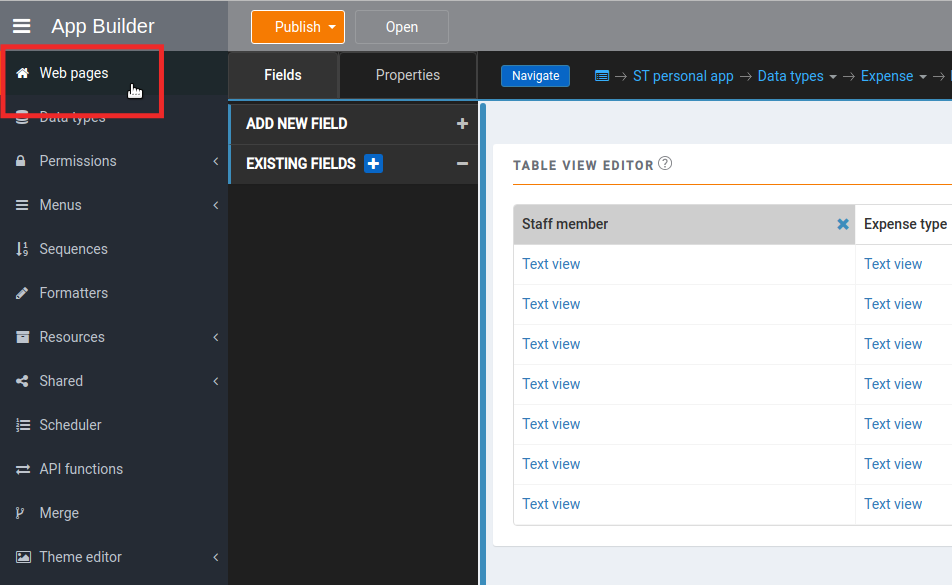
Click on Web pages in Project Menu.
Click on Preview (to edit) of the Company expenses web page.
ADD A NEW ROW
Hover cursor on the bottom of the Table. The row panel will appear. Click on Add row 2-8-2.

Move created row above the Expenses Table by dragging the blue anchor on the left of the row.

ADD DEPARTMENT FIELD
From Components -> ADD NEW FIELD drag a Select -> Select into the first column of just created row. Name it Department.

MAKE FIELD REQUIRED
To make a Department field required, click on it. In Properties -> VALIDATION put a tick on the Required option.

ADD A NEW ROW
Add new row 2-8-2 under row with the department as in step 10.

ADD TOTAL AMOUNT FIELD
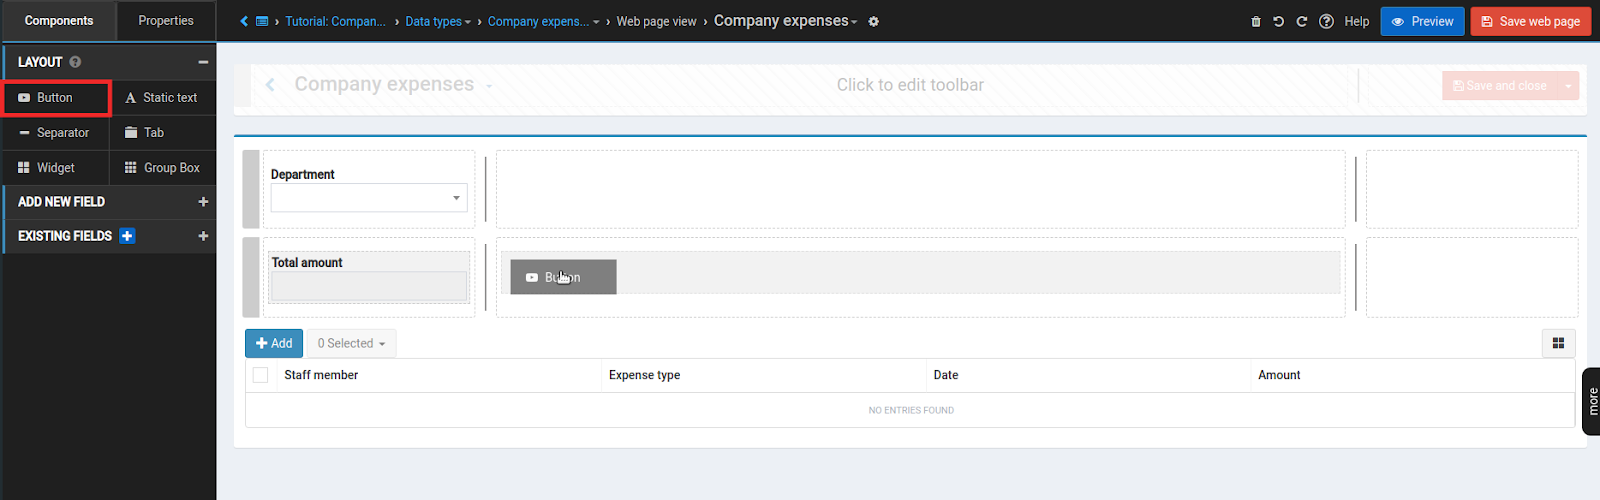
From Components -> ADD NEW FIELD drag in Number -> Decimal into the first column of just created row. Name it Total amount.
To disable editing Total amount for users click on this field and in Properties -> GENERAL put a tick on the Disabled checkbox.

ADD BUTTON
From Components -> LAYOUT palette drag in Button into the second column of a just created row.
BUTTON PROPERTIES
Click on the Name button.

In Properties -> GENERAL, set Title of the button to Calculate total.

To move the Calculate total button to be right next to the Total amount number, let’s add some appearance properties to it.
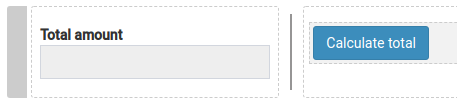
In Properties -> APPEARANCE -> CSS add a css style margin-top: 20px;

TOTAL AMOUNT APPEARANCE
To add some color to our page, click on Total amount. In Properties -> APPEARANCE -> CSS add a CSS style color: blue;

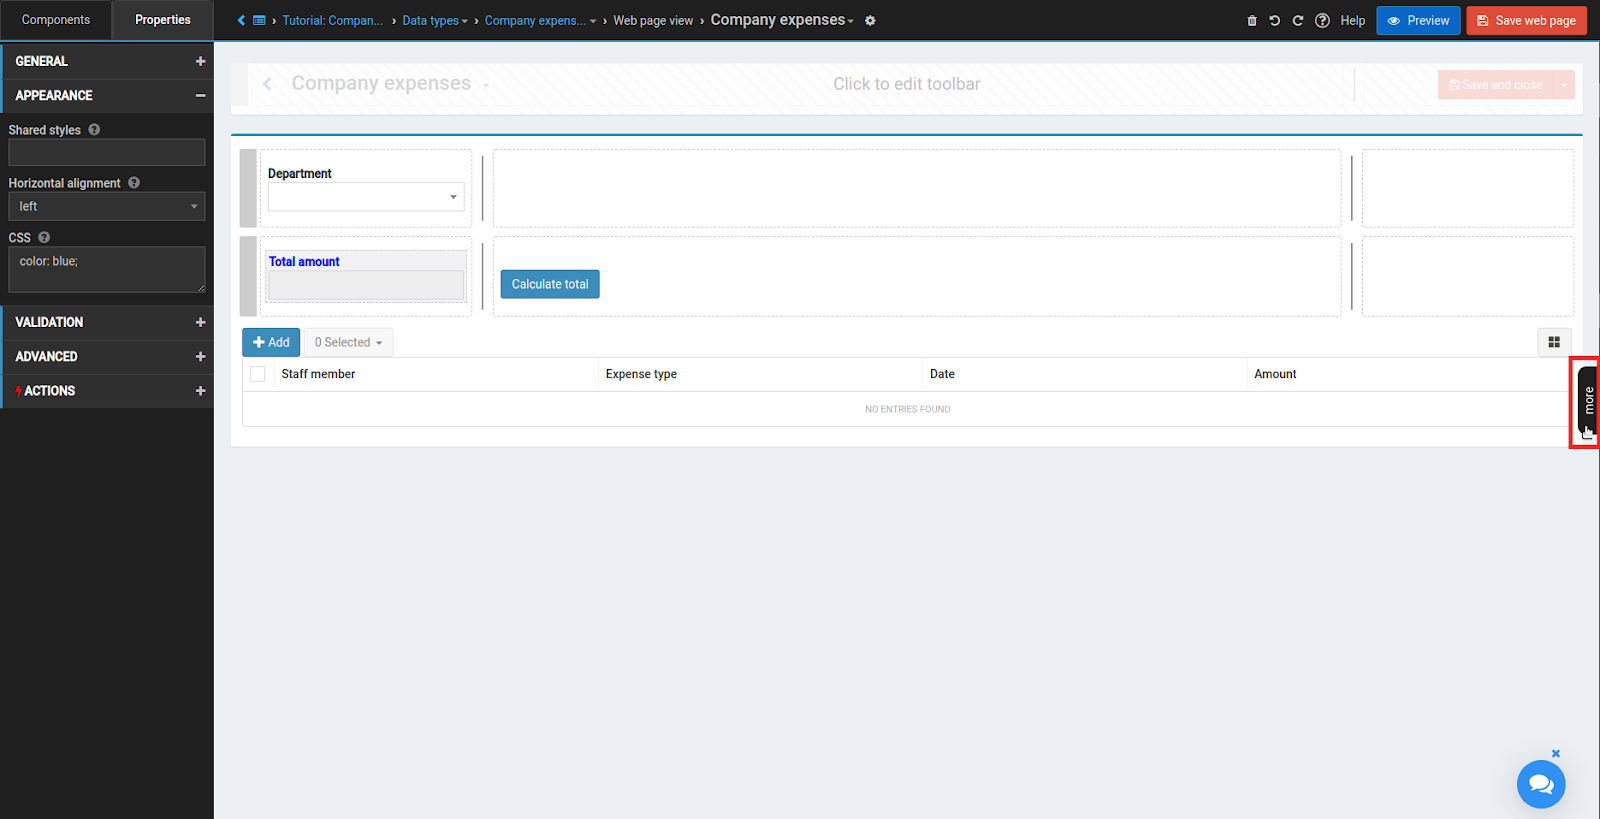
PAGE PROPERTIES
We want to allow the user to edit data right after the page is loaded.
To always open the Company expenses page in editing mode, click on more button on the right of the Working area to open the Page settings panel.
By default to update information you need to press the Update button on the right upper corner.

In Page properties mark Load in edit mode checkbox.

ADD AN ACTION
With the click of the Calculate total button, we would like to show the Total amount of all expenses related to the chosen department. For that click on the Calculate total button and in Properties -> ACTIONS create a new Server action.

Name it Calculate total expenses.
Switch to the Blocks Editor.

INTRO TO CODE BLOCK EDITOR
Before creating your first code actions in Codejig App Builder, take a quick look at the elements of the Code block editor.

LET’S WRITE SOME CODE!
At first, we would like to set zero to the Total amount field.
Click on VARIABLES in the Lookup panel and find the item object. Expand this object and select Total amount. As we want to assign a new value to it, click on Set.
Drag and drop item.Total amount into the first free cell in the arithmetic block.

To set Total amount to zero on the left of Blocks window click on the NUMBER section. Drag and drop 0 block next to the item.Total amount.

ADD FOR-EACH LOOP
To iterate over entries in the Expense table, we need to add a for-loop.
In the LOOPS section of the Blocks panel. Drag and drop for each i in … do... block into the next available cell.

GET VARIABLE
To iterate over Expenses collection, in VARIABLES in the Lookup panel click on item and find Expense in the expanded list. Select it and choose method Get (we don’t want to change this collection). Drag and connect it to the for each block.

RENAME VARIABLE
To rename the name of the current item in the loop, double click on i and rename it to one expense.

SET VARIABLE
Right-click on the item.Total amount and choose Set variable. This way we created a new item.Total amount block that can be set to a new value.
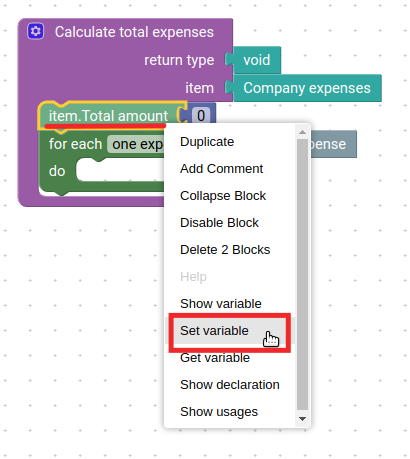
Drag and drop new item.Total amount into the next free cell inside the loop.

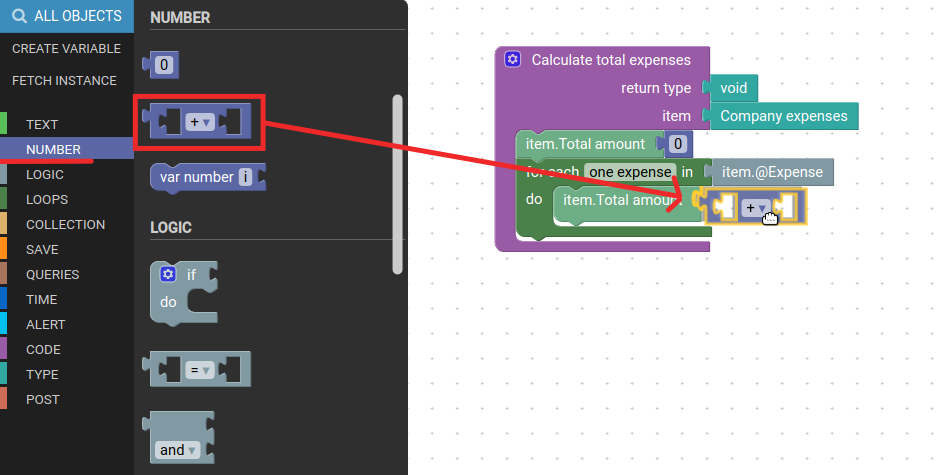
ADD NEW ARITHMETIC BLOCK
Now we want to update the value of Total amount by an amount of one expense. For that, we need to assign a new value to Total amount that will be a sum of previous value of Total amount and amount of the current one expense.
In the NUMBER section of the Blocks window. Drag and drop … + ... block right next to item.Total amount inside the loop.
ASSIGN VALUES
Right-click on the item.Total amount and choose Get variable.

Place the created block into the free slot inside the arithmetic block.

Right-click on the one expense and choose Show “one expense” variable. In expanded one expense object choose Amount and click Get. Place one expense.Amount block into the next free slot inside the arithmetic block.
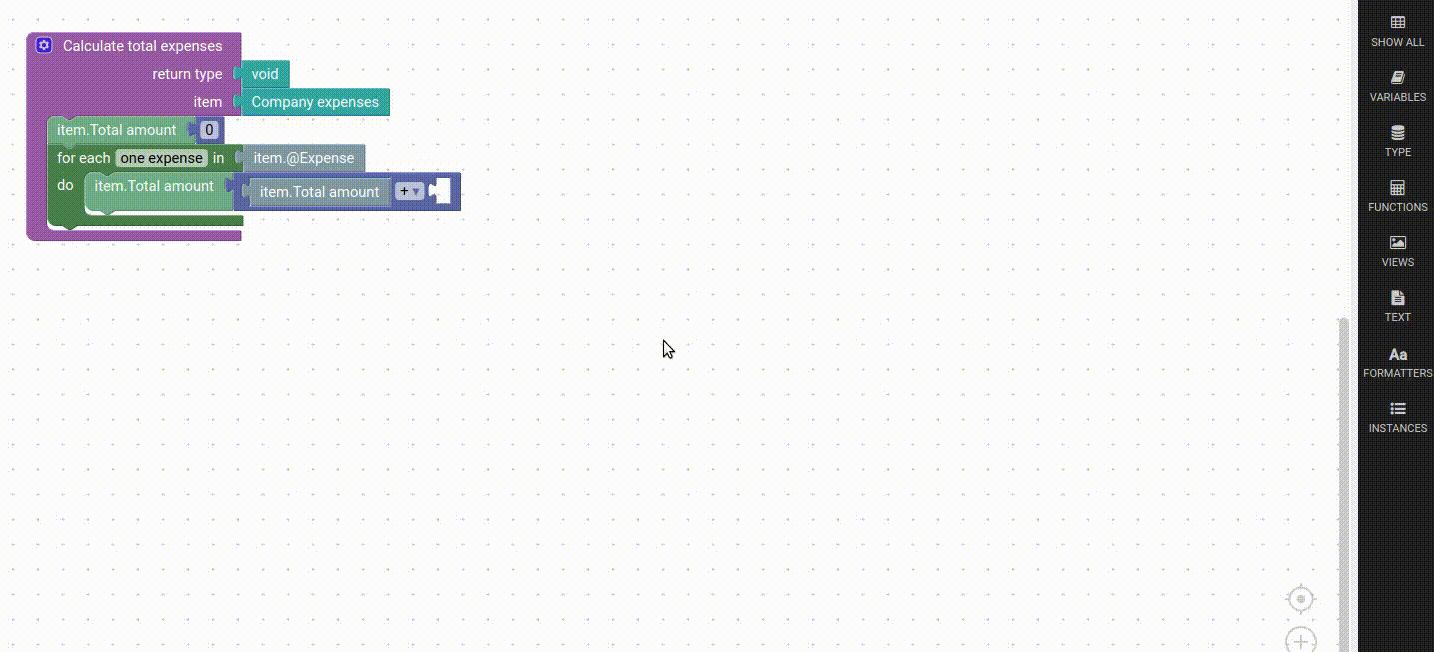
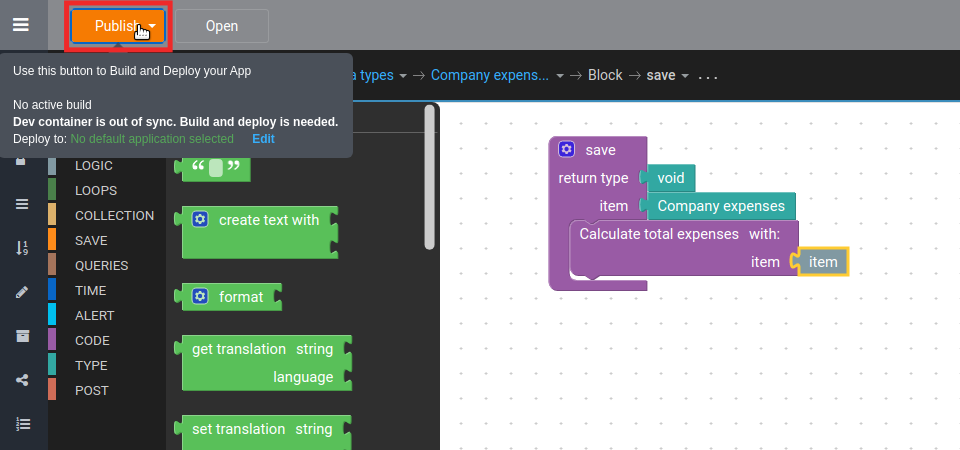
And we are done with the calculation Total amount. Now save the page and go back to the Company expenses page.
ADD ACTION ON SAVING THE PAGE
We also would like to calculate the Total amount on saving the Company expenses page. Open Type events panel by clicking more button on the right of the Working area.
In Type events -> GENERAL click On save.

Confirm on the Save page and redirect to the block.

REUSE FUNCTION
In the FUNCTIONS section of the Data panel start typing “Calculate total expenses”. Once you see that Company expenses appears, click on it to expand. Click on Calculate total expenses and SELECT. Place function on the first free cell.

In the VARIABLES section of the Lookup panel select the item object and click on Get. Drag and drop item block right next to item in the Calculate total expenses function.

TEST YOUR APP!
Save the page and publish your app. Congratulations! You have successfully created a small company Expenses tracker!