Profit calculator
INTRO
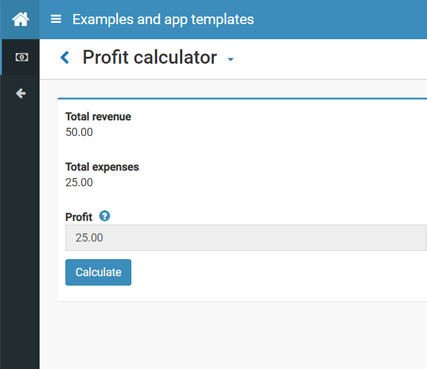
In the tutorial we will create a simple website that can calculate profit given income and expenses and save all the data provided. It takes 2-5 minutes to complete.
You will learn how to create and customize web pages, use Code blocks editor and publish your app so that it will be accessible for everyone.
CREATE WEB PAGE VIEW
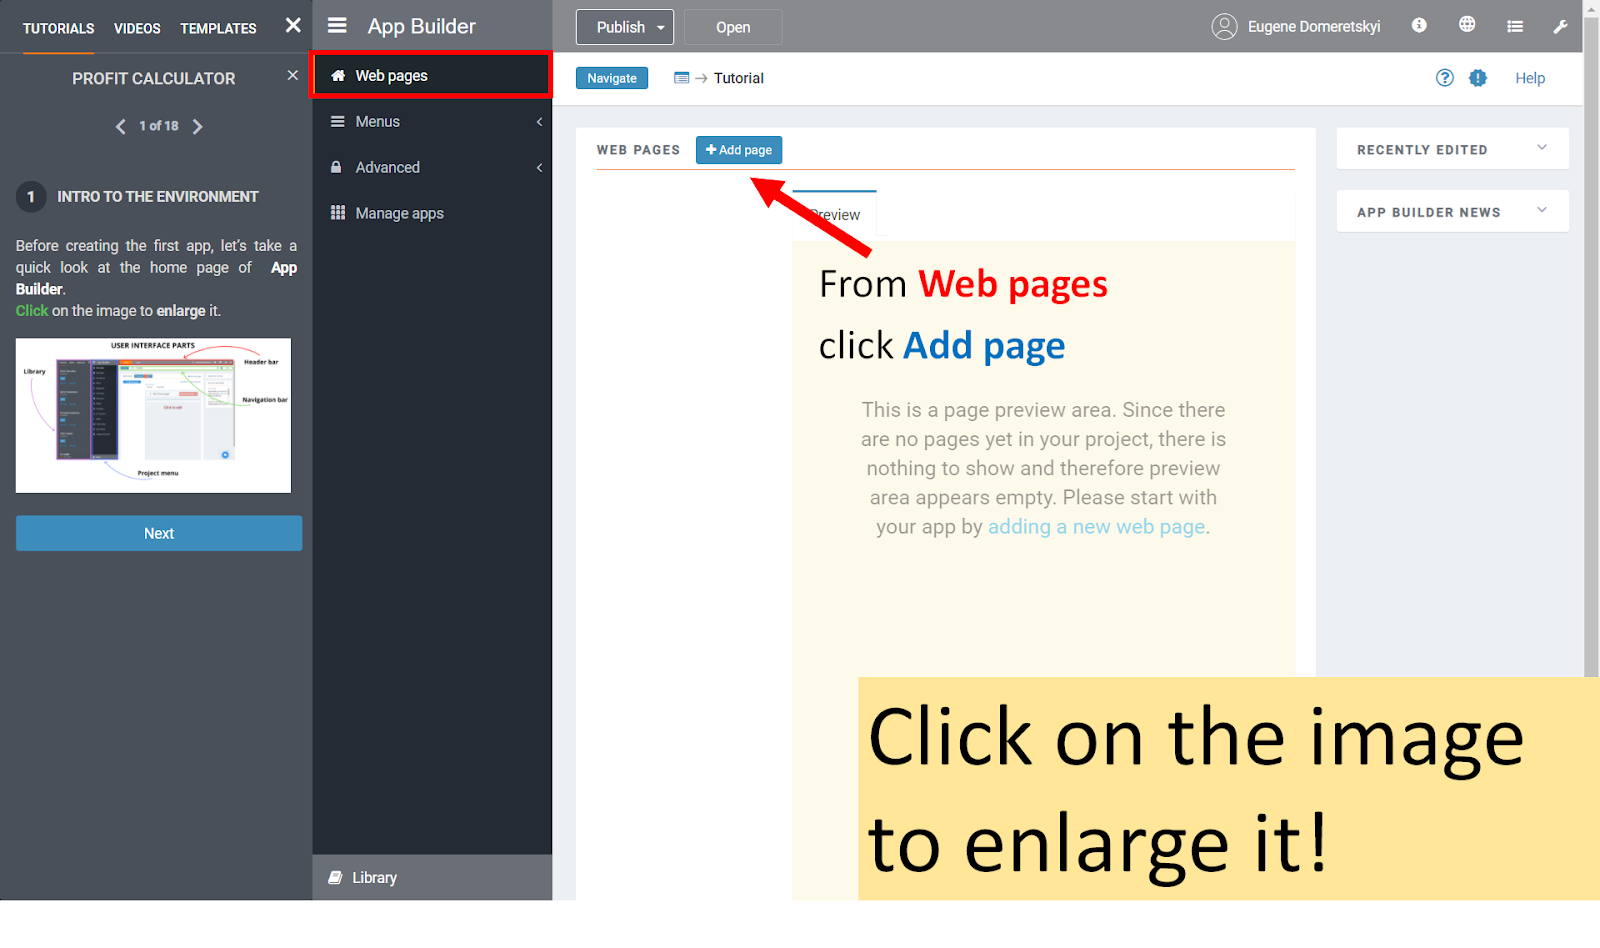
In the Web pages section you can create, and then style a web page.
To create a new web page, from the Web Pages section click on the Add Page button.
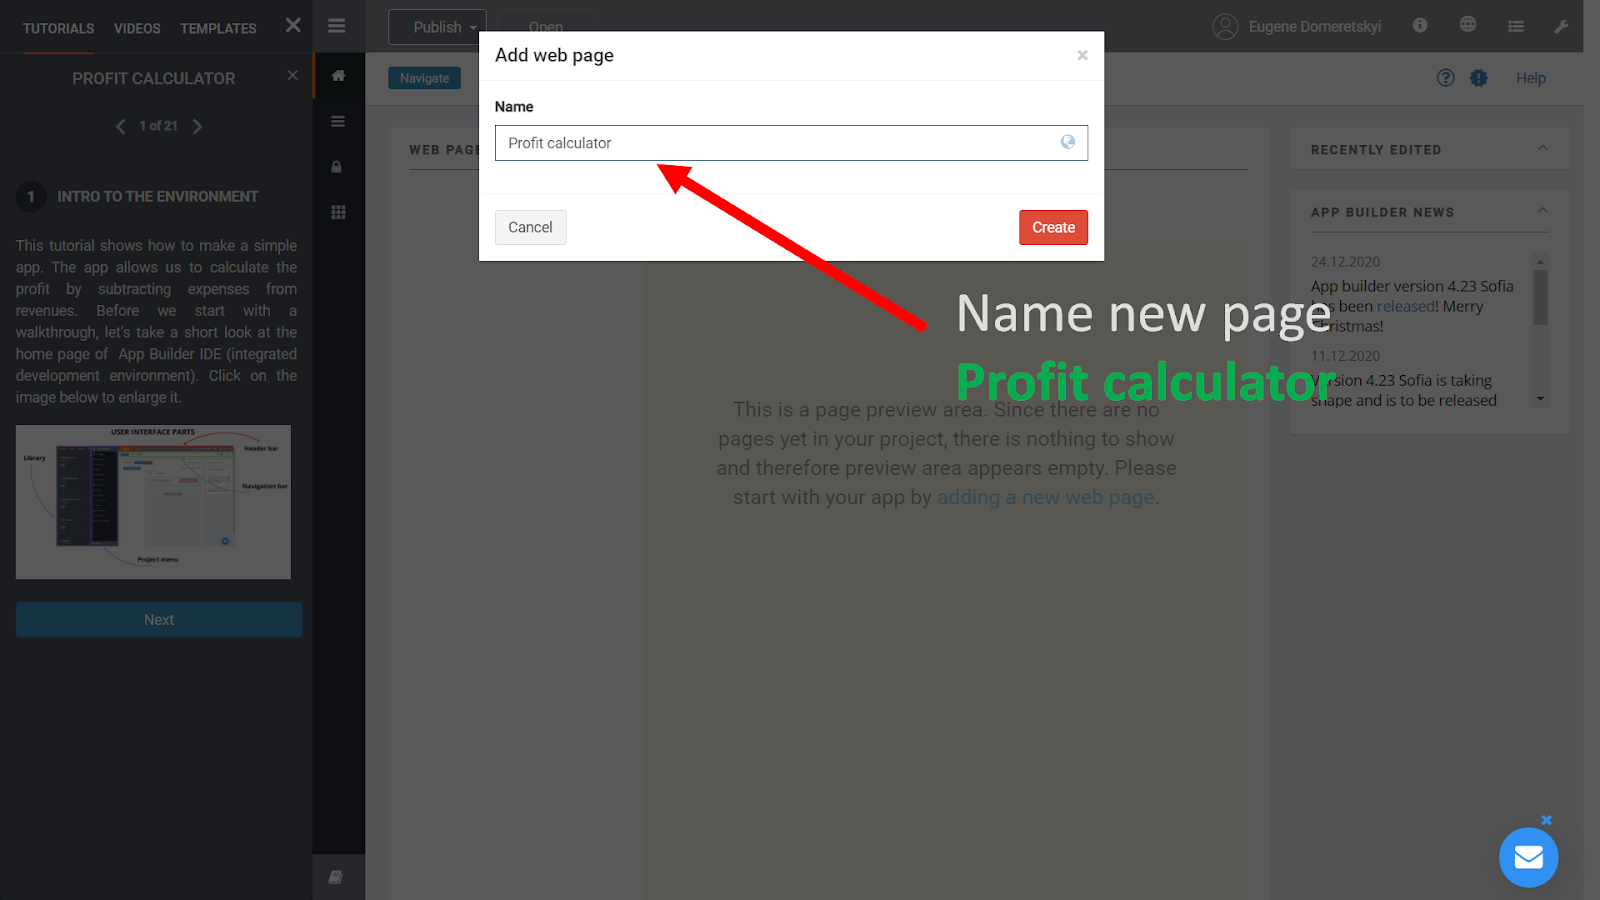
Name a new page Profit calculator.
Then click Create.
ADD DECIMAL NUMBER
From the Components ⇒
ADD NEW FIELD, drag in a Number ⇒ Decimal, and drop it into the Working Area.
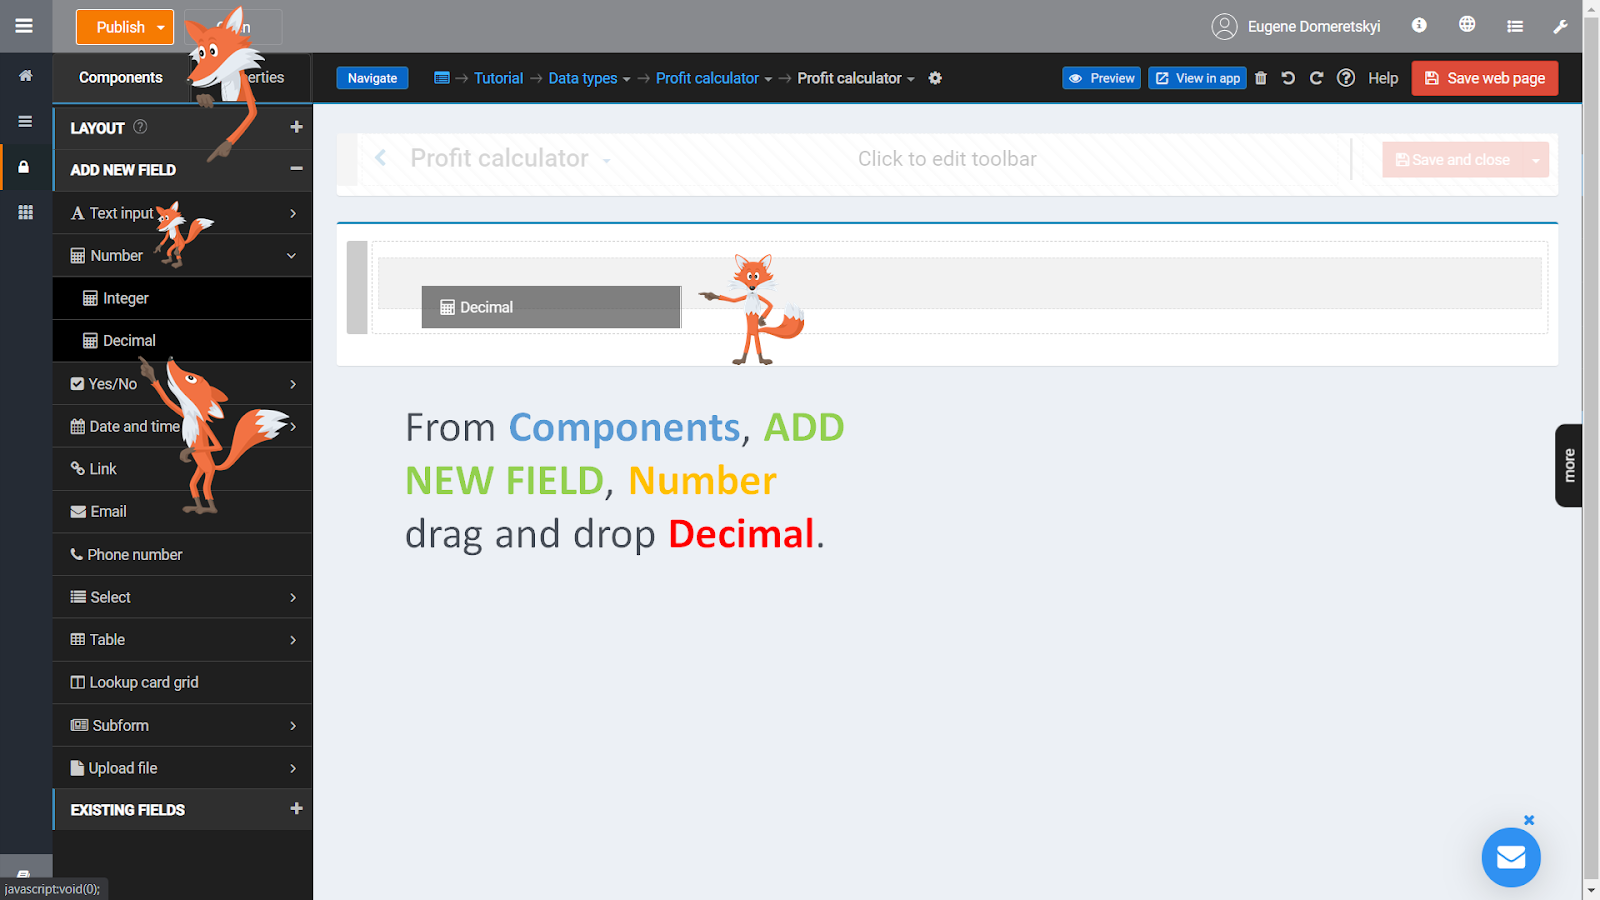
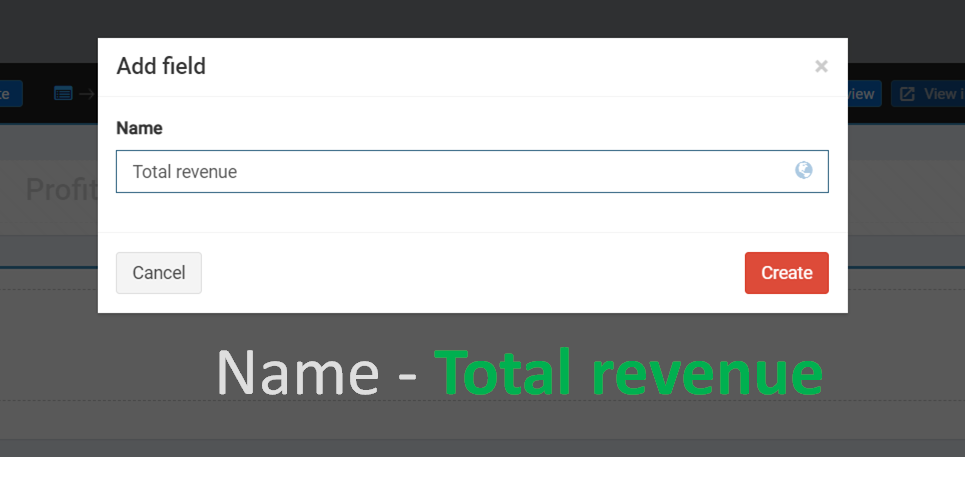
Name it Total revenue and click Create.
ADD MORE FIELDS
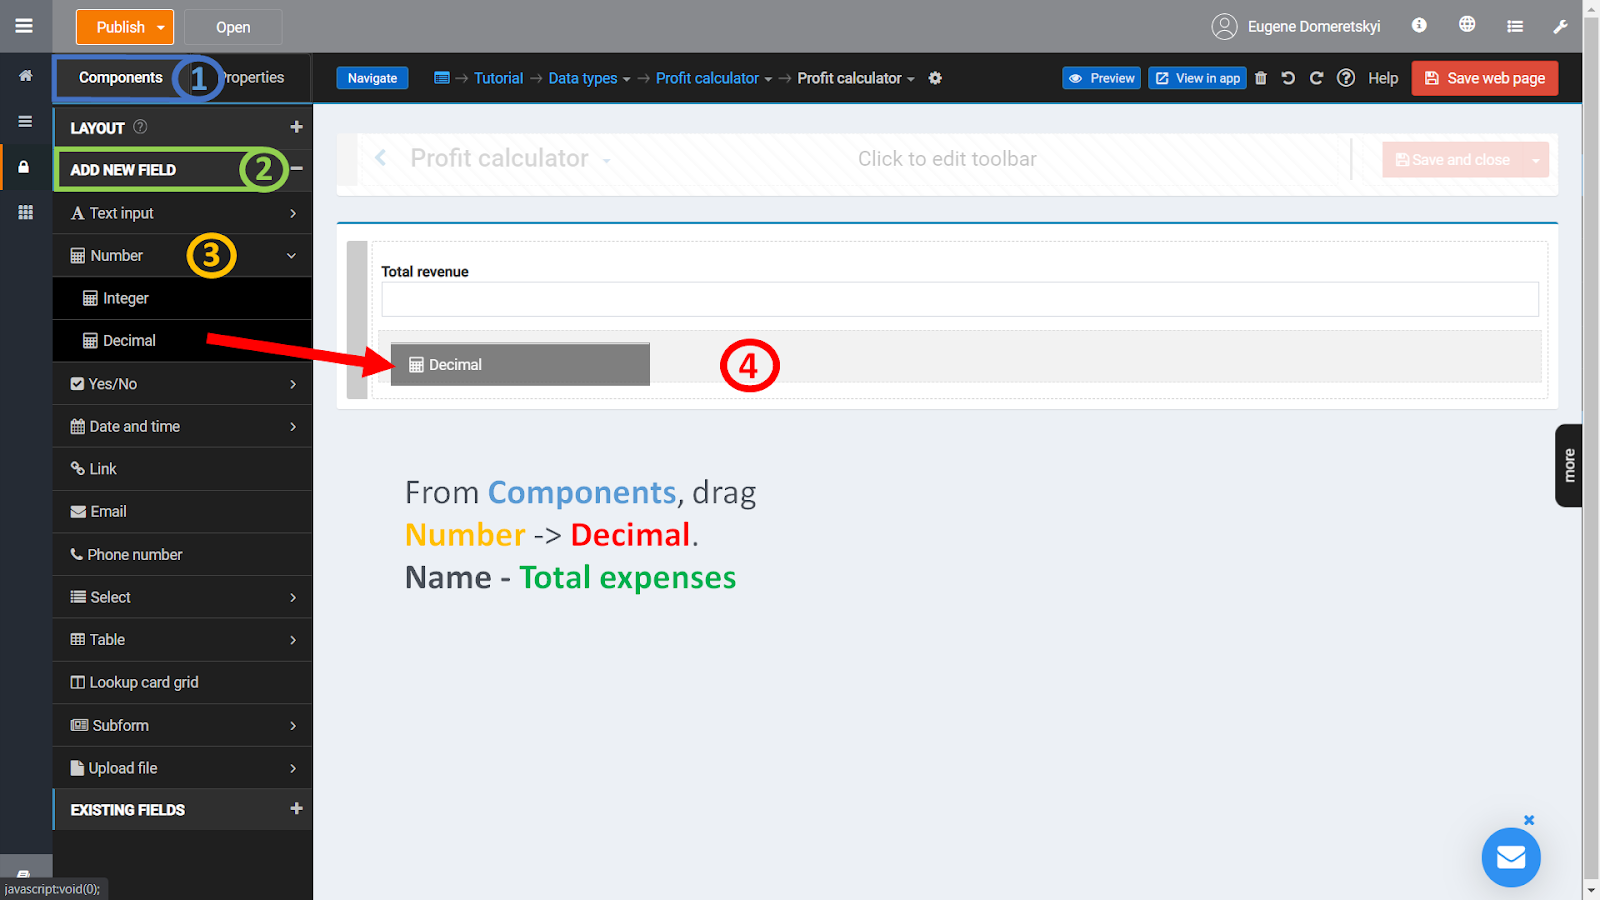
From the Components, ADD NEW FIELD, drag in Decimal, and drop it into the Working Area as we did before. Name it Total expenses.
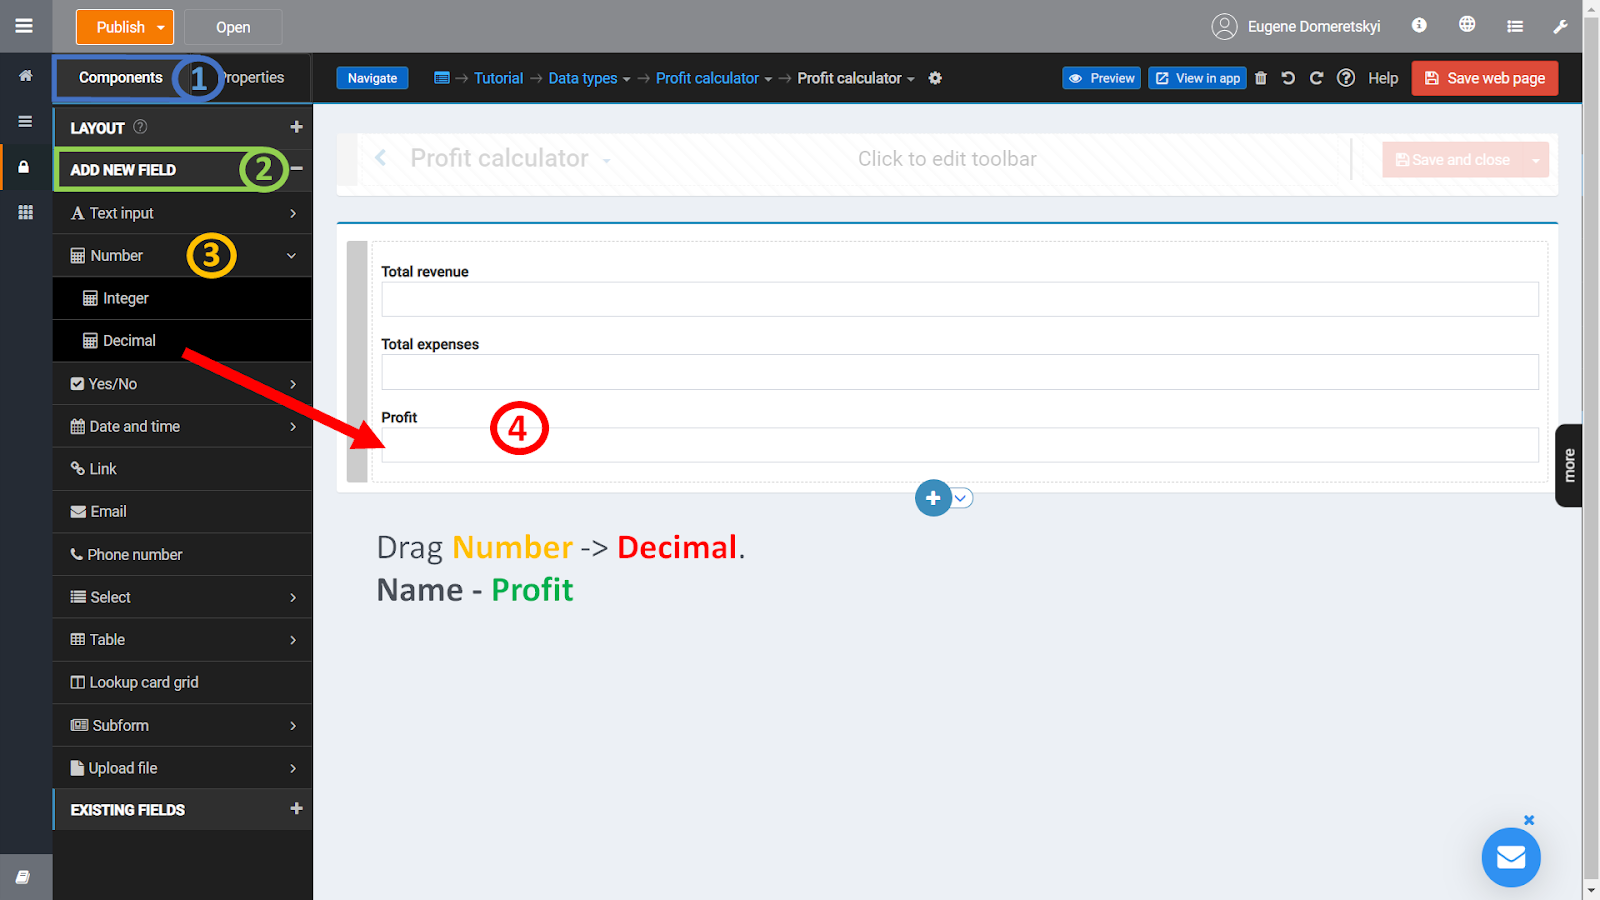
Repeat the steps. Name a new field Profit.
CHANGE FIELD PROPERTIES
In the Working Area, click on the Profit field. The Properties panel should appear.
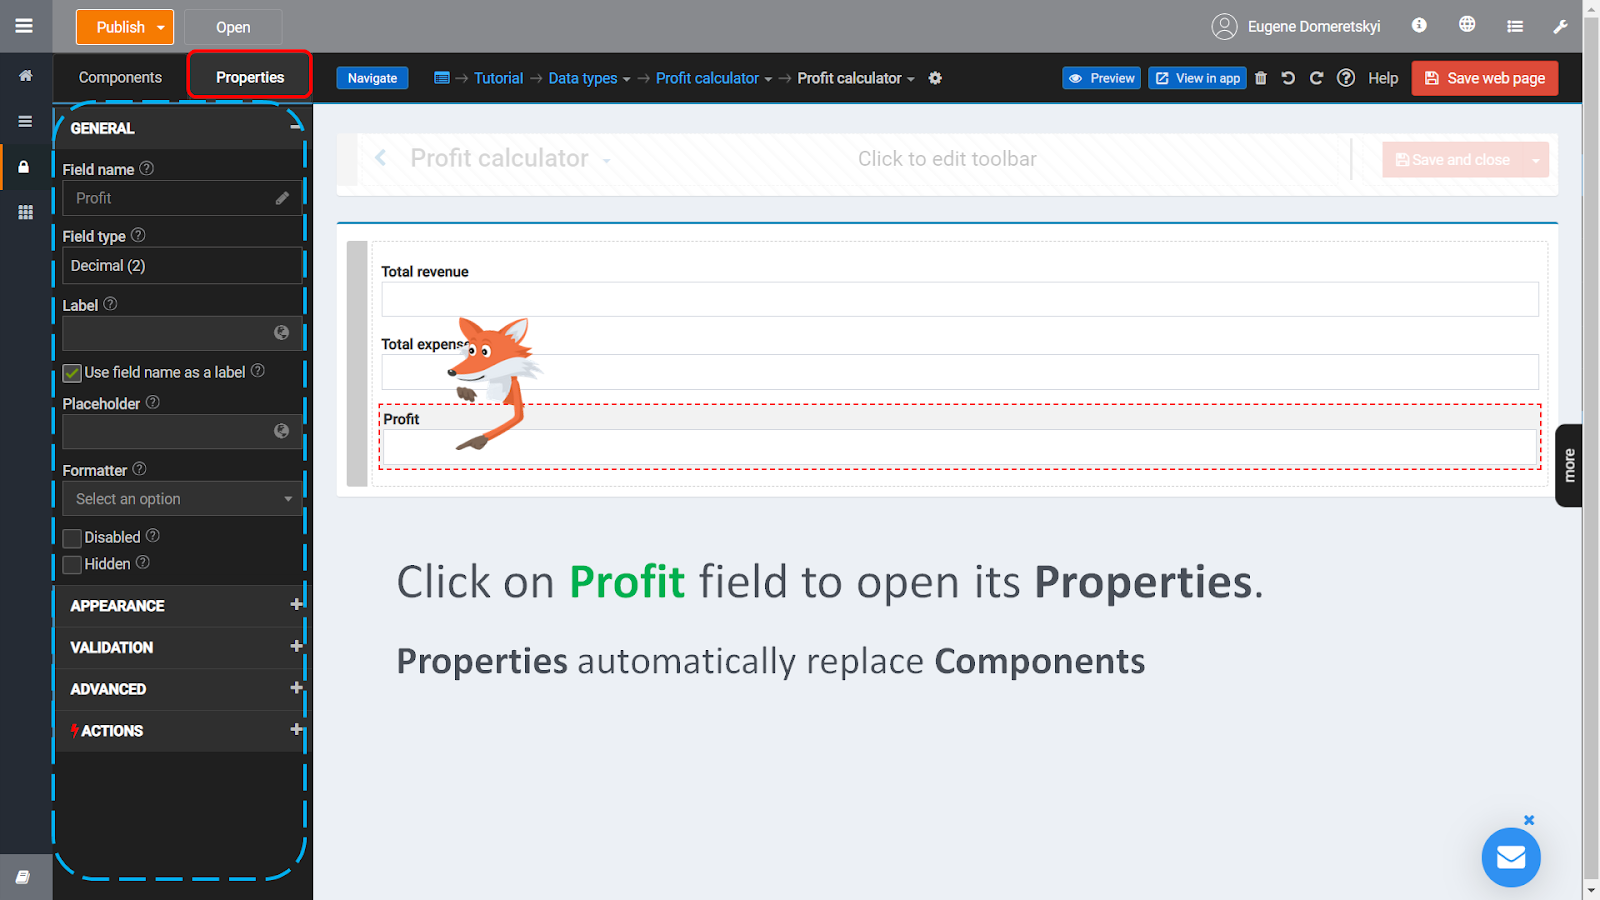
In Properties mark General -> Disabled checkbox.
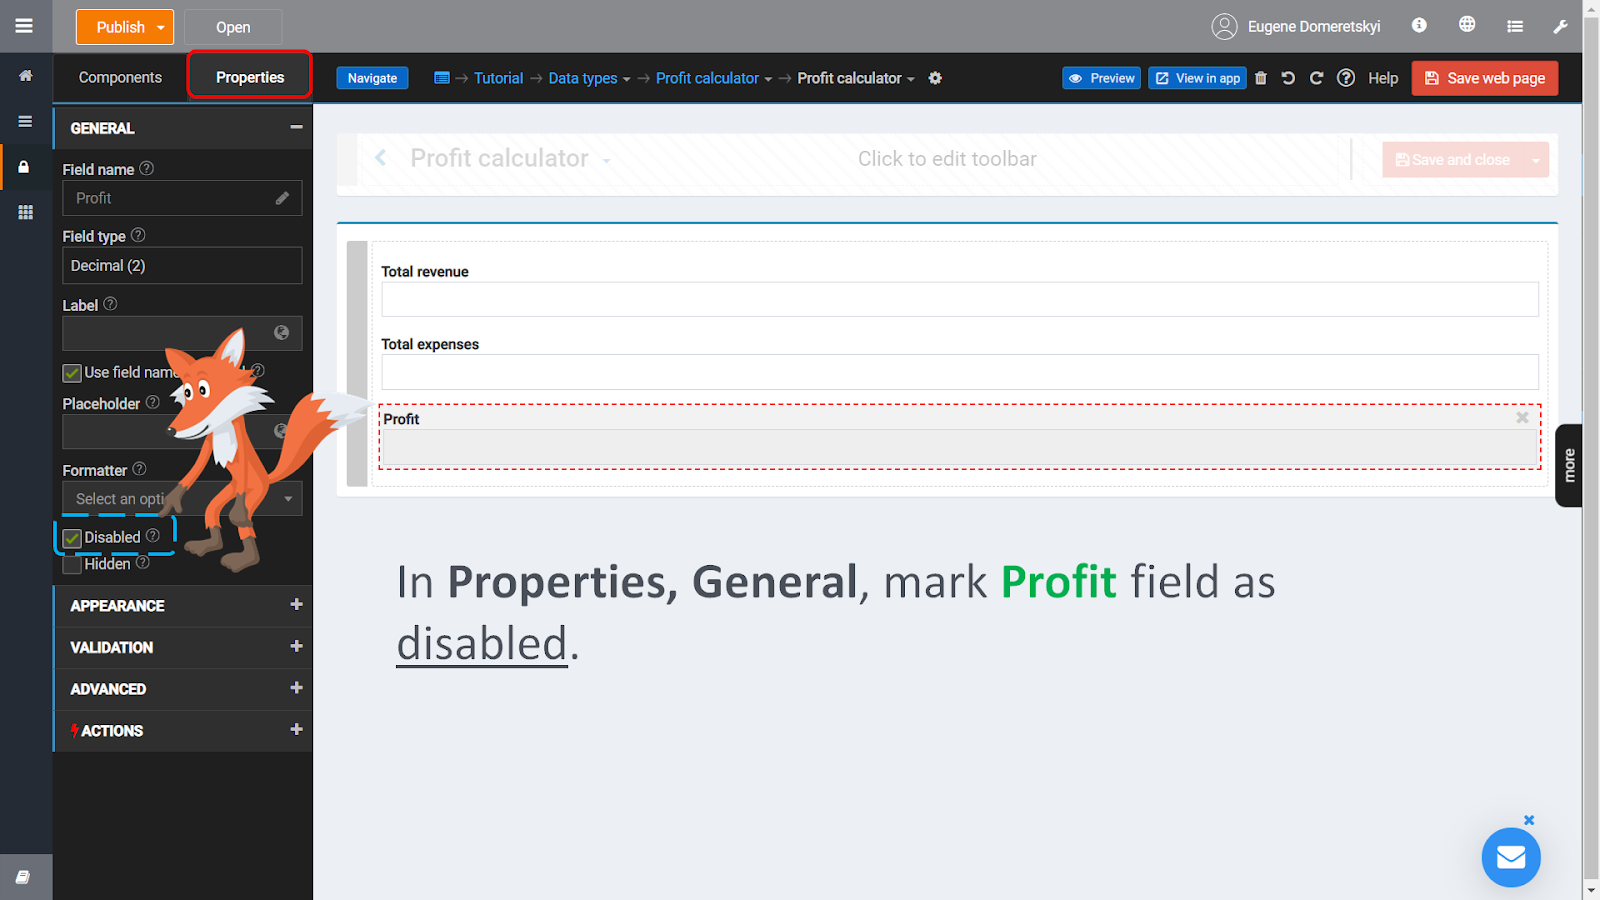
The user will no longer be able to type into the Profit field. Its value will be set automatically in the Code Blocks.
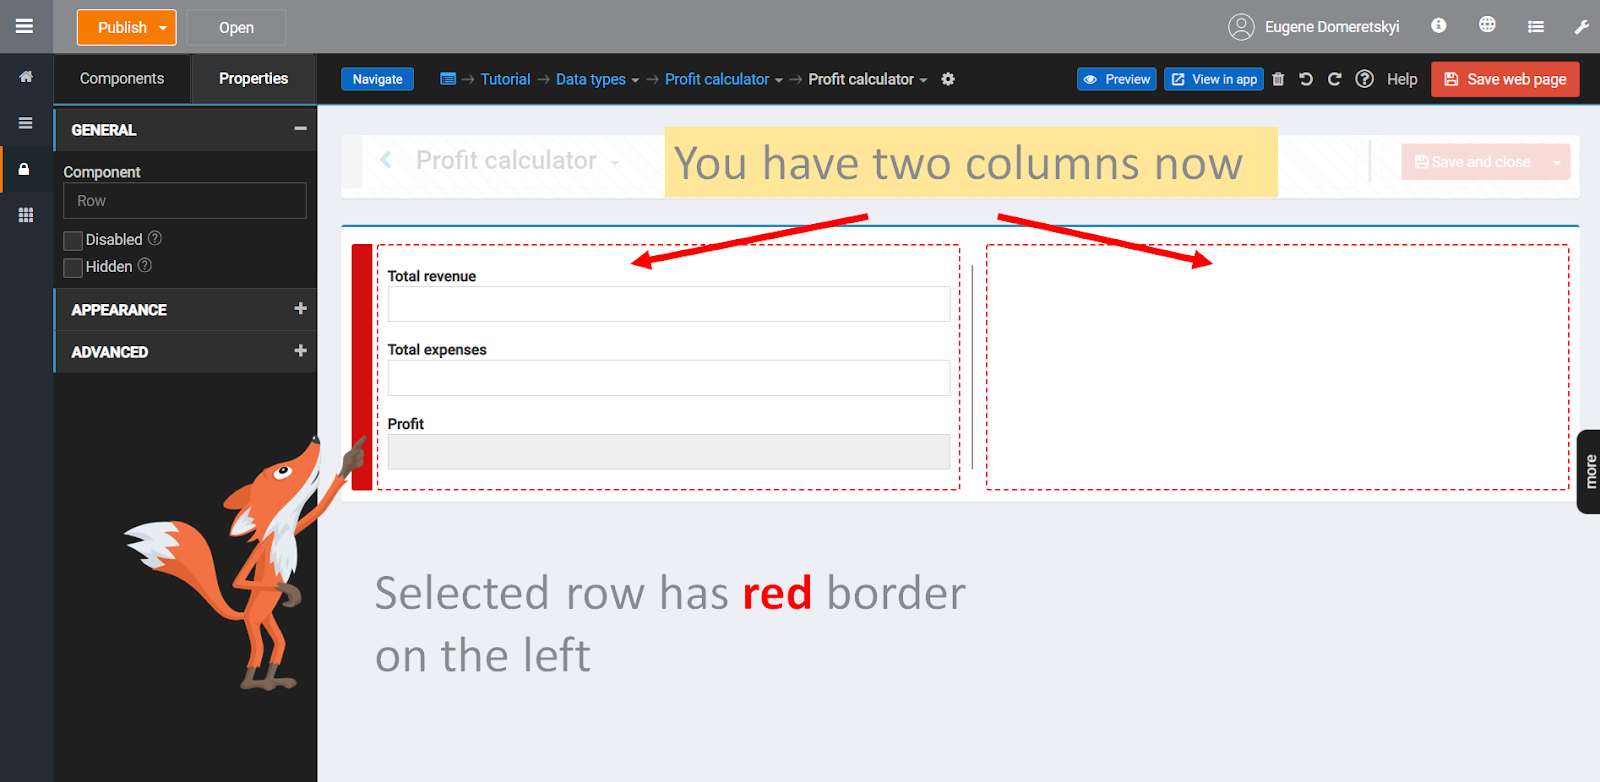
SPLIT COLUMN
You can split columns to get a better look. Hover a mouse pointer over the column’s top border and click onto the two-sided arrow icon to split a column.

After that, you get a row with two columns. Selected rows are marked with red. You can select the row by clicking on its vertical sidebar.
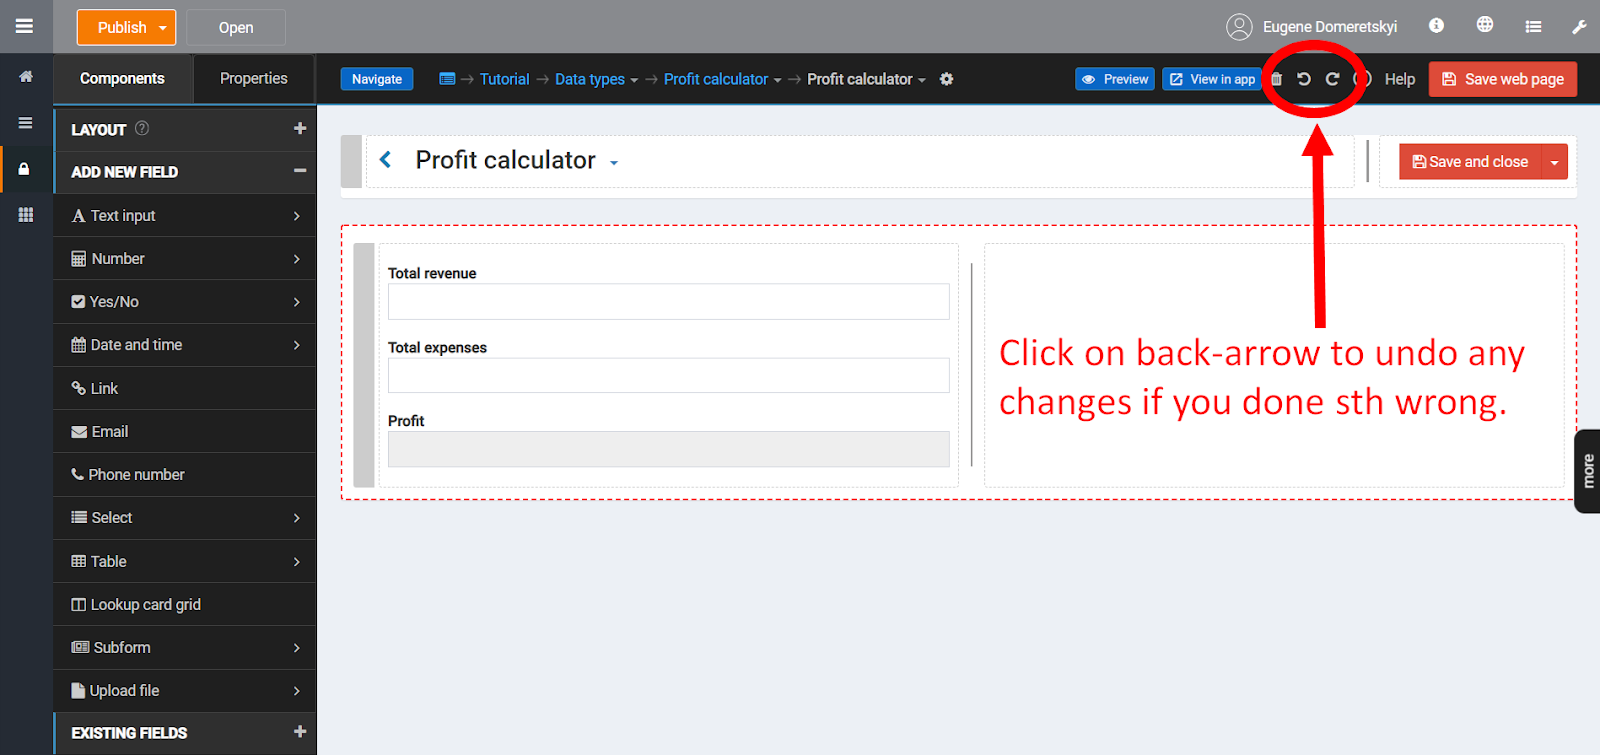
In case you have done something incorrectly, you can easily undo your changes by clicking the undo icon in the toolbar.
PREVIEW YOUR WORK
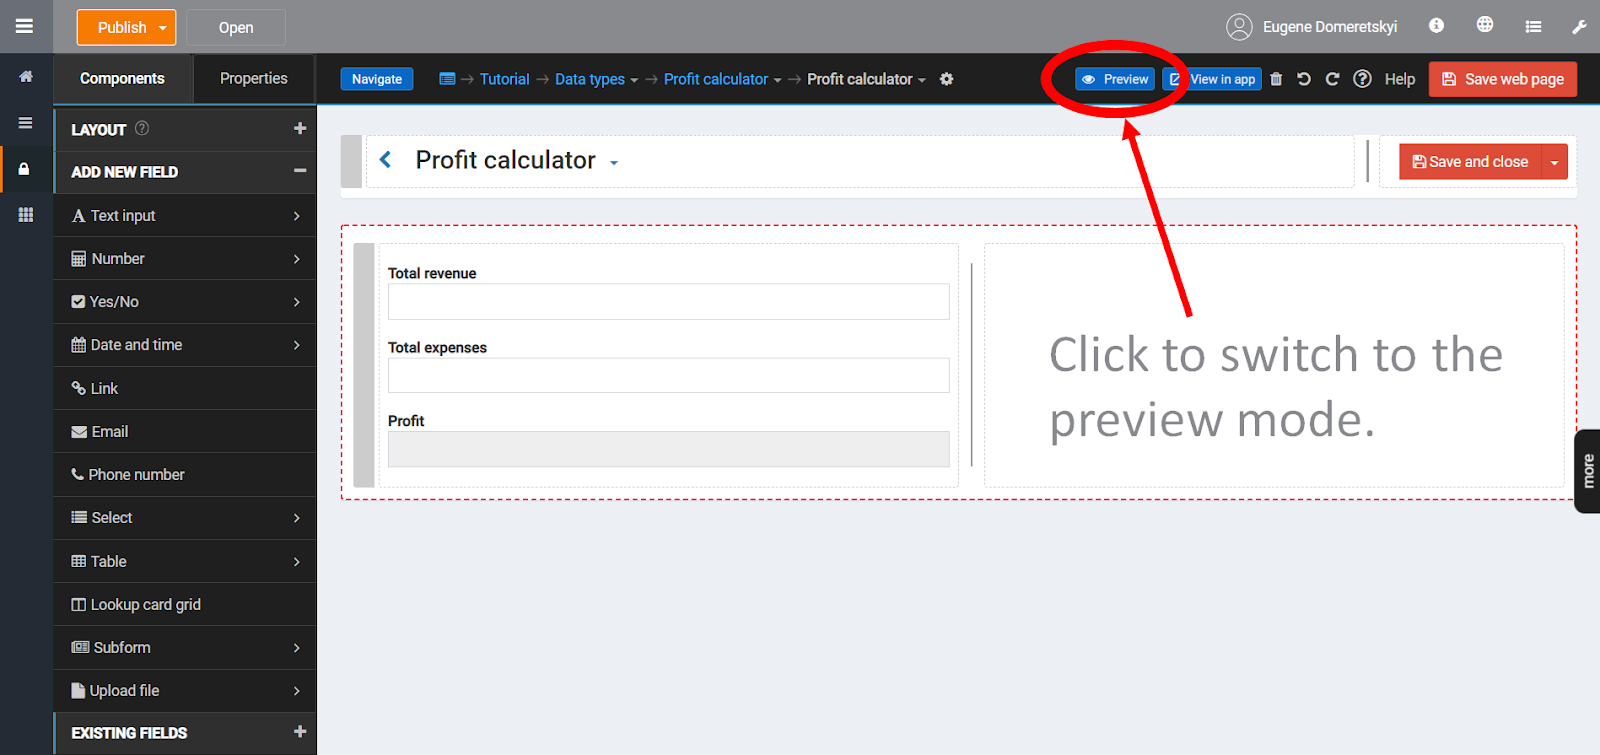
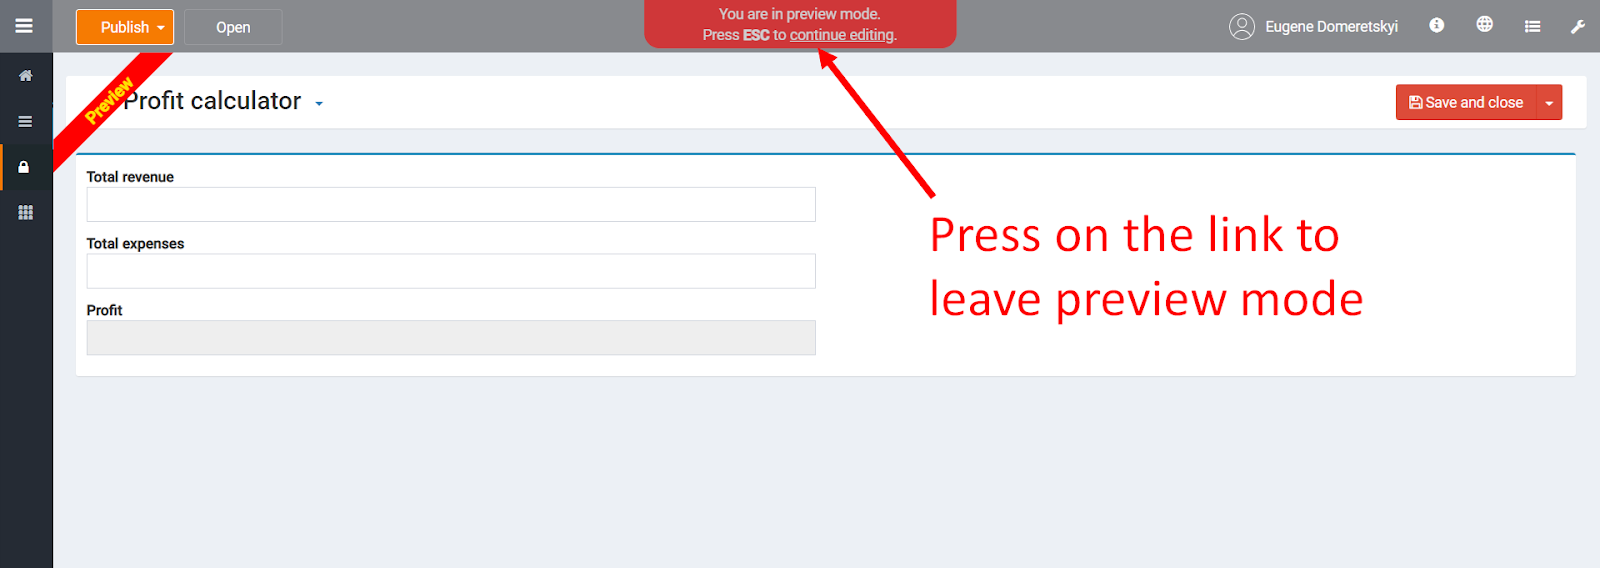
Click on the Preview button to switch the editor in the preview mode.
Page preview can’t be used to enter or save data. To do that, you have to Publish and Open your app.
Press the Esc key to leave preview and return to editing mode.
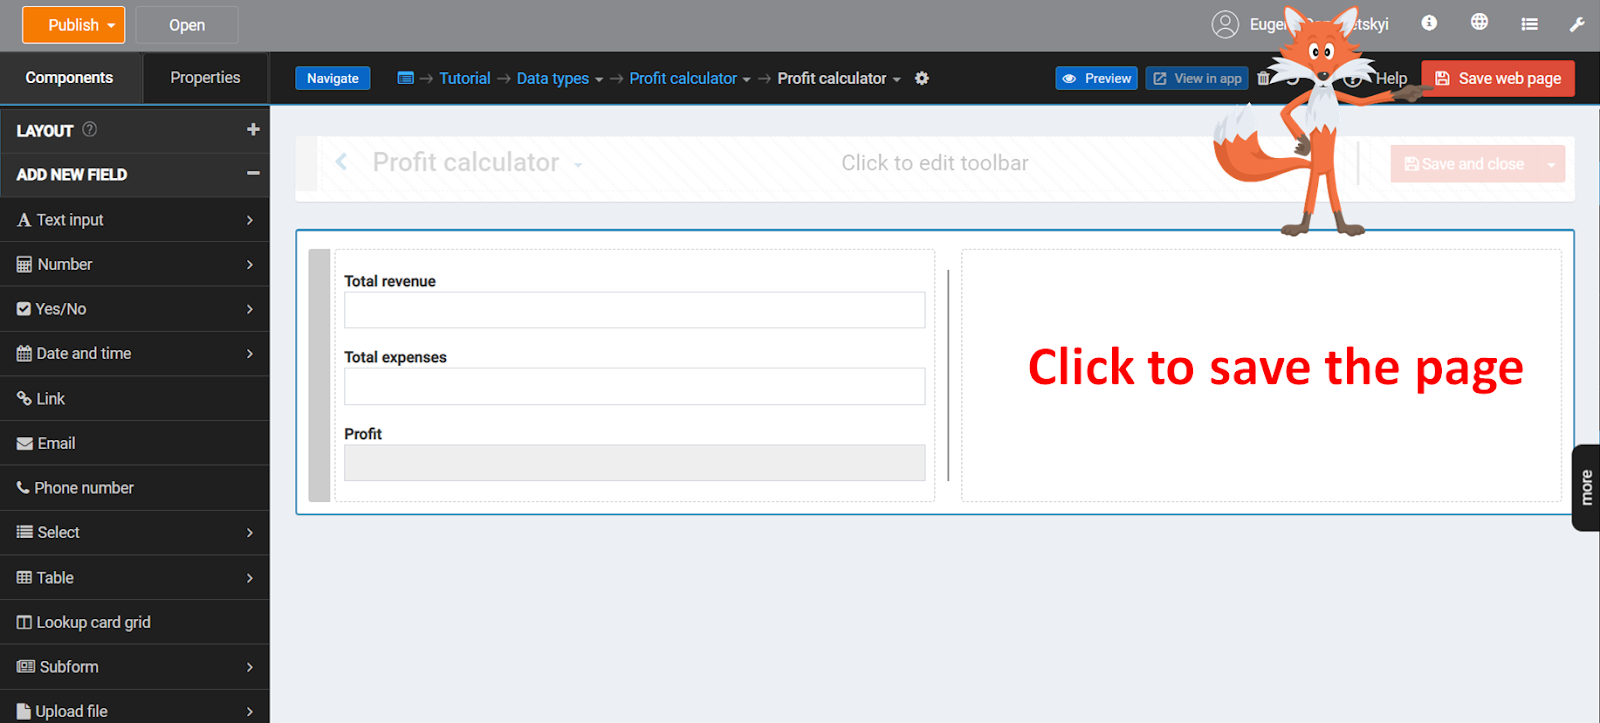
Click on the Save web page button on the top right corner to save your work.
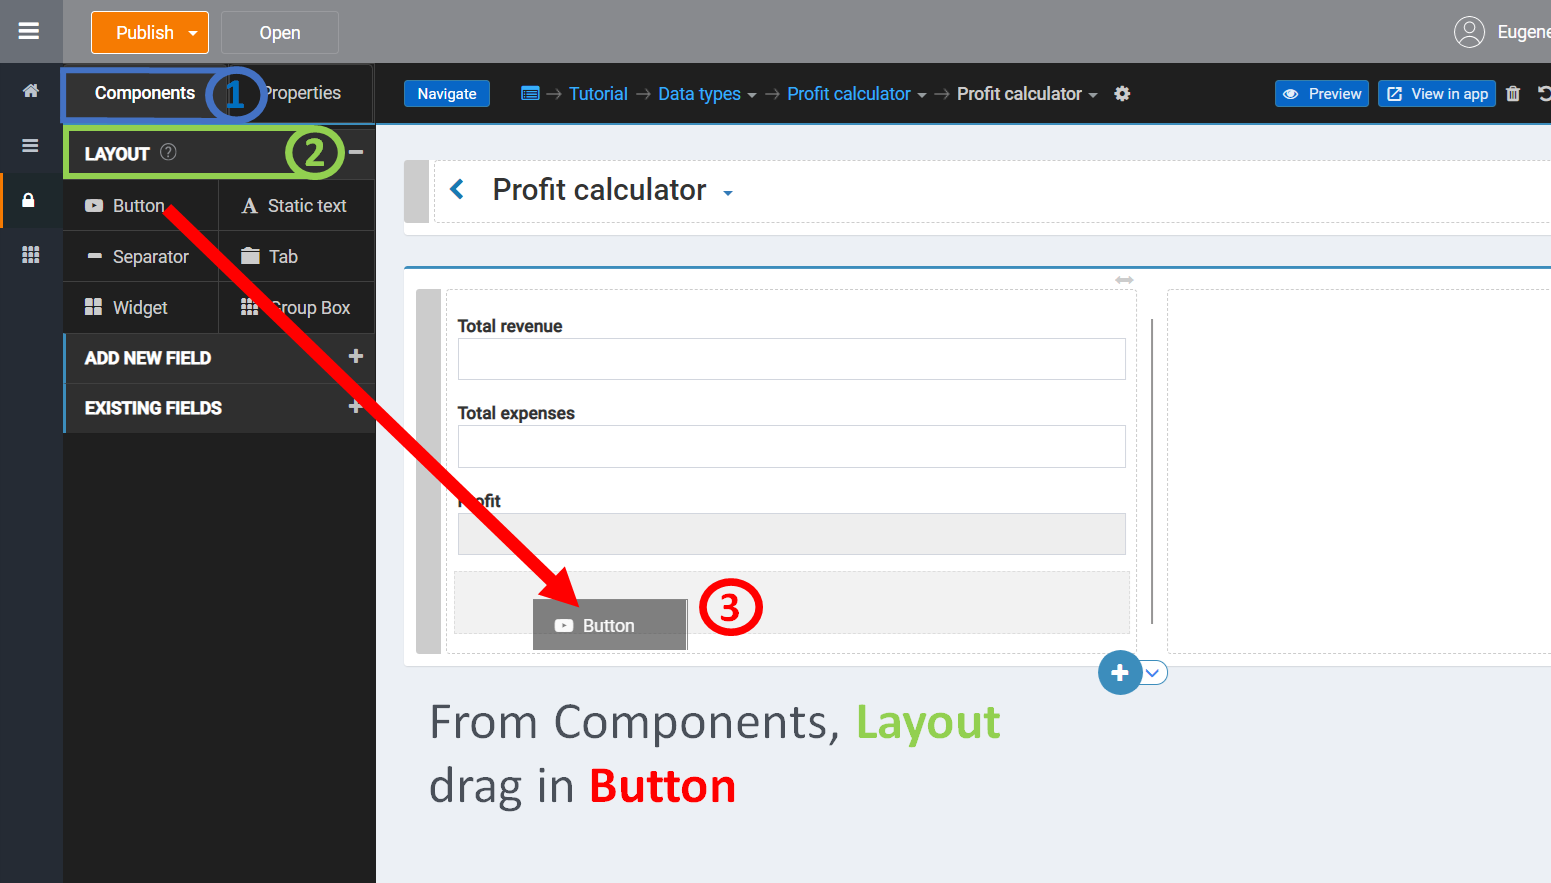
ADD BUTTON
From the Components panel ⇒ LAYOUT, drag in a Button, and drop it into the row.
RENAME BUTTON
In the Working Area, click on the Name button. The Properties panel will appear.
In GENERAL, set Title to Calculate.

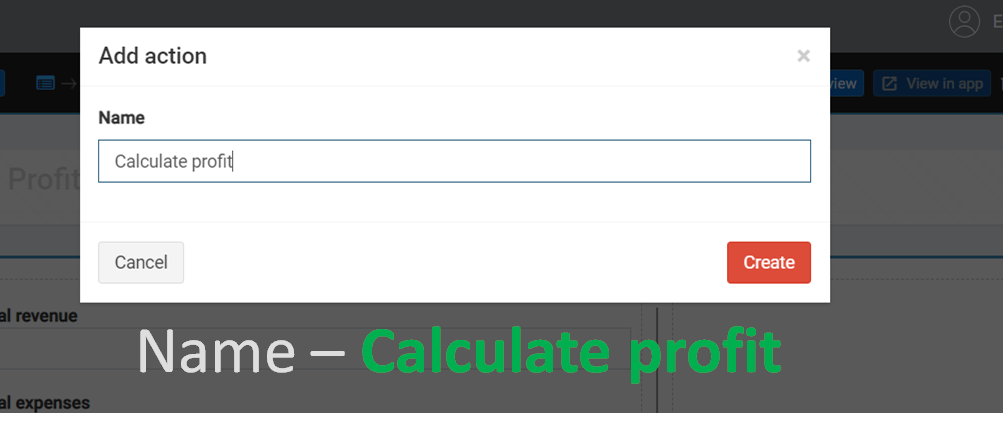
CREATE ACTION
Open properties of the Calculate button. In ACTIONS, create a new Before server action.
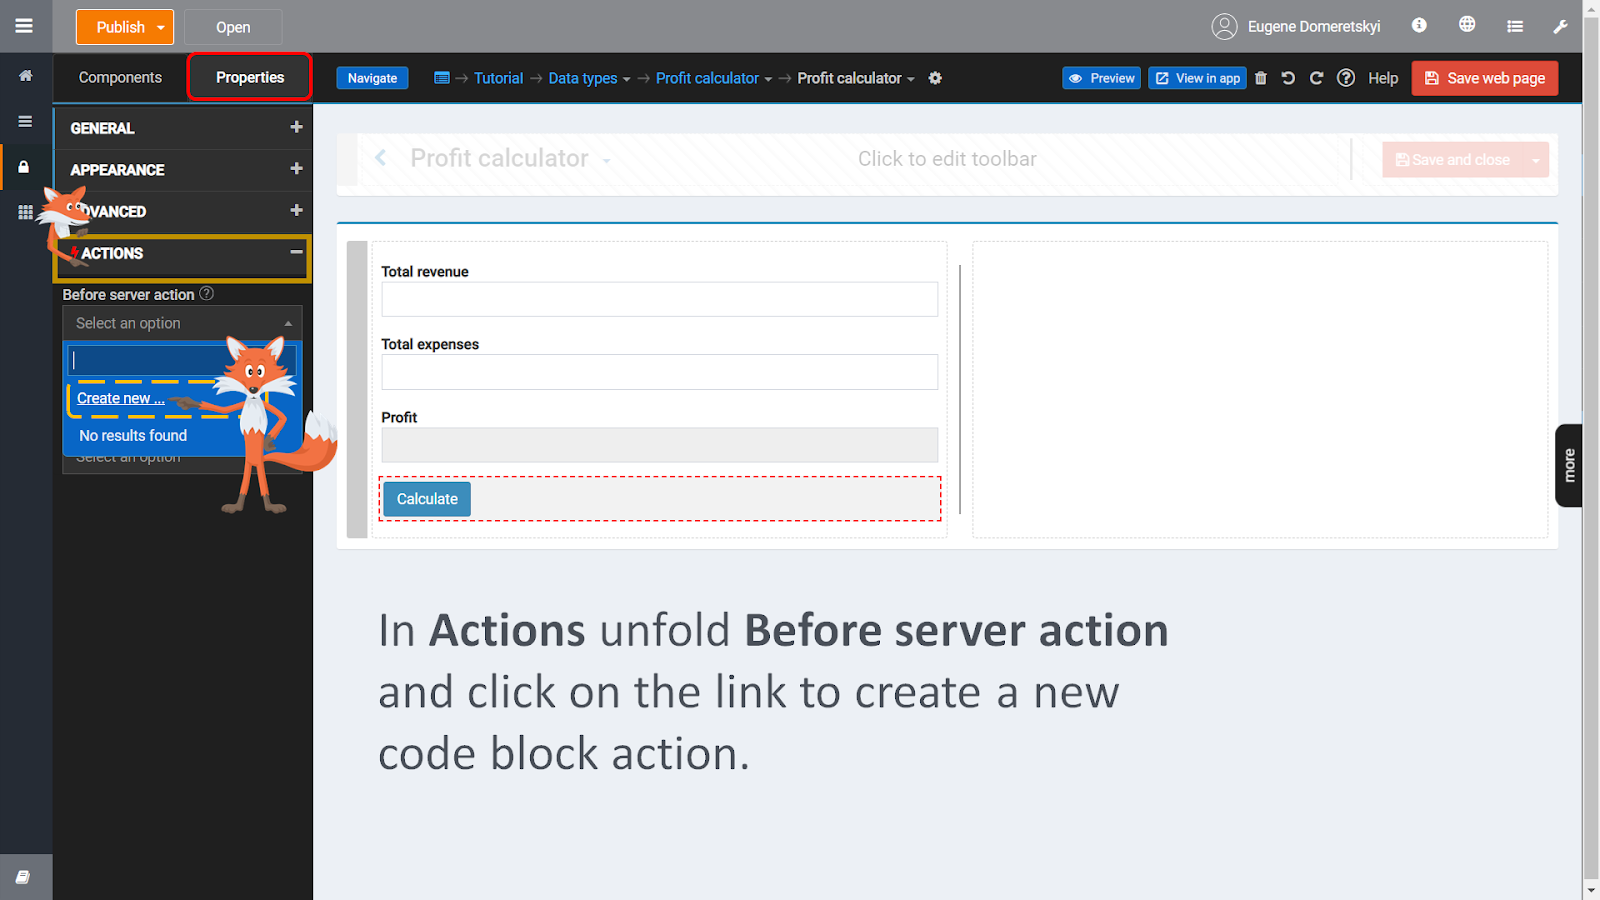
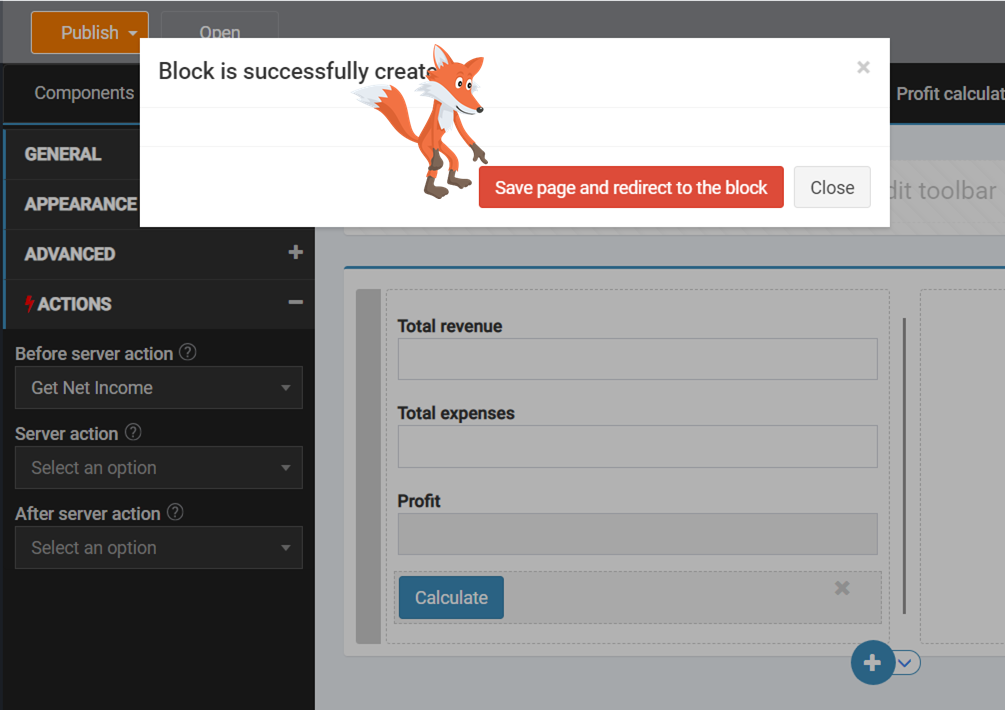
Name it Calculate profit and click on Create.
Save page and redirect to the block.
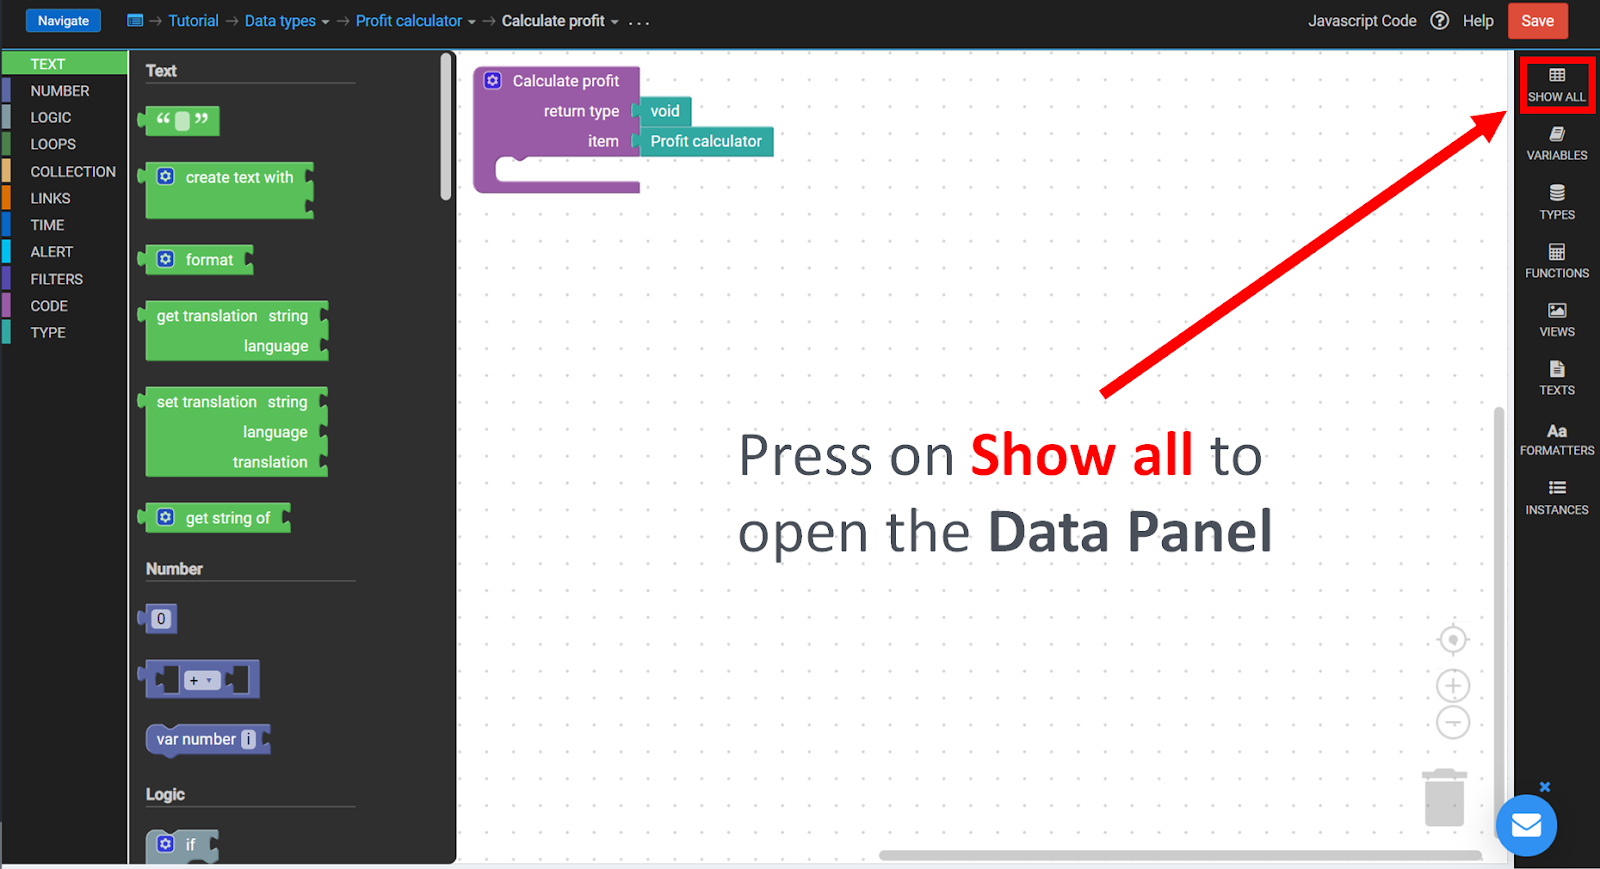
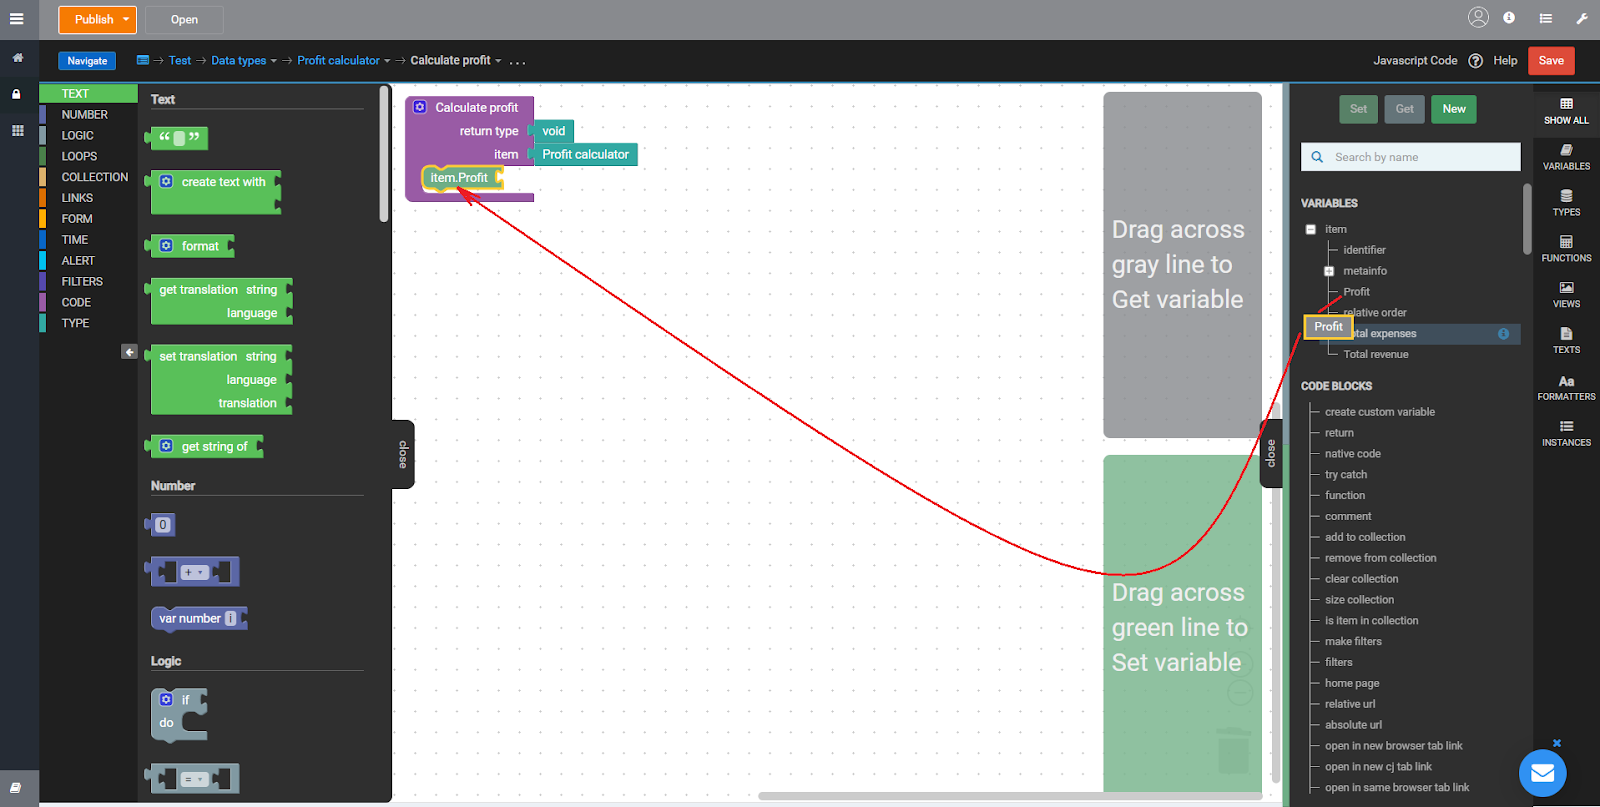
SET VARIABLE
You can get all the data from the Data panel. Open it by clicking on the Show all at the top right corner of the Working area.
Click on the plus near item to unfold the variable. Item is the word that contains all the data from our web page.
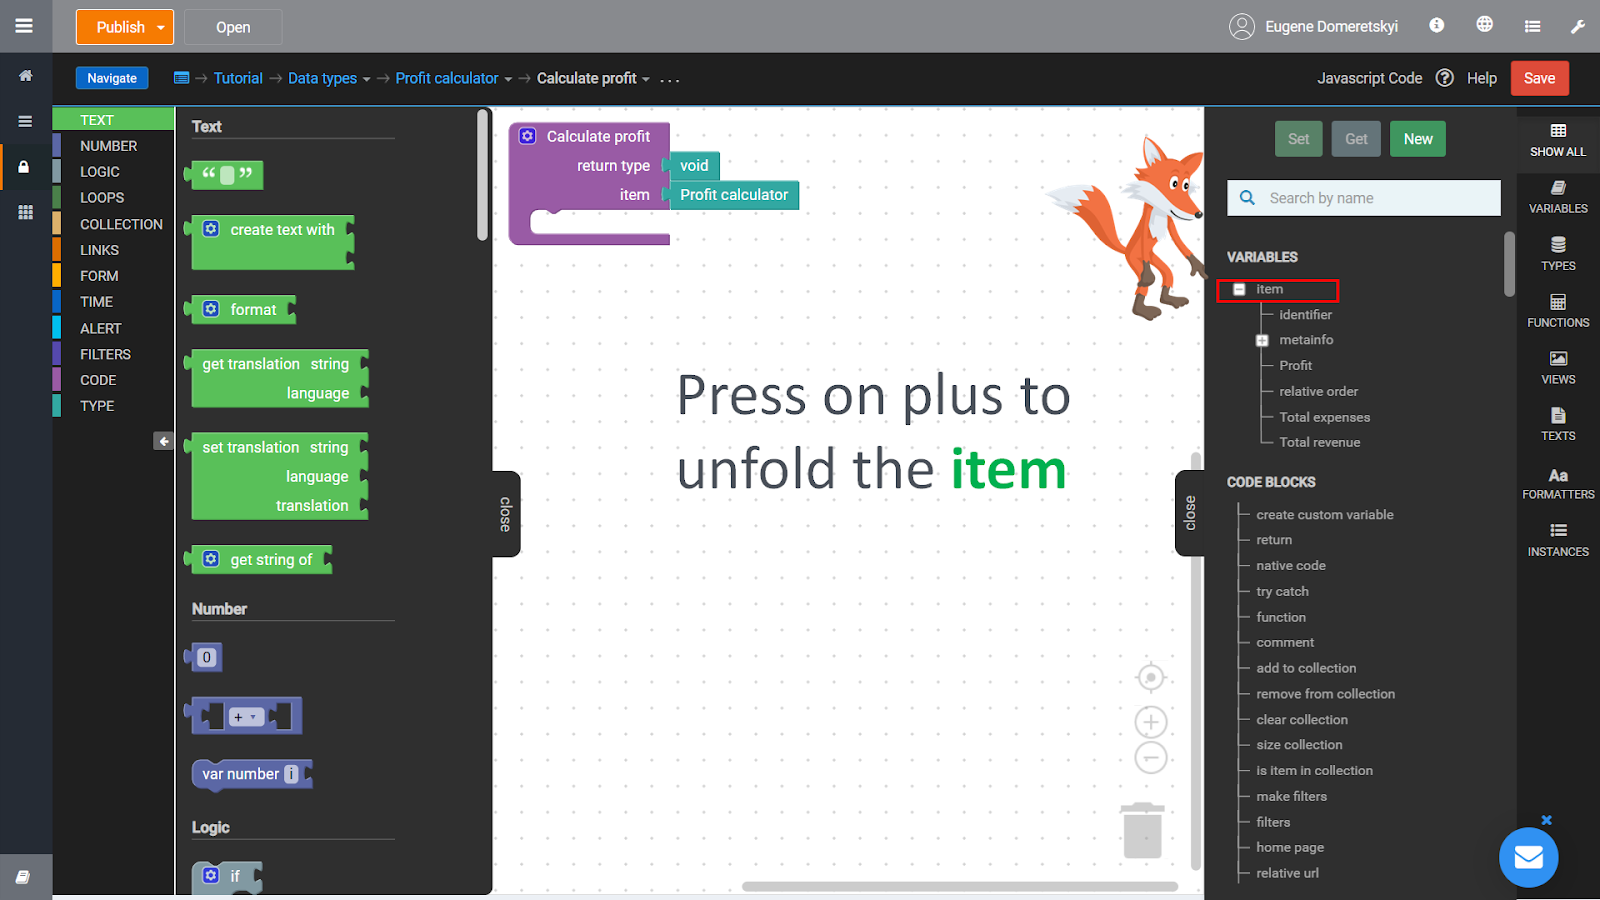
Drag and drop the item.Profit variable across the green line into the action’s body. That is how you can create a variable setter (left side of an expression).
ADD ARITHMETIC BLOCK
Drag and drop arithmetic operations block from the Number block section.
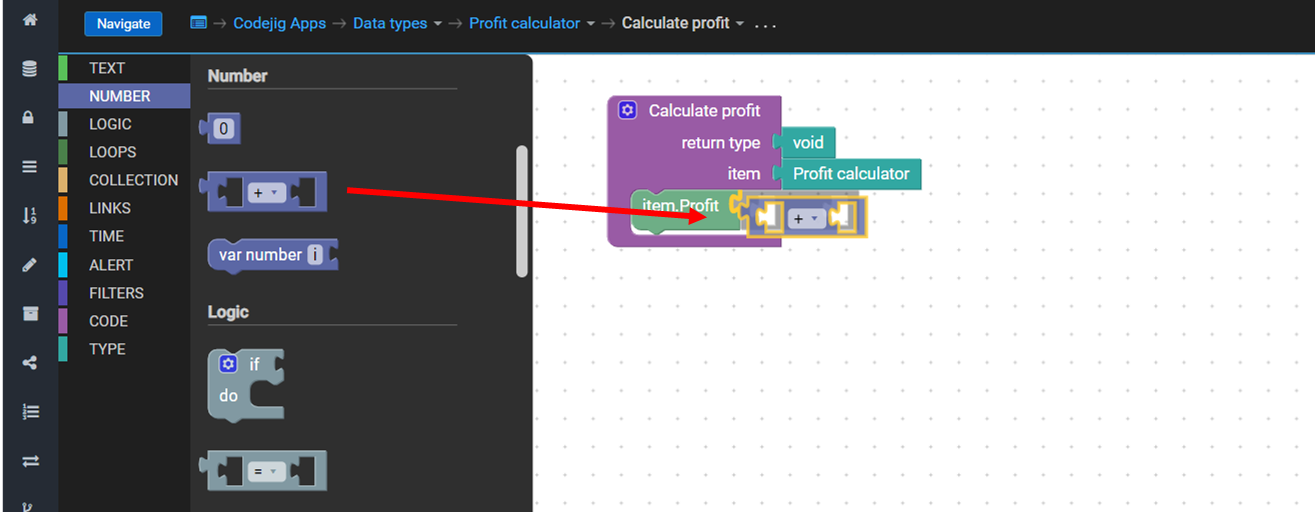
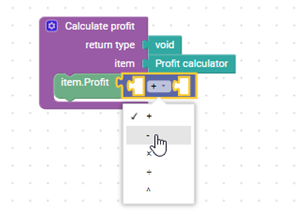
Set its value to minus:
GET VARIABLES
If you change the value in the search box you get the corresponding result.
Type “item” to show the item. variable only.
To get a variable, from the item, drag item.Total expenses across the grey line. In such a way, you can create a new variable getter.
Note: make sure that you look for a variable from the Show all section.
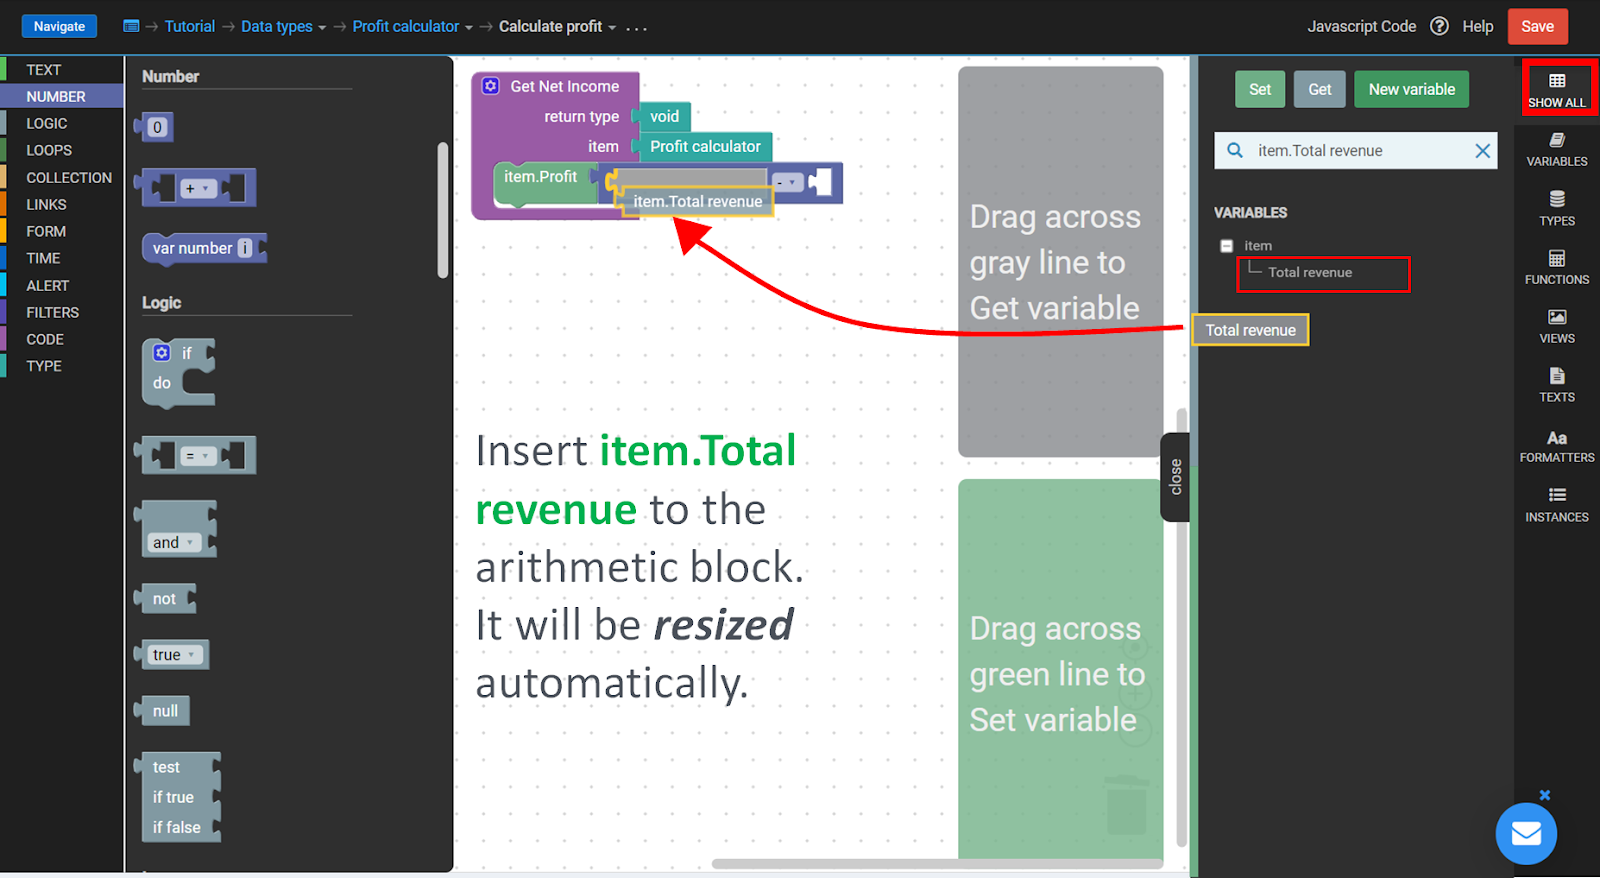
Select the item.Total expenses and connect it with the arithmetic block.

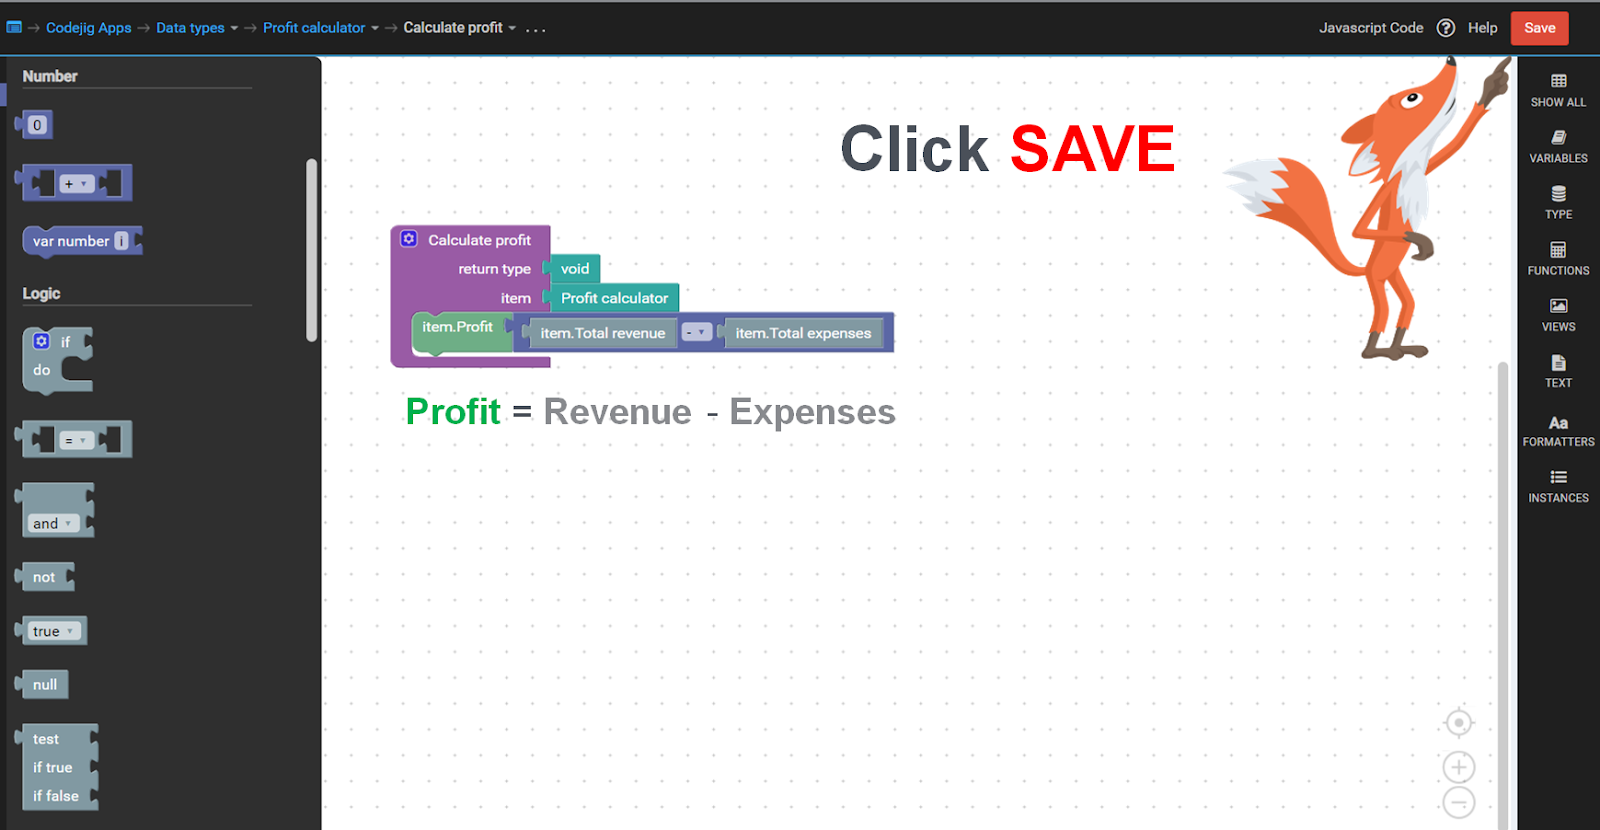
SAVE CODE
On the top right corner, click on the Save button.
The following code action will be triggered after you click a Calculate button from the web page.
Now you are ready to test your first Codejig App!
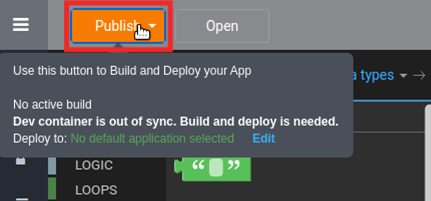
PUBLISH YOUR APP!
Build and deploy your application by clicking on the Publish button on the Header bar.
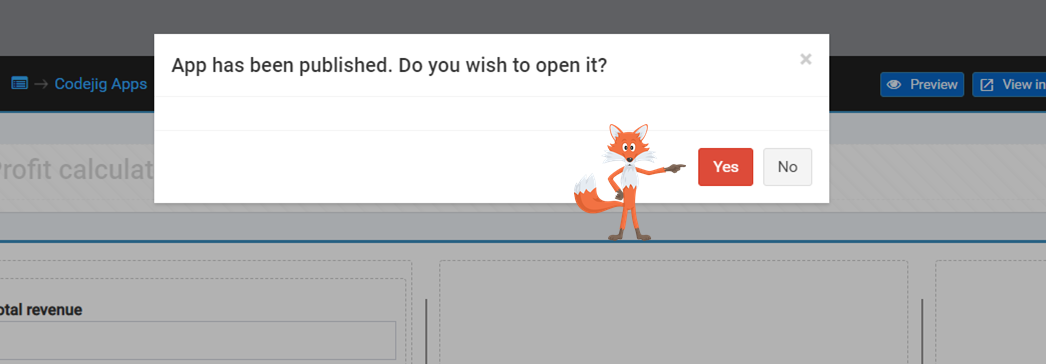
Wait about half a minute until the first publish is completed. During publishing, App Builder generates a new executable file and restarts the web app container with it.
After the application has been published, you will see the pop-up window. Click Yes to open the app.
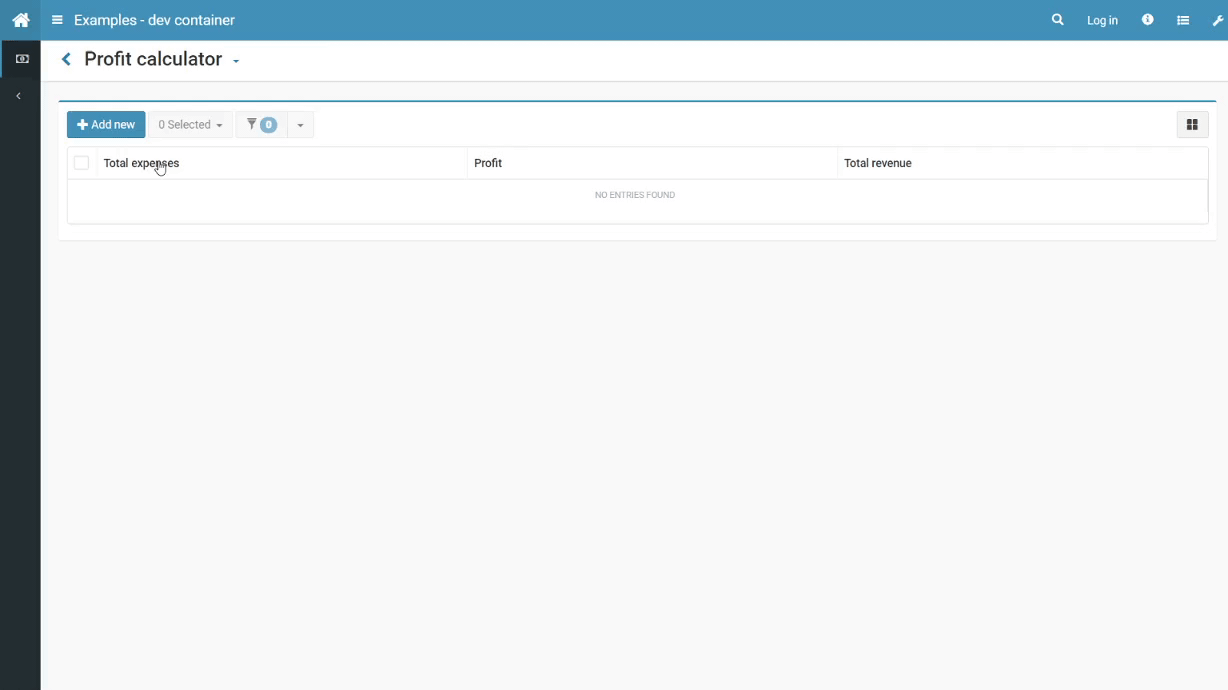
The app will open in a new browser tab. It should look as below.
CONGRATULATIONS !
Now you can share your app with the others!
Feel free to experiment by adding more functionality or just move to another tutorial.
Also, you can find the gallery of available Codejig projects here.